Hi!
Want to learn Power Apps?
This is a Step by Step Power Apps tutorial to get you started if you are a beginner.
Step 1: Log into Power Apps
First you will need a Microsoft Power Apps licensed account.
Once you have that, log into Power Apps by going to https://make.powerapps.com/
This is what you are going to see:
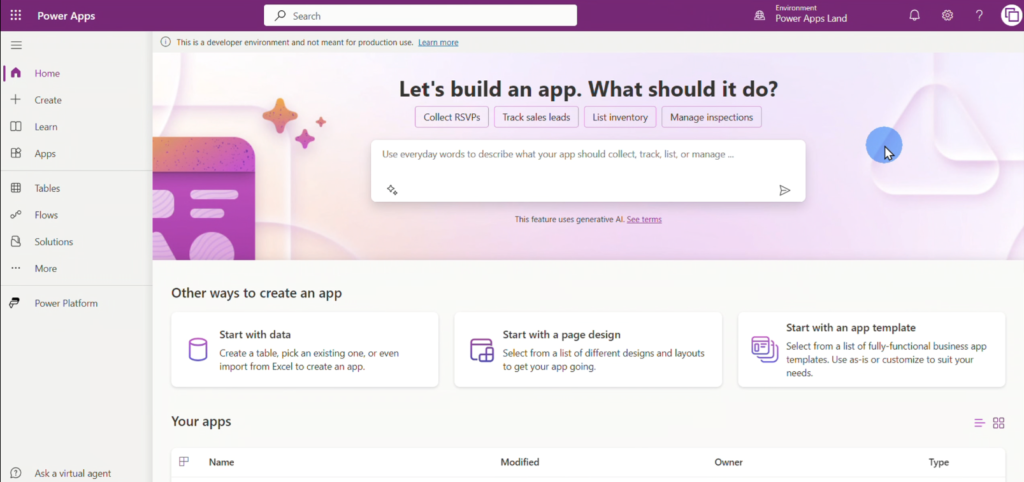
It’s the Power Apps home page.
From here you can choose what you want to do.
The app the we are going to build here is an app to store contacts information.
Step 2: Create a Dataverse table
We will start creating a table to store our data.
For this tutorial we will be using Microsoft Dataverse as the data source.
Dataverse is the main data source for Power Apps.
But you could choose among many other ones.
There are more than 1000 connectors available to all sorts of data sources, including all of the main databases such as SQL Server, Oracle, MySQL, PostgreSQL.
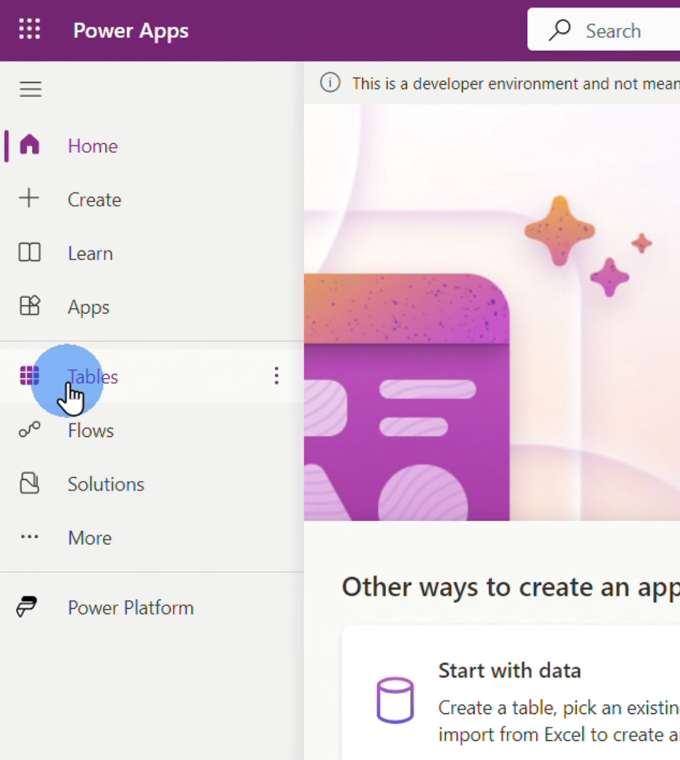
On the left menu click on “Tables”.
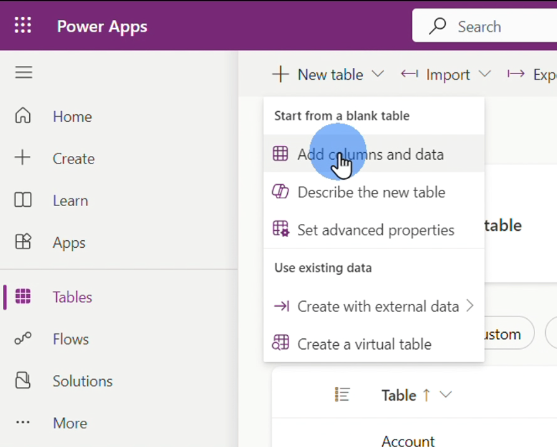
Click on “New Table > Add Columns and Data”.
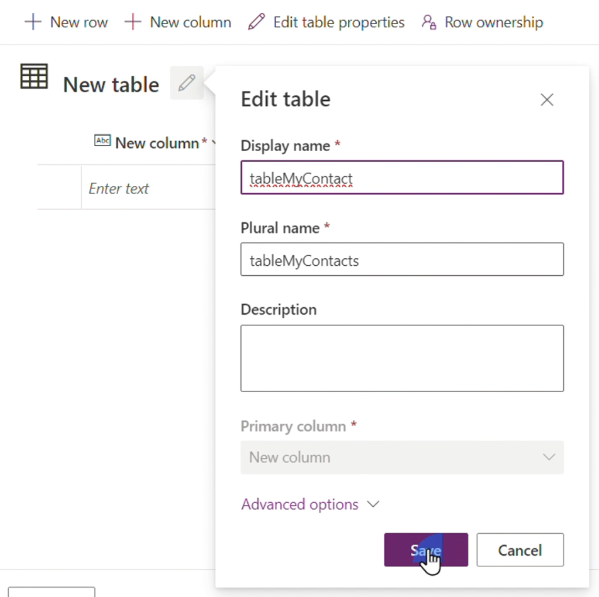
Call it “tableMyContacts” and click Save.
Step 3: Add columns
Add the following columns:
Display name: Name
Data type: Single line of text
Format: text
Display name: City
Data type: Single line of text
Format: text
Display name: State
Data type: Single line of text
Format: text
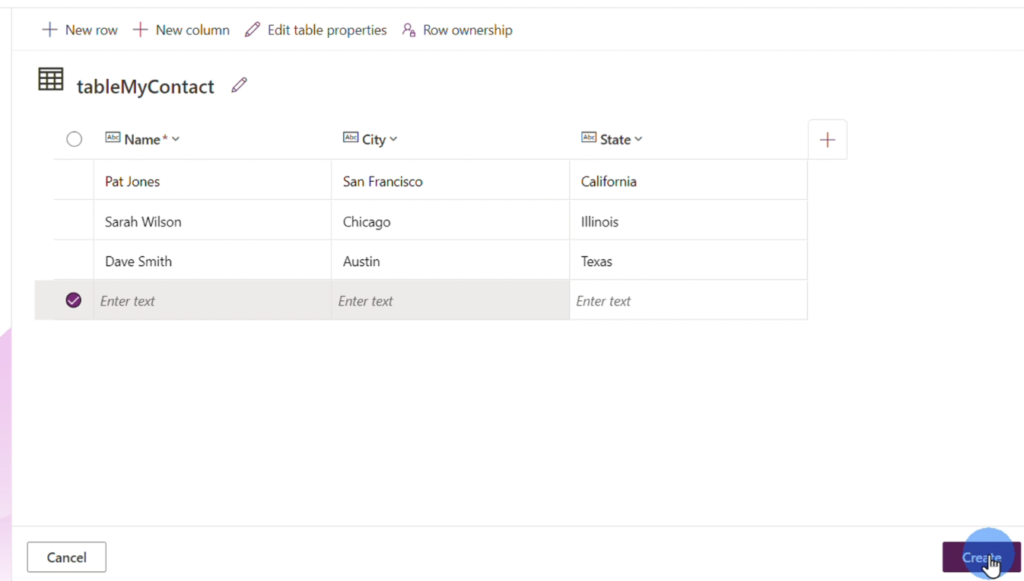
Step 4: Add data
Add some sample data to the table and click Create.
Step 5: Create a Canvas app
For this tutorial we are going to be creating a Canvas app, which is the most popular type of app in Power Apps.
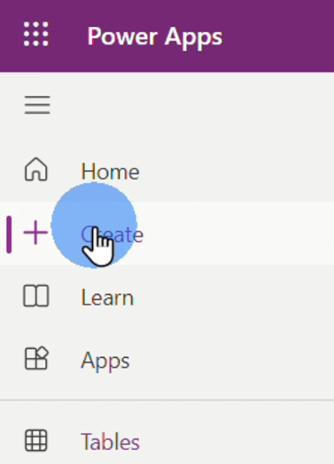
Click “Create” on the left sidebar to create a new app.
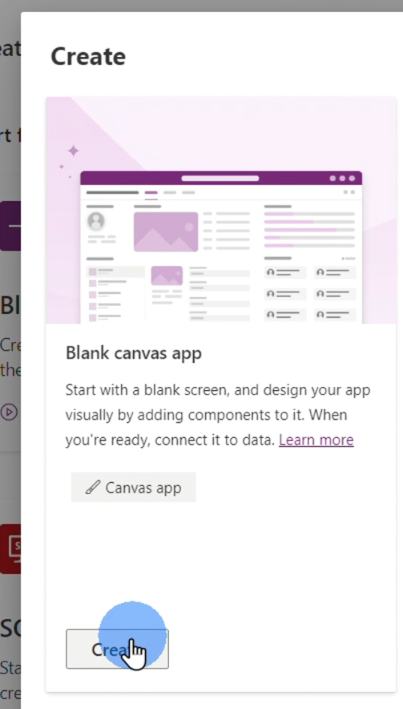
Click “Blank App”.
Then go to “Blank Canvas App” and click “Create”.
In the next screen give the name “MyContactsApp” for the app and click Create.
Step 6: App title design
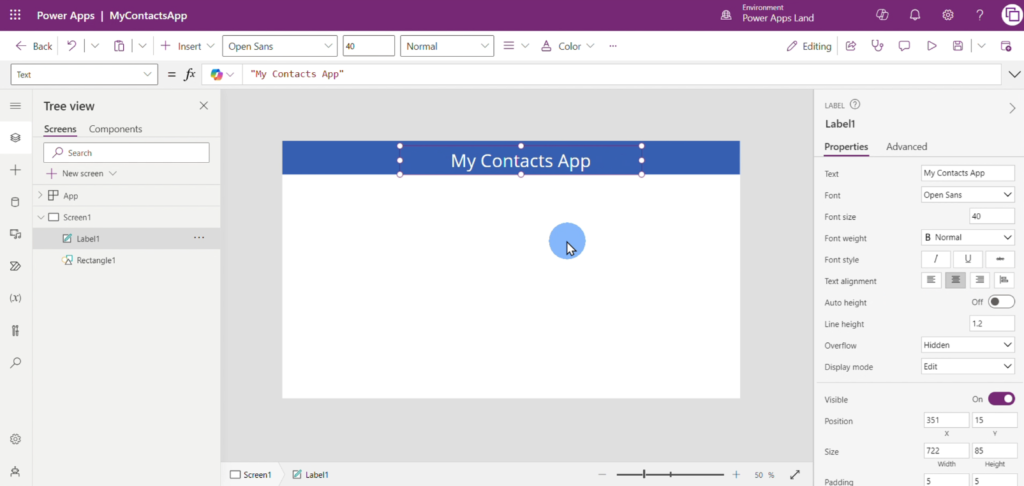
Go to the Insert menu and click “rectangle”. This will be the background for the app title.
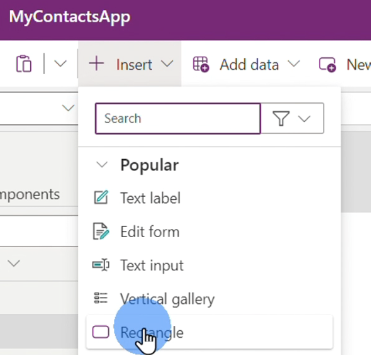
Position it at the top and resize it to make the width fit the whole screen.
Next, insert a “Text label” control, position it to the center of the rectangle.
On the properties pane on the right side, change its color to white, increase font size and change text to “My Contacts App”.
The result should look like this.
Step 7: Add a vertical gallery control
Now we will add the control to display contact records on the screen.
Go back to the Insert menu and click “Vertical Gallery”.
Select tableMyContacts, which is the table we created previously, as the data source for the gallery.
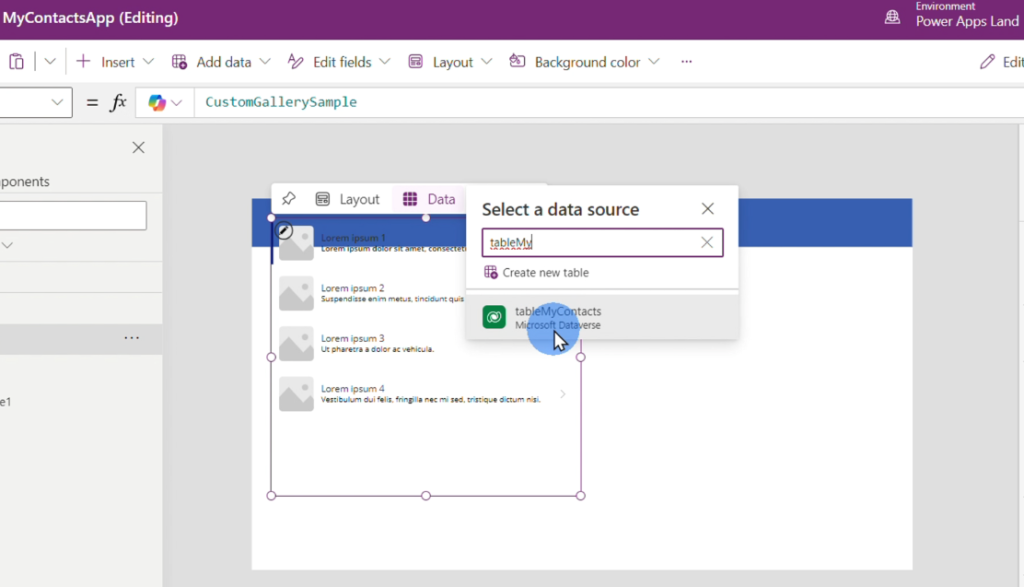
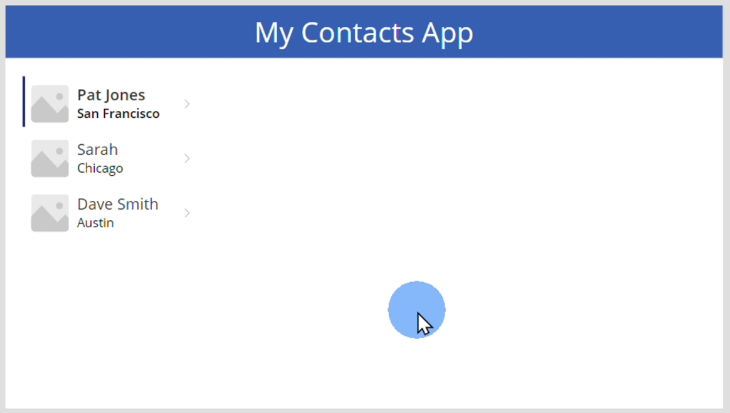
You should see the records of the table already being displayed.
Now format the gallery to look better. For that, click on the gallery, then go the properties pane on the right side, increase font size for the contact name and city.
Step 8: Add an edit form control
Now we need to add a form to insert and update data.
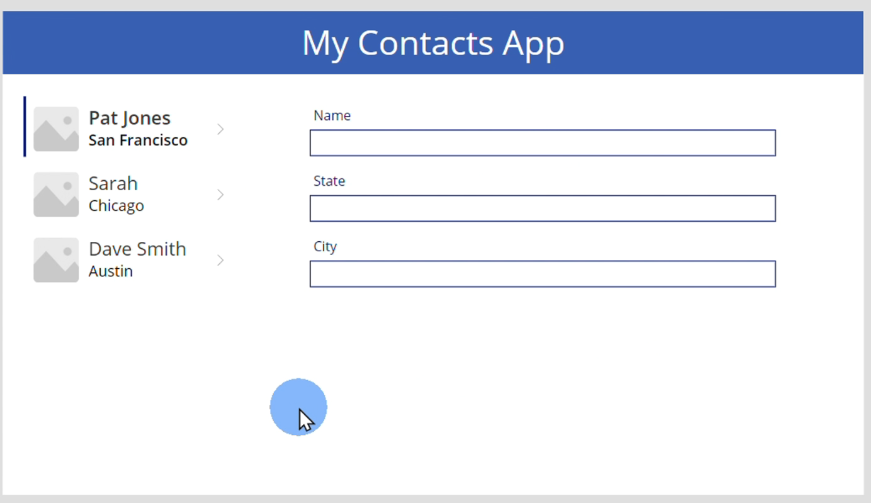
Go back to the Insert menu and click “Edit Form”.
Select “tableMyContacts” as the data source.
The table fields will appear on your screen.
Position them to the right side of the vertical gallery.
Then resize them to fit the whole width and increase font size.
As a result, your screen should look like this.
Now, we need to indicate to the form that it needs to display the selected item in the gallery.
For that, click the form, go to the form properties, advanced tab, Item property and type “Gallery2.Selected”, where “Gallery2” is the name of your gallery.
In case, the name of your gallery is different, use the correct name.
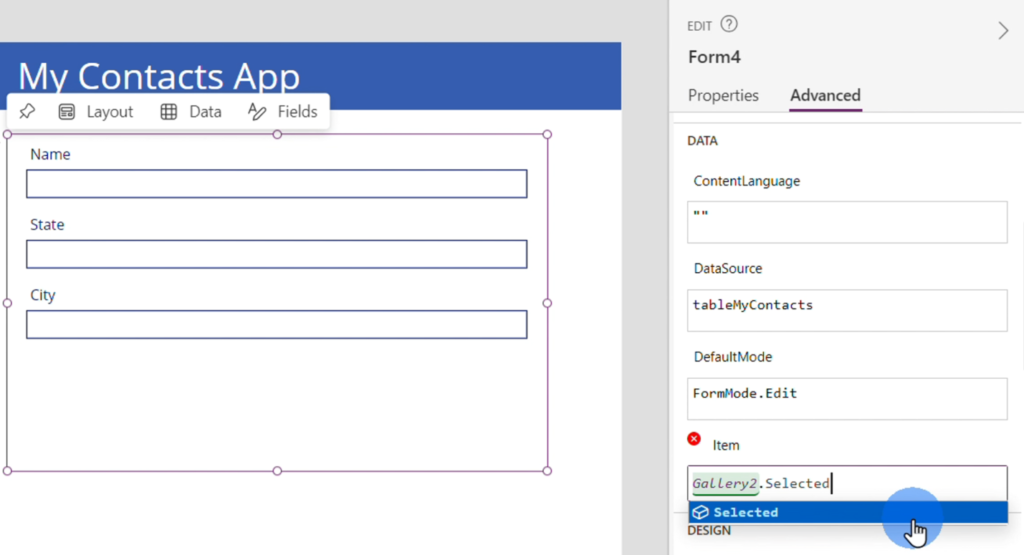
It will then show the data from the first record of the vertical gallery in the edit form.
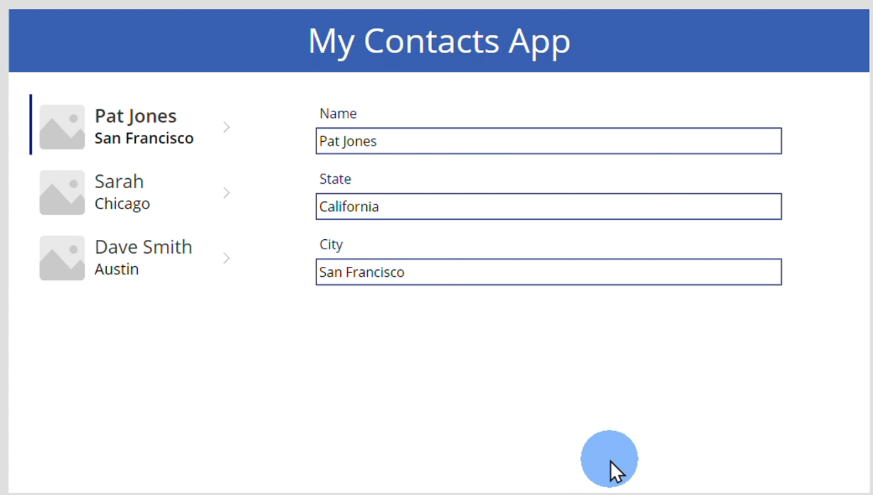
Step 9: Preview your app
At this point, you are ready to see how your app is working.
For that, go to the top right corner and click the “Preview the App” button.

Click the different records on the left side and you will notice that the form changes accordingly.
Step 10: Drop down control for the States field
Now, we want to change the State field to a drop down control so that you can select the state from a list.
For that, first create a new table with the states. Follow the same procedure outlined in the step to create the contacts table.
In that table add just one column “State” and add a few sample states such as Texas, California and Illinois.
Then, go back to Power Apps and replace the State field by a Drop Down control.
For that, first remove the State field and then drag a Drop Down control from the Insert menu to where the State field was located.
A couple red circles with an x inside should show up indicating an error. Click that.
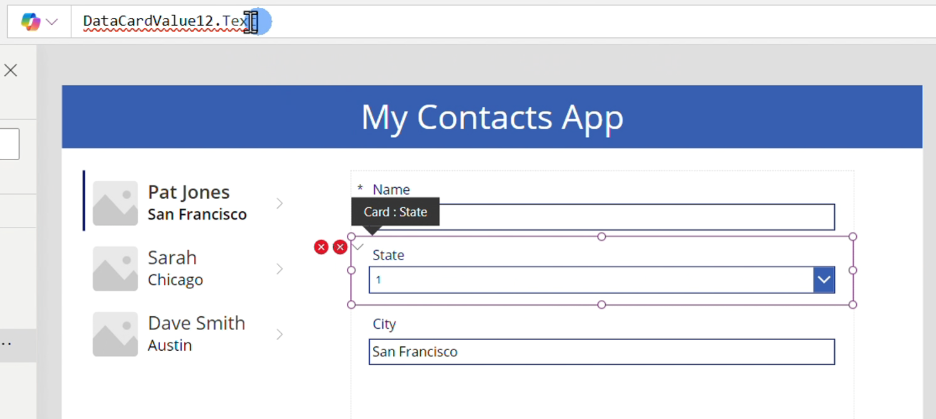
When you click on one of them, you will notice at the top that it is referencing “DataCardValue12.Text”.
Replace that by “DropDown1.SelectedText.Value”.
The name of your controls might differ from these. Use the control names that are correct for you.
The second error is because it is referencing this value:
DataCardValue12.Y + DataCardValue12.Height
You can just delete that line.
The two errors should be gone by now.
Next, let’s add a reference to the States table to be able to use it.
On the left sidebar select the States table as a second data source.
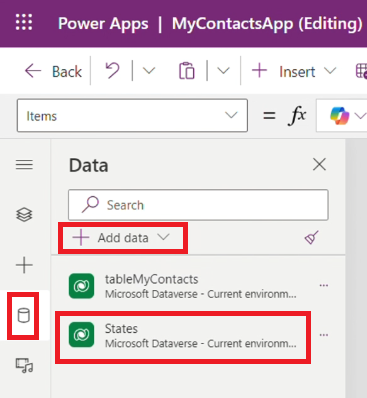
Select the States drop down control.
On the right side pane go to Advanced > Items > inform “States”.
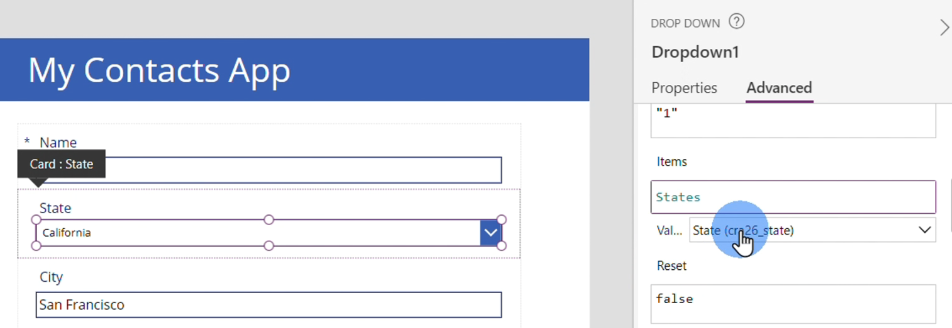
And in the “Default” property, change it to “Parent.Default” so that it will display the value selected in the Vertical gallery.
You can now preview your app and notice how States drop down is working.
Step 11: Add a Save button
Go to the Insert menu, drag and drop a button to the bottom of the screen.
Change text to “Save” and increase its size.
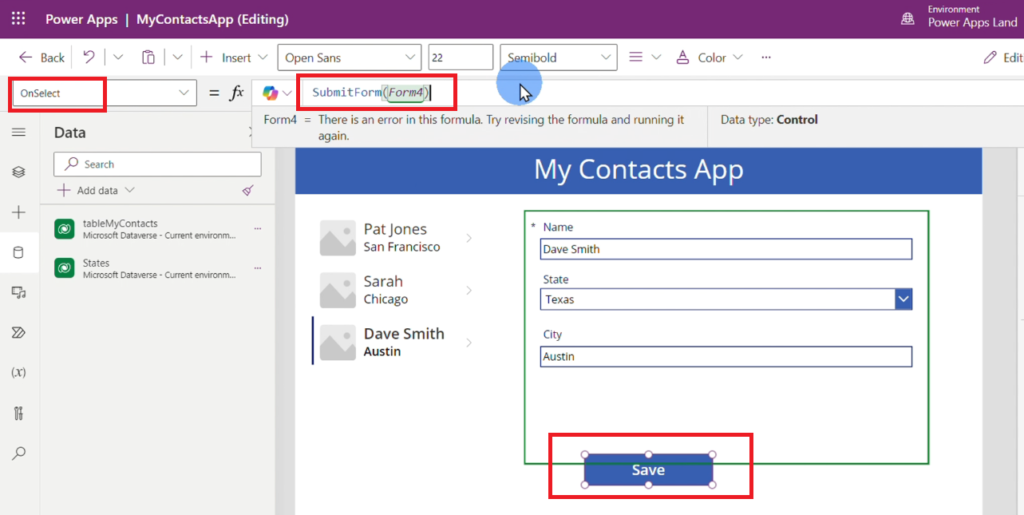
Then, with the button selected, go to the OnSelect property of the button on the top left and type “SubmitForm(Form4)” in the formula bar.
Your form might have a different name instead of Form4. Use the correct name.
Click the form and go the properties to check that.
Step 12: Test your app
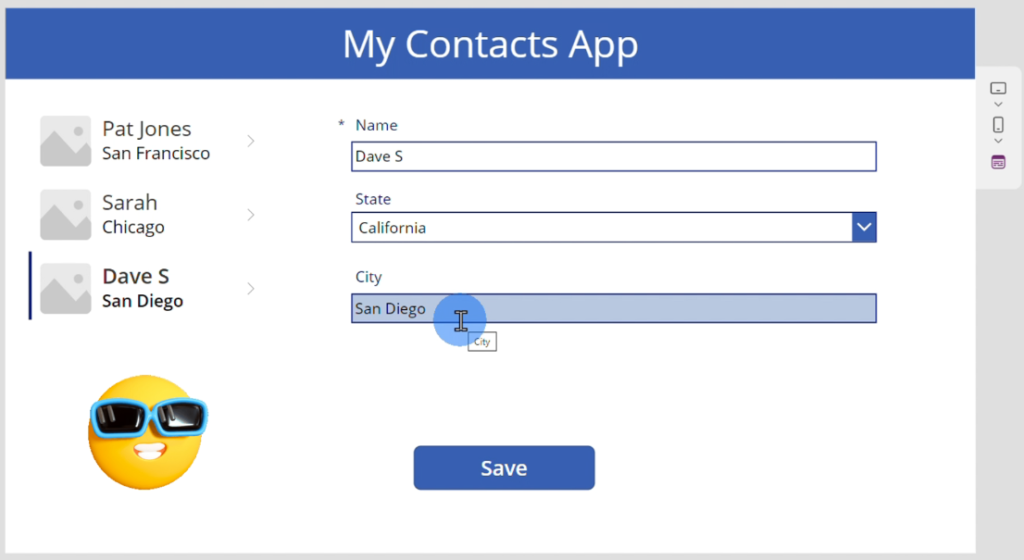
Click the “Preview the App” button on the top right corner to test your app.
Use the form to change some values and click save to see how it correctly updates the values on the gallery and tables.


Leave a Comment