Hi!
You can easily create highly customizable apps with Power Apps Canvas.
Follow this step by step tutorial to learn how to create a Power Apps Canvas app. Sharepoint will be used as the data source.
Step 1: Login to Power Apps
Using your Microsoft Power Apps licensed account, log in to your account from here: https://make.powerapps.com/.
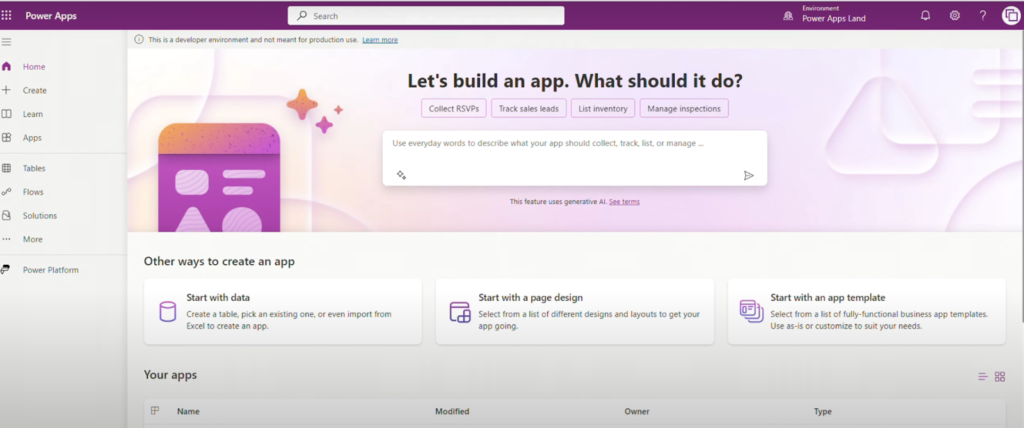
The Microsoft Power Apps homepage gives you options on how you want to build your custom app.
For this tutorial, we will be building a power apps canvas app for car rentals using Microsoft Sharepoint as a data source platform.
Step 2: Create the App
To create the app:
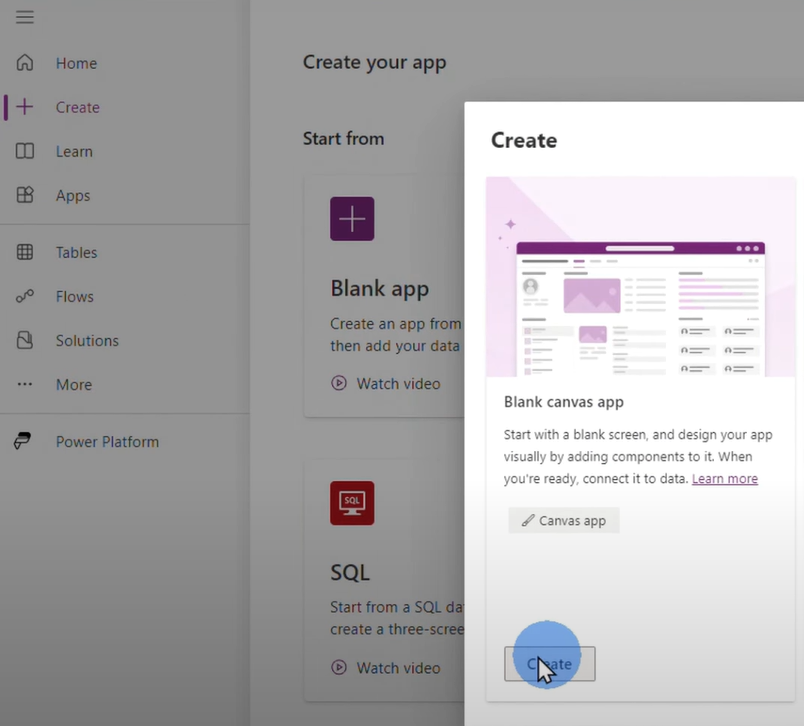
Click Create > Blank App > Create under Blank Canvas App.
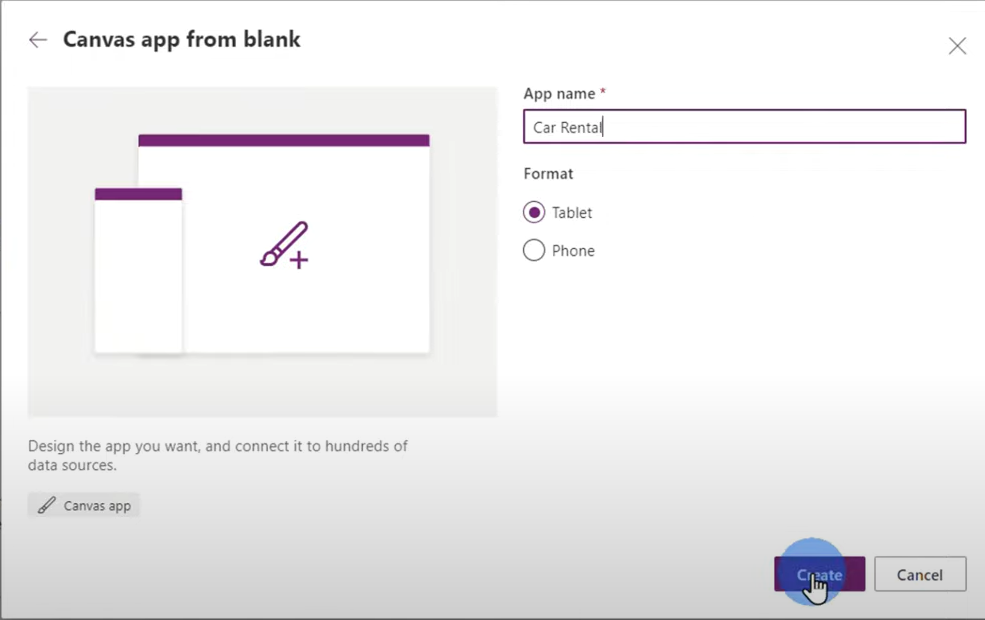
Add Car Rental as the App Name, then select Tablet for the app to be viewable on both desktop and tablet devices, and click Create.
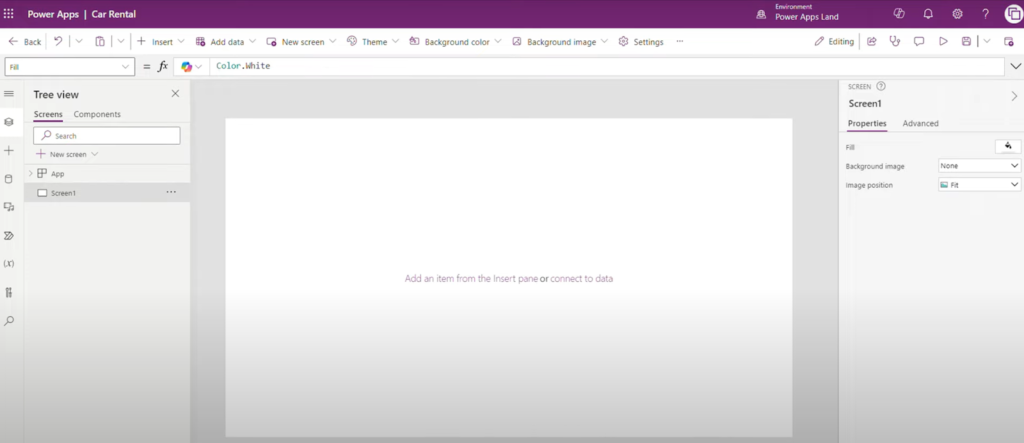
You will be redirected to the Power Apps Studio, where you can build and customize your app further. To start, you need to create your data source for storing the data entered on this app.
Step 3: Create a Sharepoint Site
Using Sharepoint, we will create a site to store our data. Sharepoint is a web-based application that allows organizations to store and manage content and information.
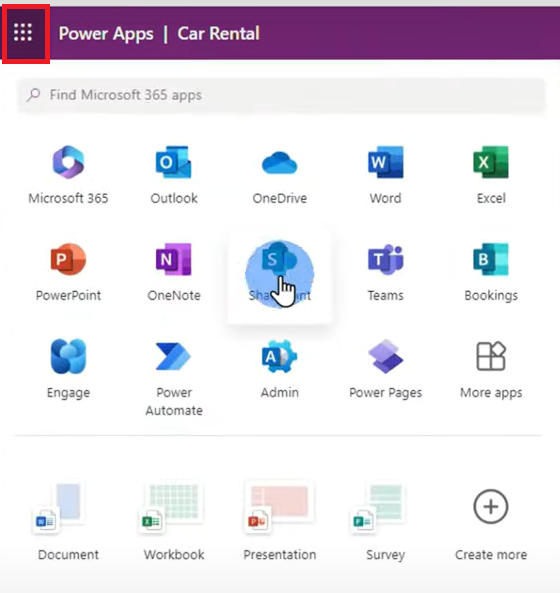
To access Sharepoint from Power Apps, click the 365 Menu at the upper left corner of the screen and select Sharepoint.
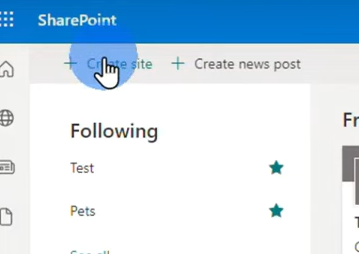
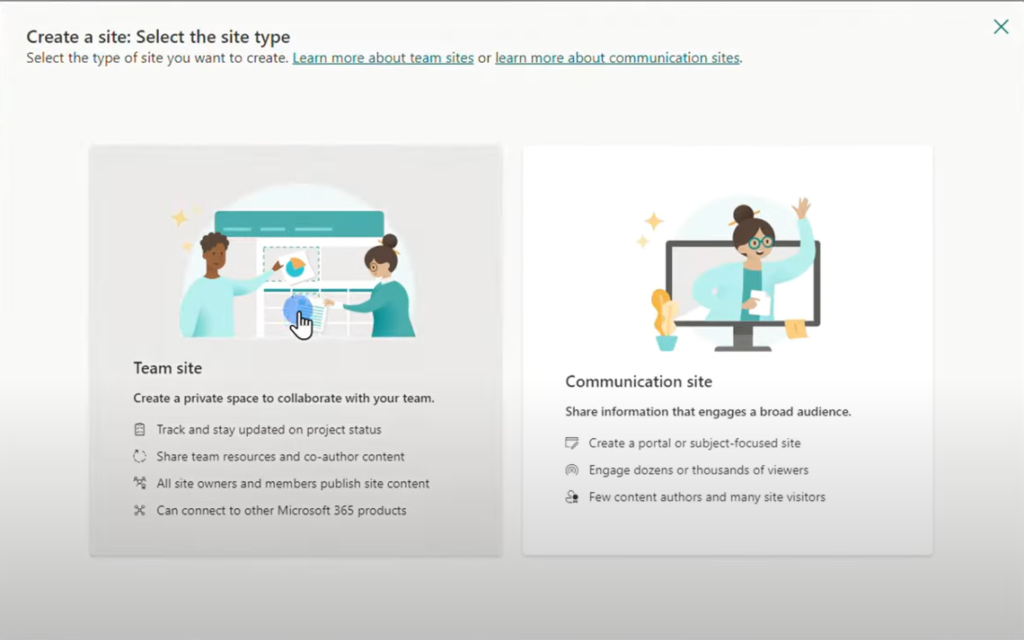
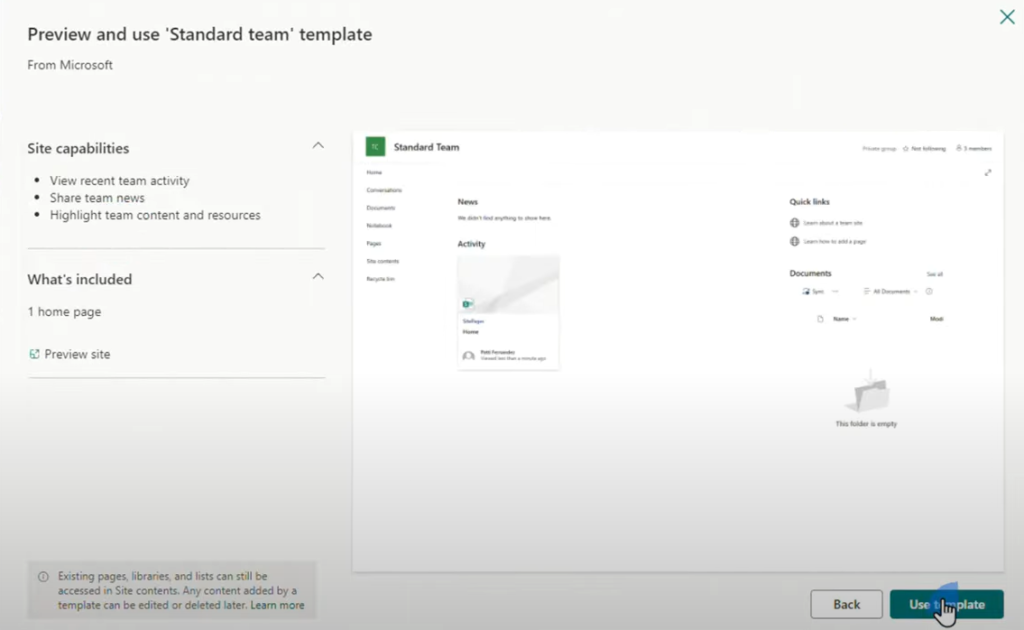
Click Create a Site > Team Site > Standard Team Template.
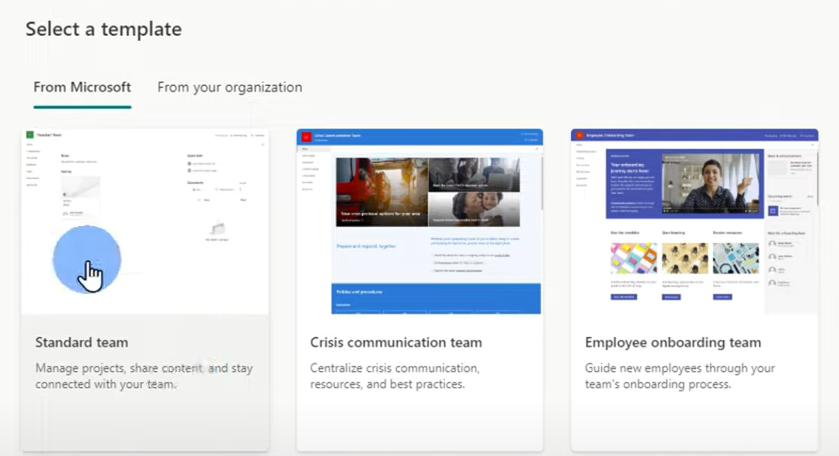
Click Use Template to start building a table where the data will appear from the app you will be creating using Power Apps.
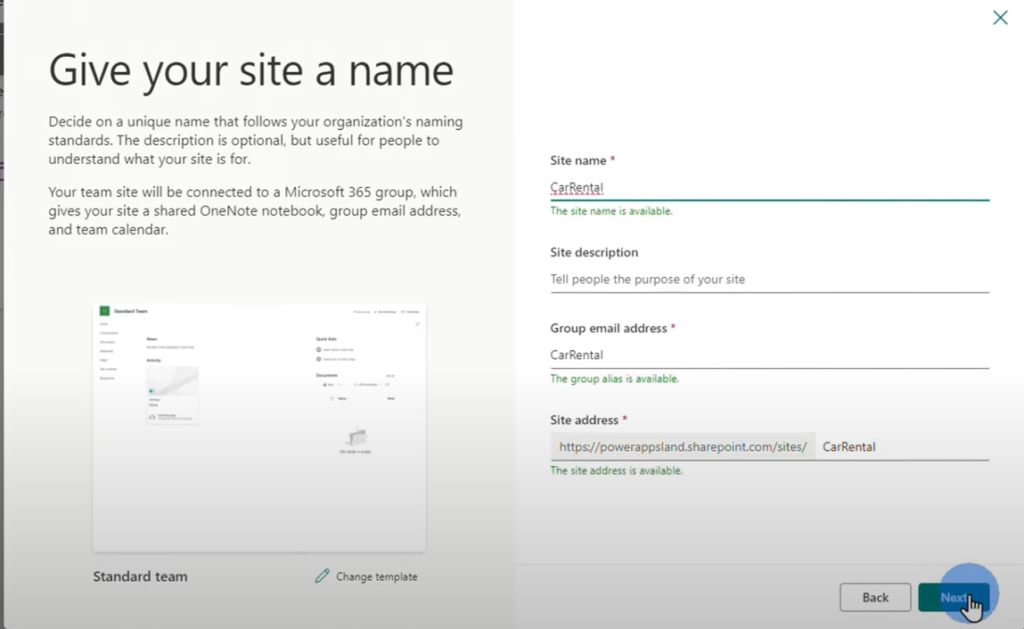
Give your site a name, keep clicking Next, then click Create Site > Finish to generate the table. For the purpose of this tutorial, we’ll call this site CarRental.
Step 4: Create Lists on your Sharepoint Table
Lists is where the data goes to from your Power App application. We will be creating three (3) lists for this tutorial: Customers, Cars, Rents. To create a list:
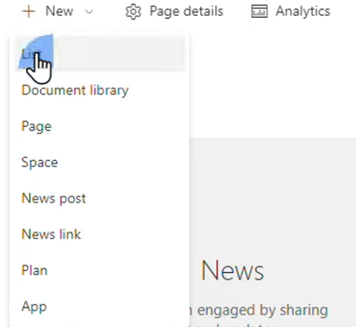
Click New > List > Blank List.
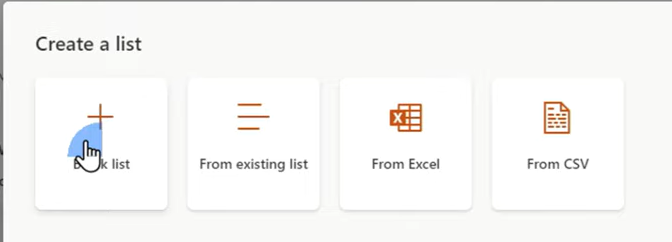
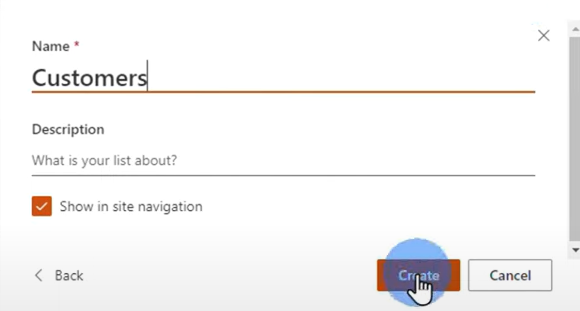
On the Name* field, add Customers then click Create.
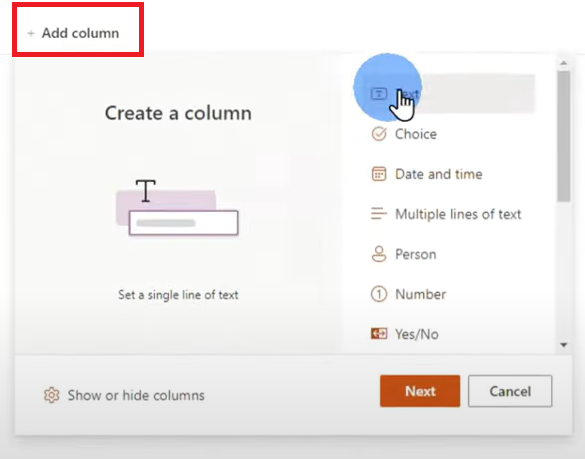
To add columns on the list, Click Add Columns > Text.
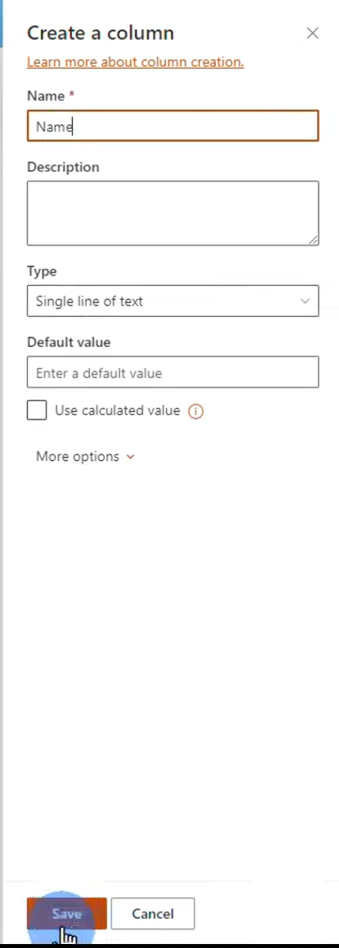
For the first column, add Name as the header and select Single line of text on the type field. Click Save once done.
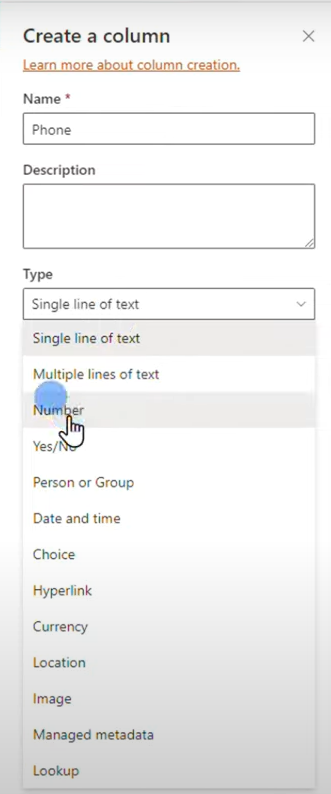
Repeat the same process for the second column, Phone but change the type to Number.
To remove unnecessary columns, click the Title > Show / Hide Columns.
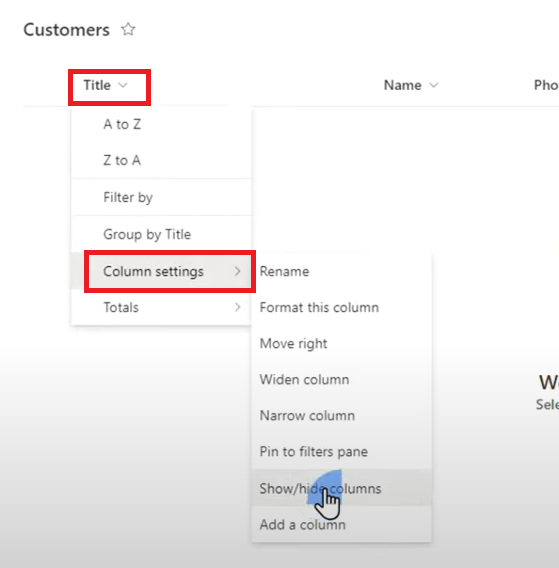
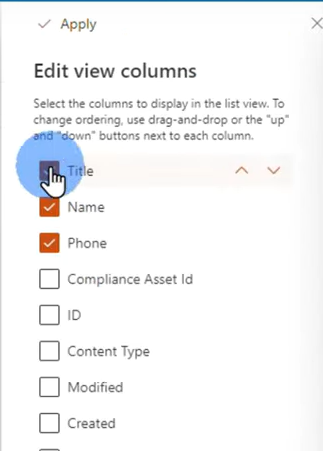
On the Edit View Columns, remove Title and other unnecessary columns.
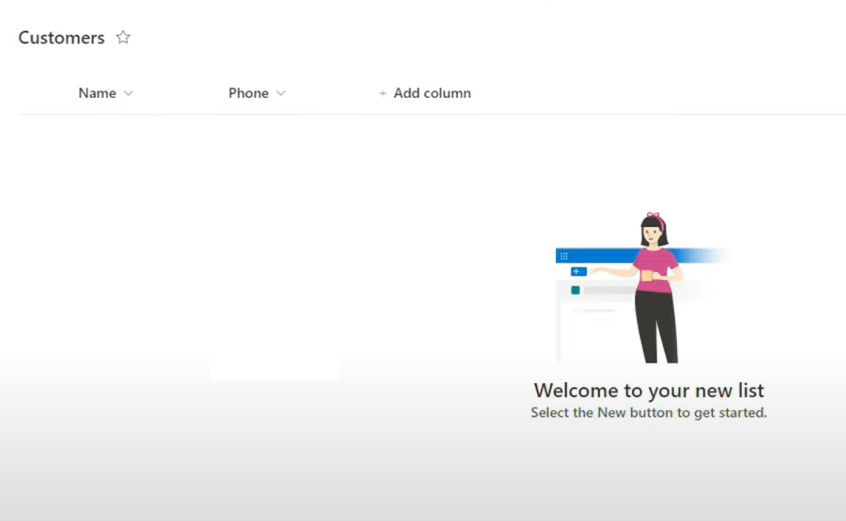
Your lists should look like this:
Go back to Home and repeat the process of creating lists and columns for the following:
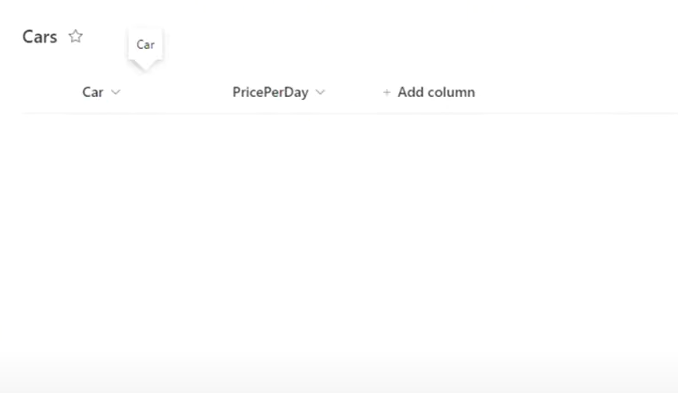
Cars
- Car with the type as Single Line of Text
- PricePerDay with type as Numbers
Rents
- Car with type set as Single Line of Text
- Customer with type set as Single Line of Text
- Start with type set as Date and Time and Use calculated value box unchecked.
- End with type set as Date and Time and Use calculated value box unchecked.
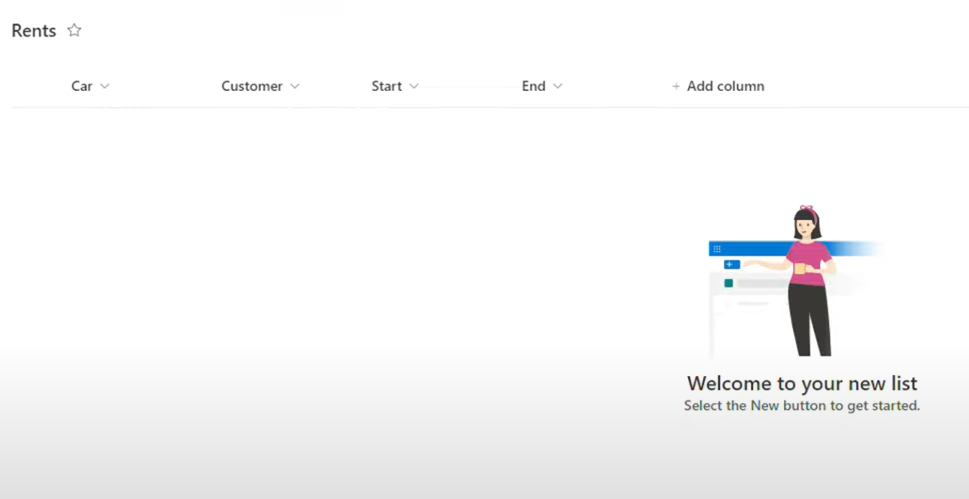
Step 5: Connecting the data source to your app
Go back to the Power Apps Studio to connect the data source and the app you will be creating.
Click the Data button then search and select Sharepoint.
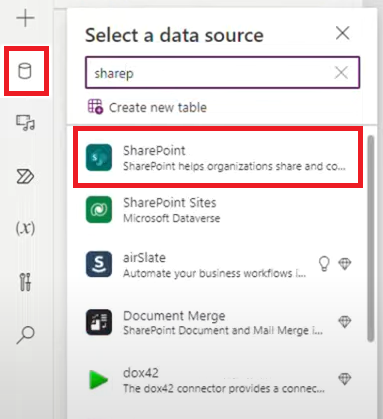
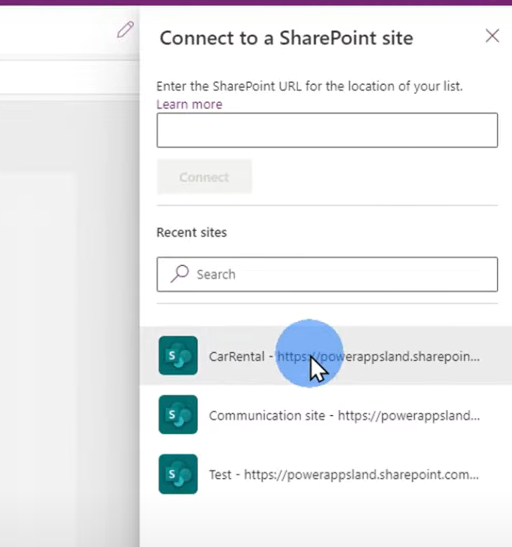
On the right column, you will see all Sharepoint data sources. Click CarRental to select.
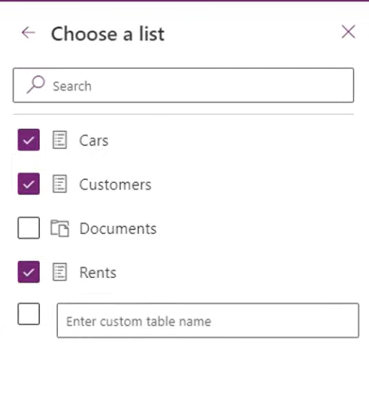
Tick the boxes beside Cars, Customers, and Rents then click Connect.
Step 6: Customize the app screen
On the Tree View on the left side of the Power App Studio interface, you will see Screen1, which is the default name for the app screen.
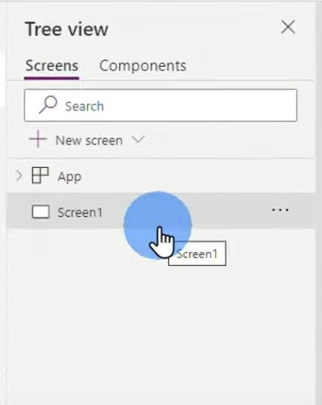
Click on the ellipses beside Screen1 > Rename, then rename Screen1 to AddCustomers
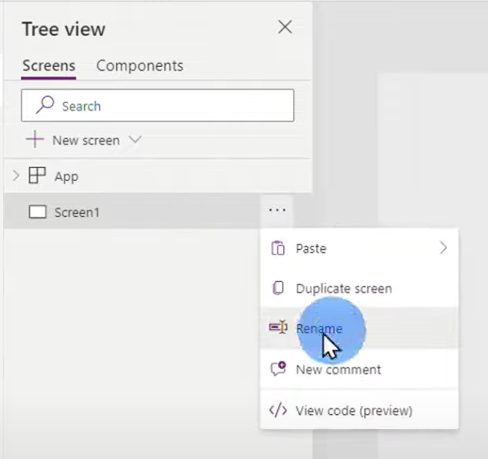
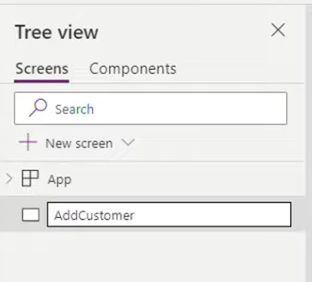
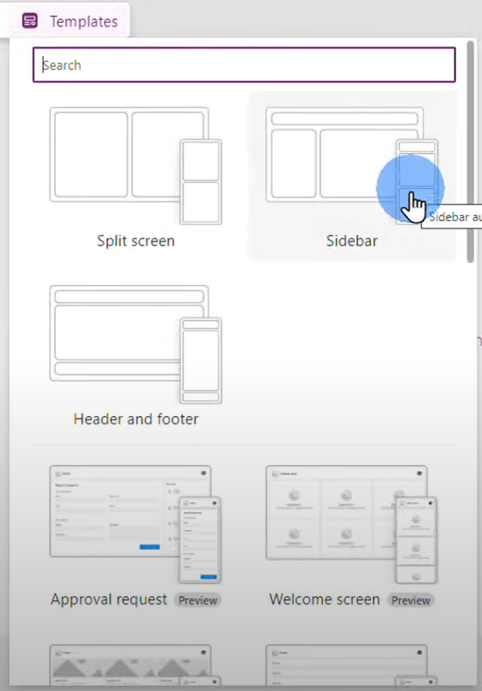
To customize the interface, with a pre-determined design, click Template.
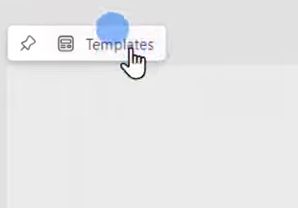
Select the Sidebar template.
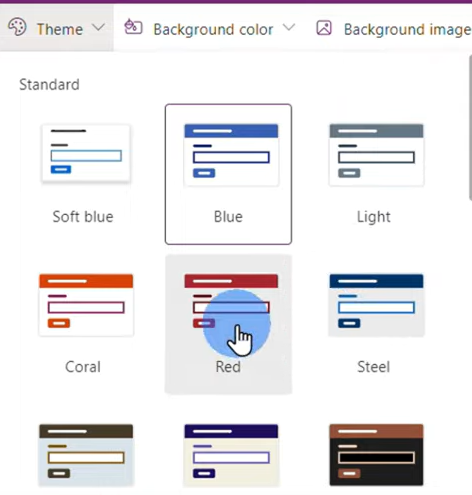
To add colors, click Theme and select Red.
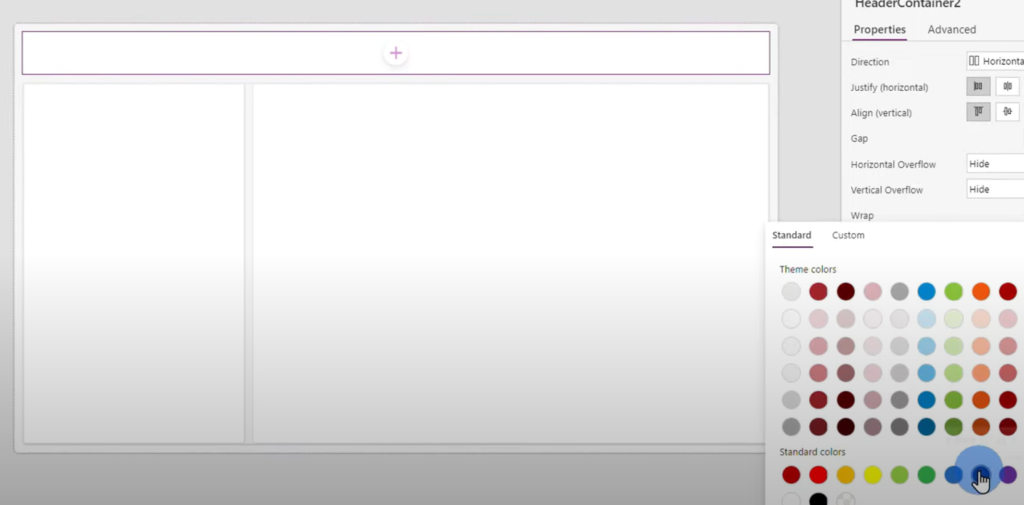
In the app Canvas, click the Header and select the color dark blue for background color in the Properties section, where you can customize the existing components of your app’s screen.
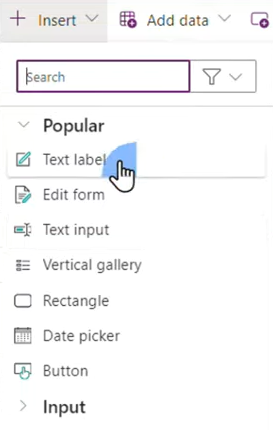
To add more components such as buttons on the screen, click Insert. For the app we’re creating, select Text Label to add a header text on the app screen.
Change the text color to white to contrast the dark blue background from the Properties section.

Change the text to Car Rental – Add Customer then make the font size 40 with font weight Bold. Width should be 900.
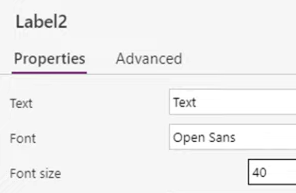
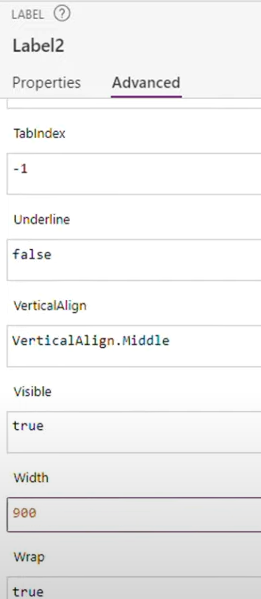
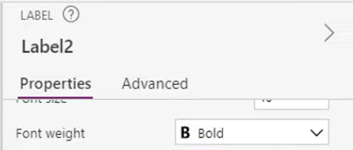
Click Save to save changes. To preview the app, click Preview.
Duplicate the Car Rental – Add Customer three (3) more times by clicking the ellipses menu and selecting Duplicate Screen.
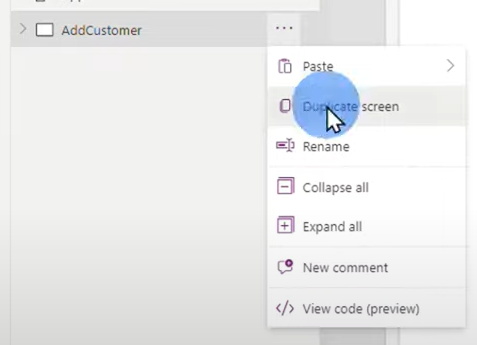
Rename the duplicate screens to AddCar, AddRental and ListRentals.
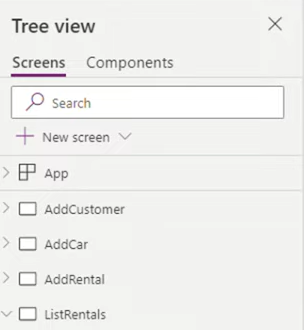
Change their headers to:
- Car Rental – Add Car
- Car Rental – Add Rental
- Car Rental – List Rentals
Step 7: Create the left menu
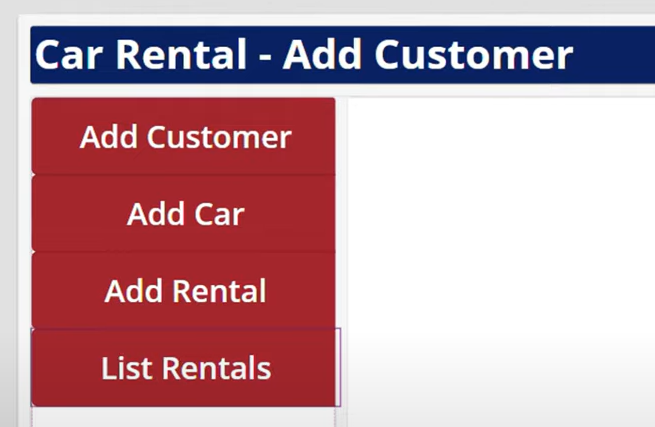
To create the left Canvas app menu of the Car Rental – Add Customer screen, click the + sign on the left column of the app screen. Select Button.
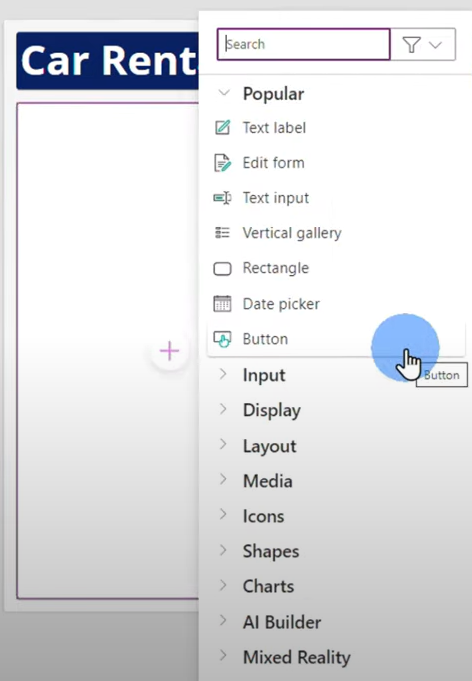
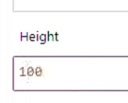
Resize the button to 400 and change height to 100 on the Properties menu.

Change button text to Add Customer, then change font size to 30.
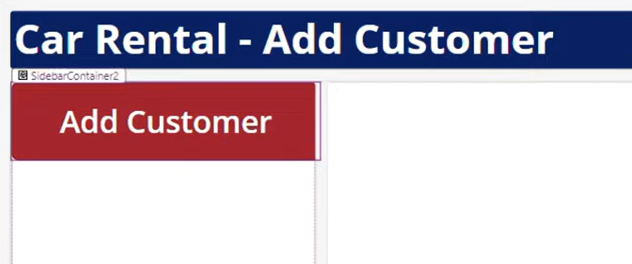
Copy and paste the button to duplicate three (3) more times by pressing CTRL + C and CTRL + V to duplicate the buttons.
Rename the duplicated buttons as:
- Add Car
- Add Rental
- List Rentals
These buttons will be your Navigation buttons to the different screens of the app.
Step 8: Link the navigation buttons to their respective screens
To configure each button so they go to their assigned screens when clicked, select the button you want to configure and select OnSelect on the Properties dropdown on the upper-left corner of the Power Apps Studio interface.
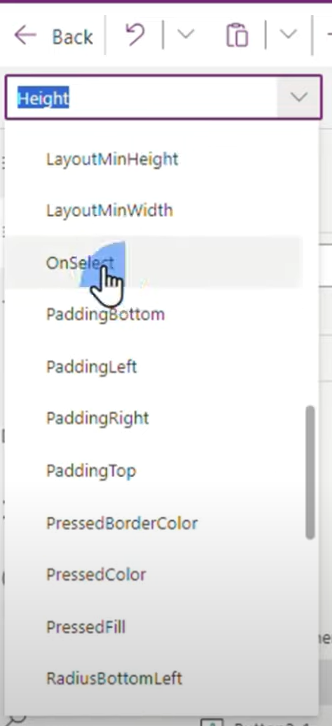
Change the Power Fx formula on the fx field to Navigate(AddCustomer).

Do the same for the other buttons with the following formula:
- Add Car – Navigate(AddCar)
- Add Rental – Navigate(AddRental)
- List Rentals – Navigate(ListRentals)
Add all buttons to all screens by copying and pasting the buttons from the sidebar container under AddCustomer to all of the screens. To highlight multiple components in the Tree View, press Shift then click on each item.
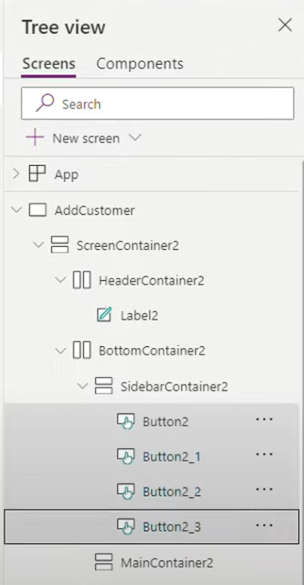
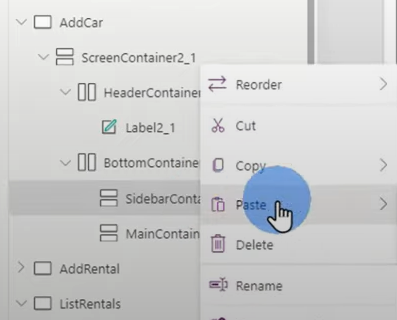
To paste all buttons to each screen’s sidebar containers, click the sidebar container in the Tree View then select Paste.
Step 9: Add fields to each screen
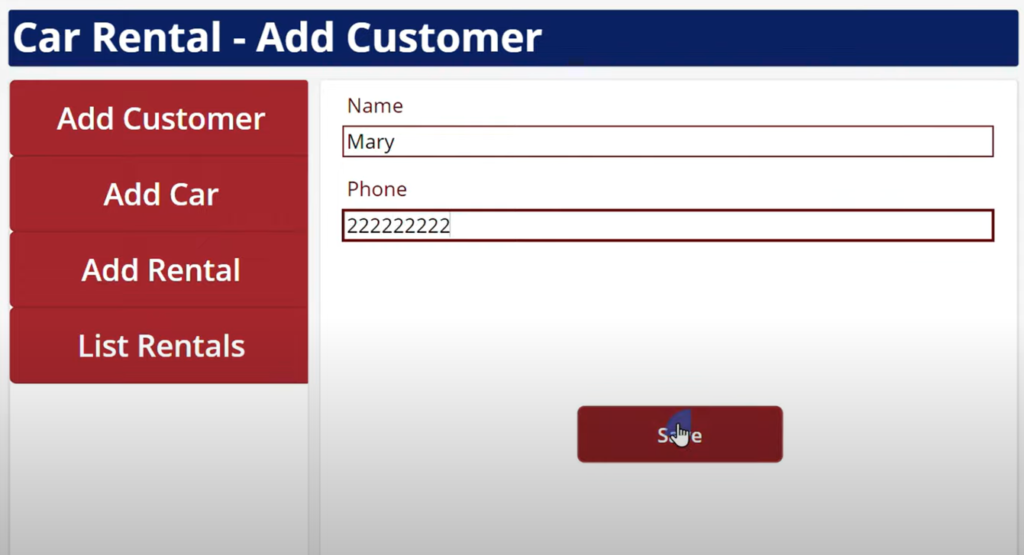
To add fields to the Add Customers screen of your Power Apps Canvas, add the + sign at the center of the main container.
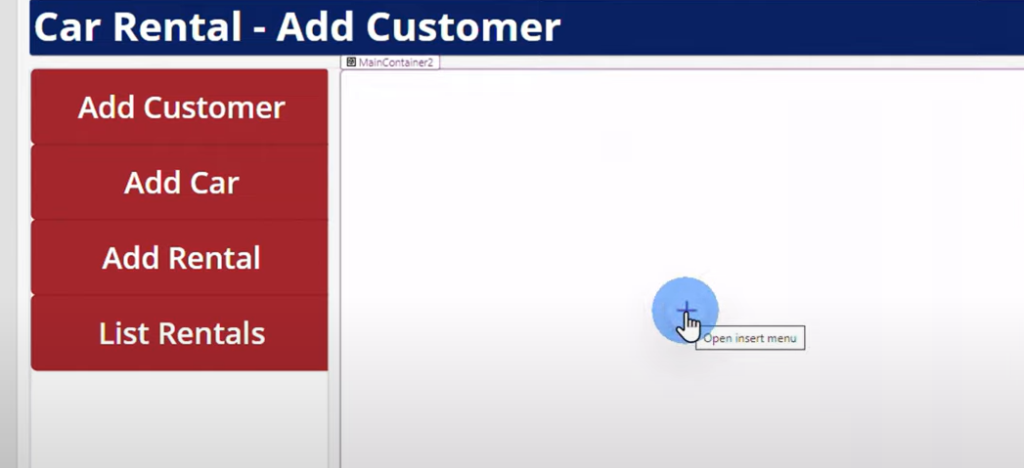
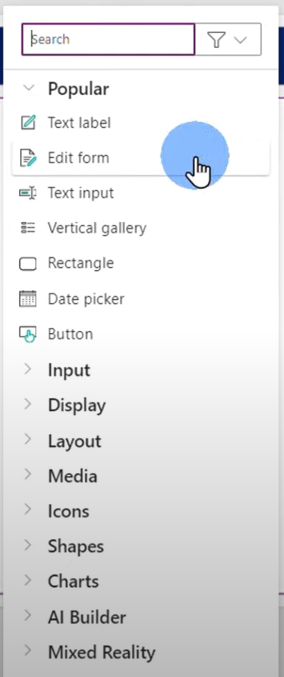
Select Edit Form.
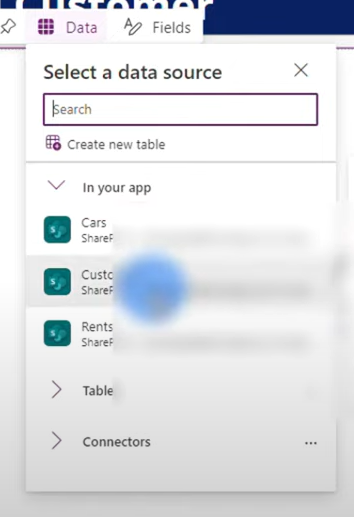
On the Data Source menu, select Customers.
To create fields, click Fields > Add Field.
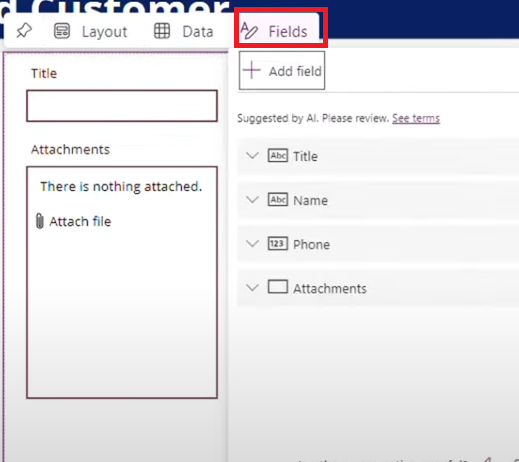
From the selection, remove unnecessary fields by clicking the ellipses menu and selecting Remove.
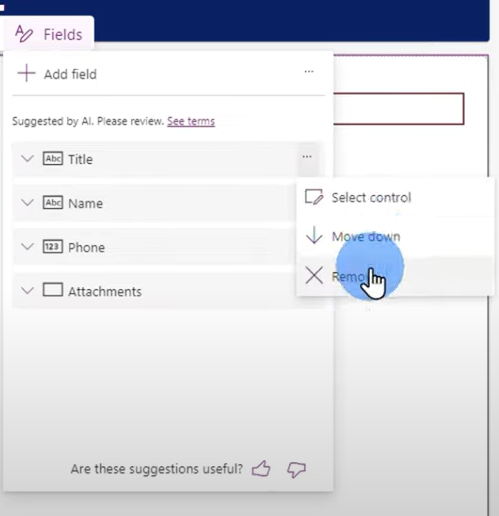
The Name and Phone fields should appear on the main container.

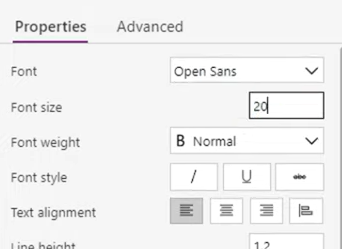
To customize the fields, go to the Properties window of the Power App studio then change the font size to 20.
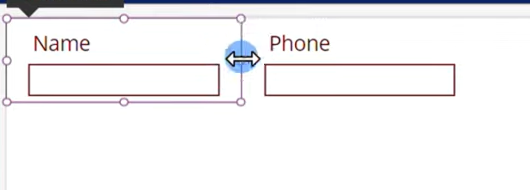
Stretch out the fields to the other side of the container to fill the entire width by dragging and dropping the object frame.
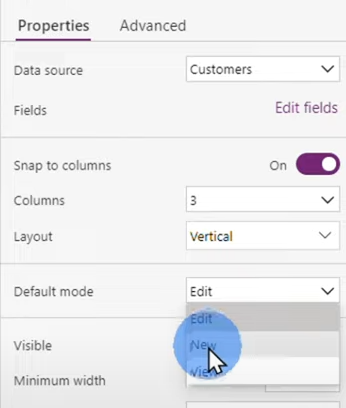
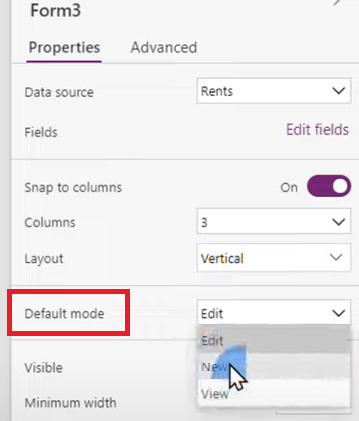
To make the fields appear on the screen when you switch to Preview mode, make sure to set the Default Mode on the Properties window to New.
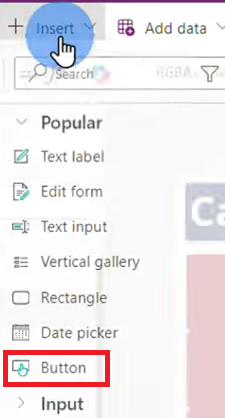
To add a Save Button, click Insert then select Button.
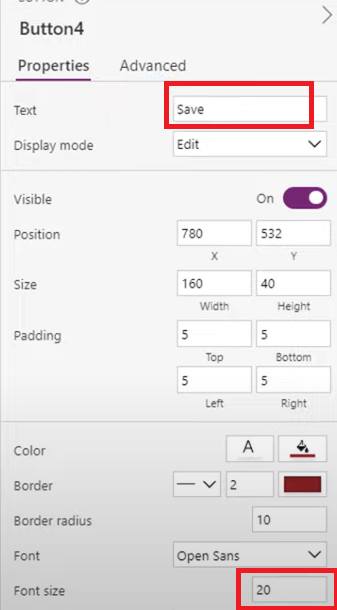
Change the font size to 20 and change the text to Save.
To configure the Save button, click the button, select Onselect on the Properties dropdown, then change the formula to: SubmitForm(Form1); ResetForm(Form1).

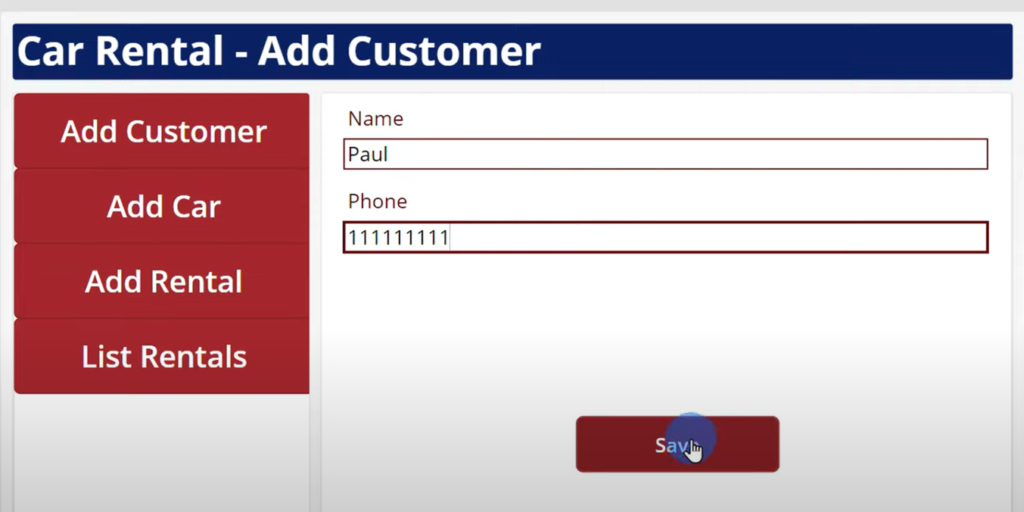
Now test your app by clicking the Preview button, adding some data and clicking Save.
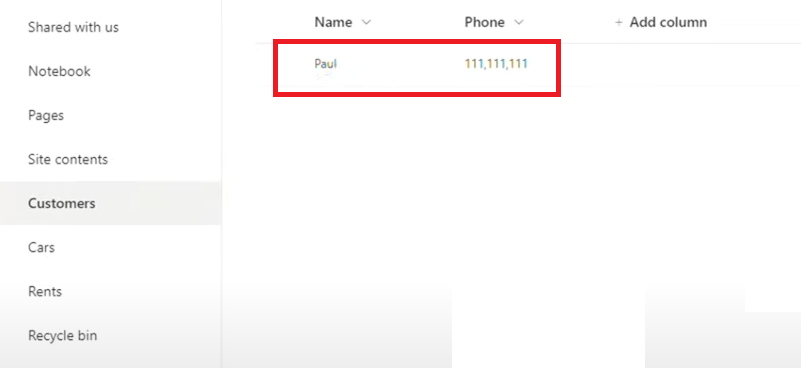
To test if the Save button is working and the data is going to the right data source, check the Sharepoint site you created under Customer list.
Your test data should appear on the Customer list.
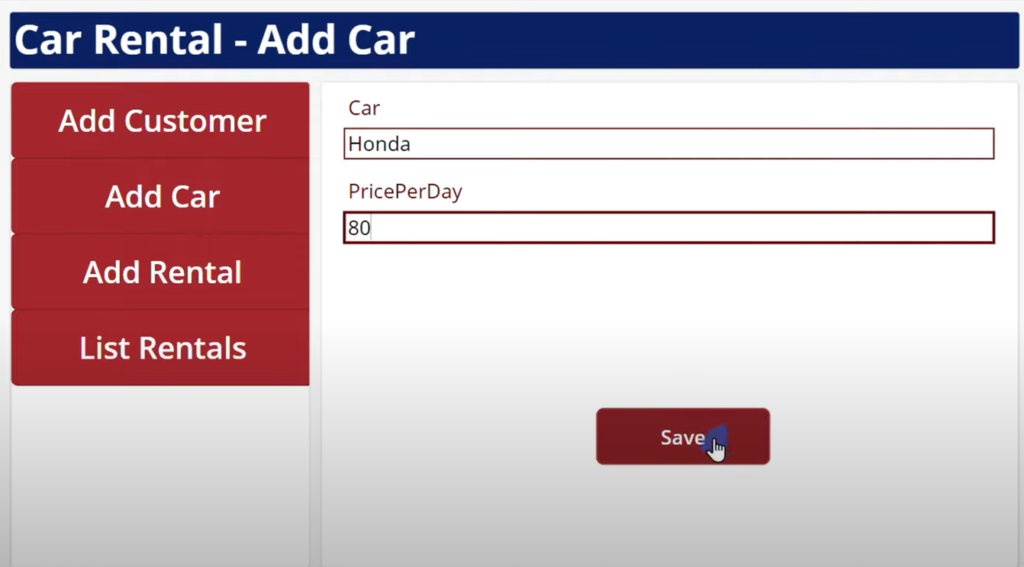
Repeat the process on the Add Car and Add Rental screens but with the following components and properties:
Add Car:
- Choose the Cars data source
- Leave only the Car and PricePerDay fields.
- Onselect Formula: SubmitForm(Form2); ResetForm(Form2)
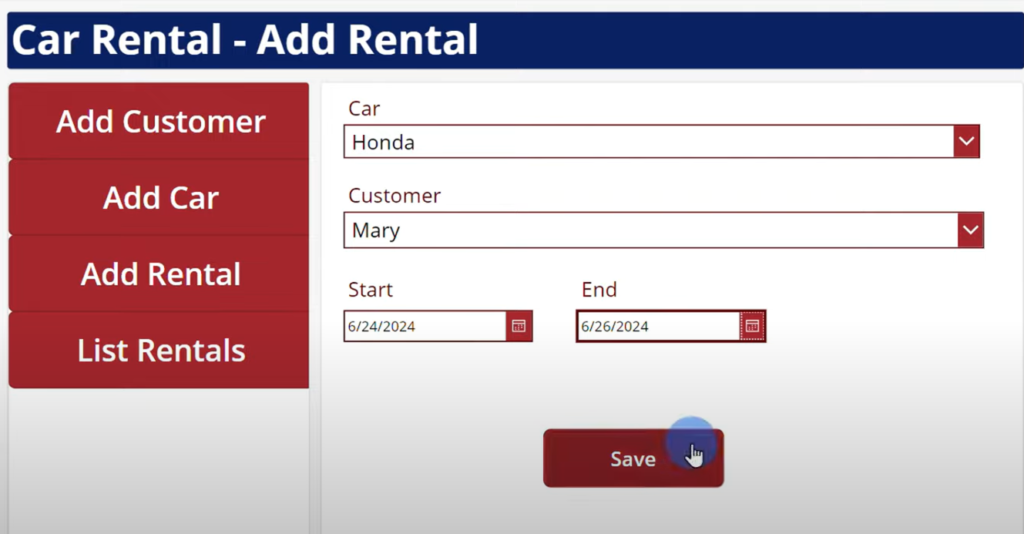
Add Rental:
- Choose the Rentals data source
- Leave only the Car, Customer, Start and End date fields.
- Onselect Formula: SubmitForm(Form3); ResetForm(Form3)
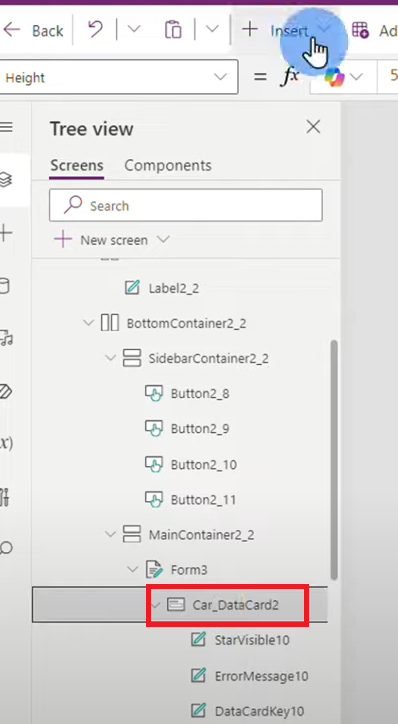
For the Car field, replace them with drop down menus. Select Car_DataCard2 from the Tree View then click Insert.
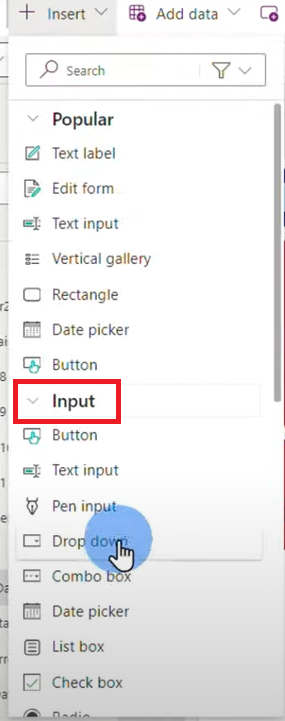
Select Input > Drop down.
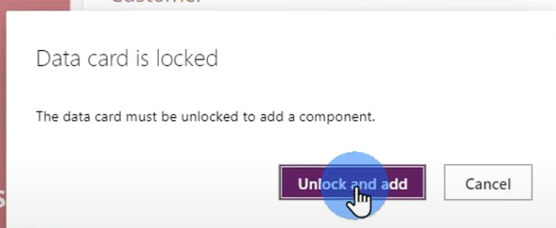
Click Unlock and Add.
On the Properties field above the Tree View, select Items then change the formula to Cars.

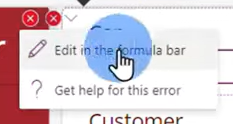
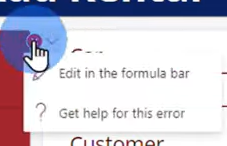
When you hover your cursor near the Car dropdown, you’ll see two (2) small circles with X’s. Click one of those circles.

Select Edit in the Formula Bar.
Remove the existing formula, then replace with Dropdown1.SelectedText.Value.

Click the remaining small circle > Edit the formula then remove the formula.
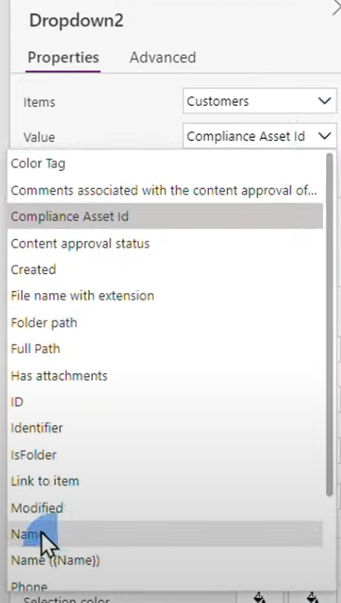
Do the same with the Customer field with the Item value as Customers and the Customer field formula as Dropdown2.SelectedText.Value.
Change the Value field as well to Name.
Change the Default Mode to New.
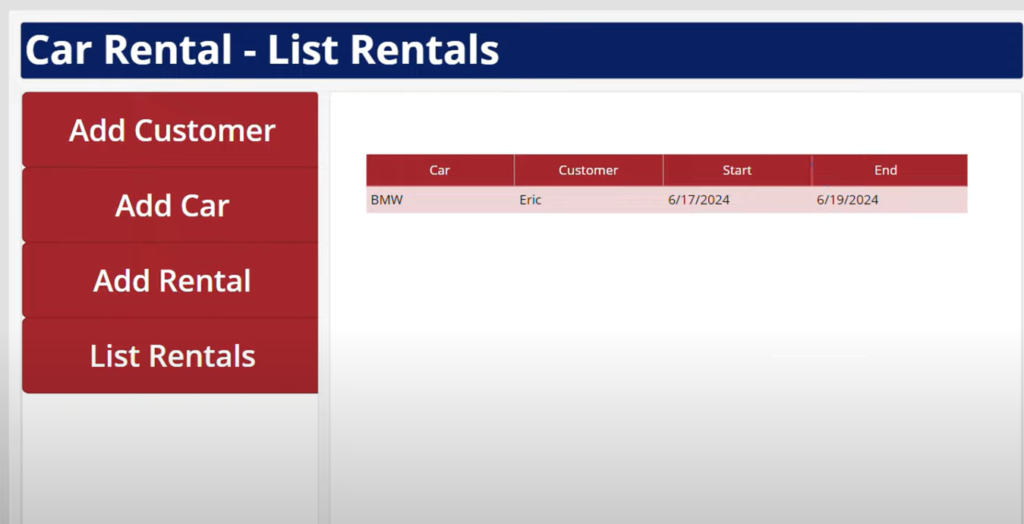
For the List Rentals screen, click the + sign on the Main Container, then select Data Table.
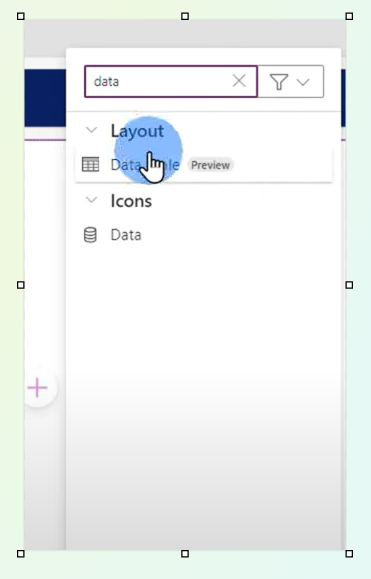
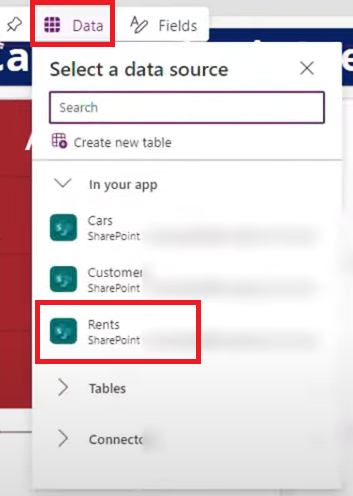
To add the data source, click Data and select Rents.
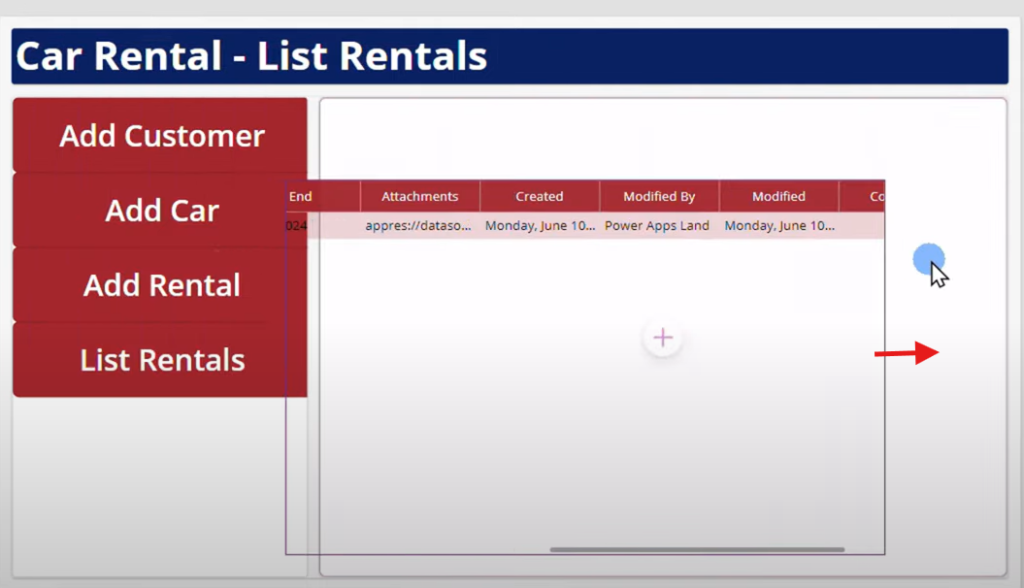
Drag and drop the table to the center of the screen.
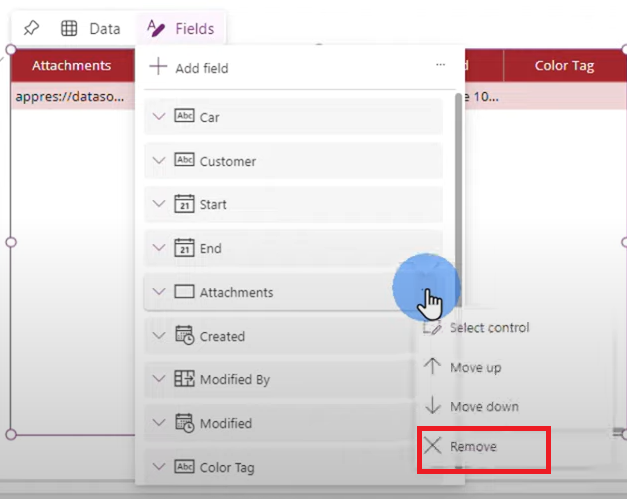
Remove all the unnecessary columns by clicking Fields and removing the fields that you don’t want on the table.
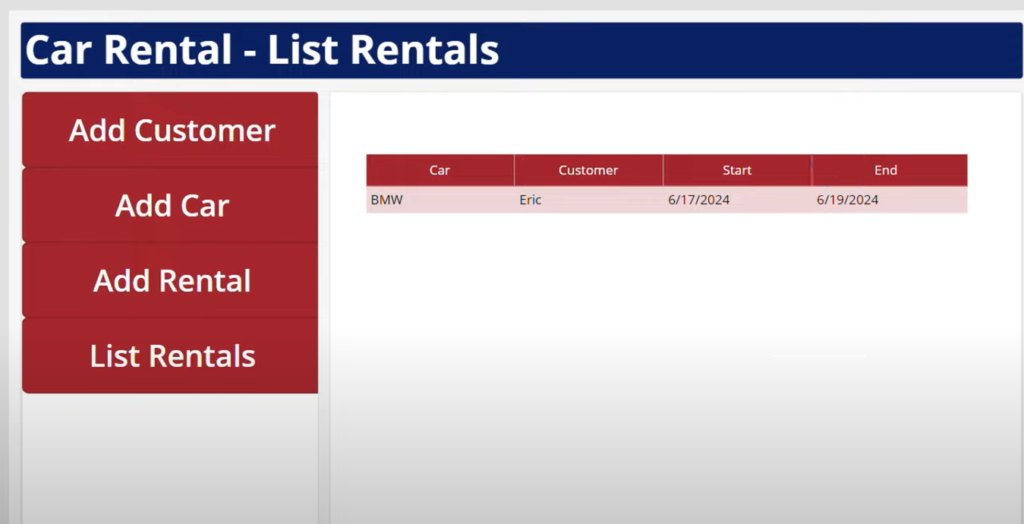
Leave Car, Customer, Start and End Date.
When you go to the Preview mode, you should be able to see all the rentals test data you have entered on the Rental screen.
Step 10: Test the app
To test your Power Apps Canvas app, go to the Preview mode by clicking the Preview the App button.
Add and save data on the app.
Congratulations! You completed the creation of your Power Apps Canvas App.

Leave a Comment