The Power Apps Patch function allows you to add data into a data source and edit data as well.
It is a more flexible alternative to the Power Apps Submit Form function of the Edit Form control.
To add a Patch Function on your form app, follow the steps below.
NOTE: For this tutorial, we will be using a pre-created Sharepoint list as the data source, a customer’s list from a Store Sharepoint site. To learn how to create a Sharepoint site and list you can take a look at step 3 of this tutorial.

Get to know the data types of each column of your data source
The Power Apps Patch Function works differently than the SubmitForm function depending on the data type of the fields on the application.
This is why it is important to determine the data type of the columns of your data source.
In this tutorial, we will use the pre-created Sharepoint data source integrating into the sample app.
Step 1
Go to Sharepoint or the data source you will be working with.
Step 2
Click the first column and
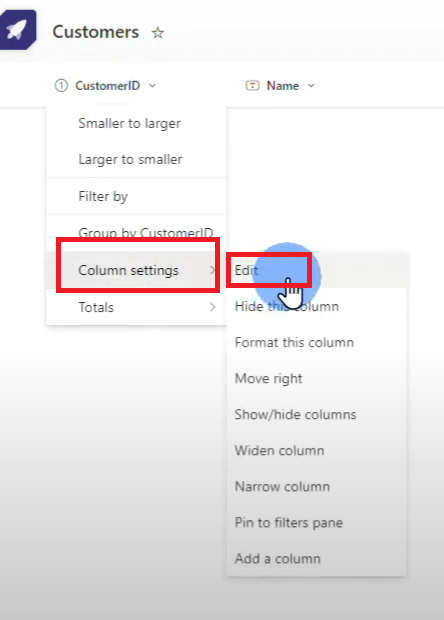
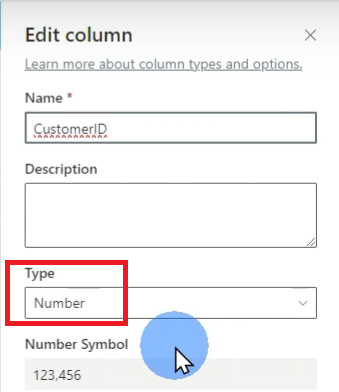
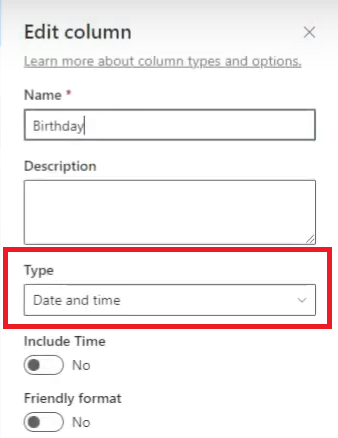
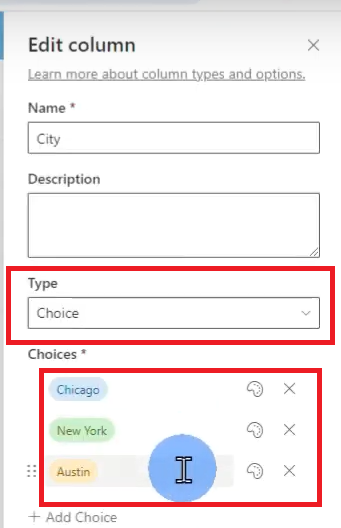
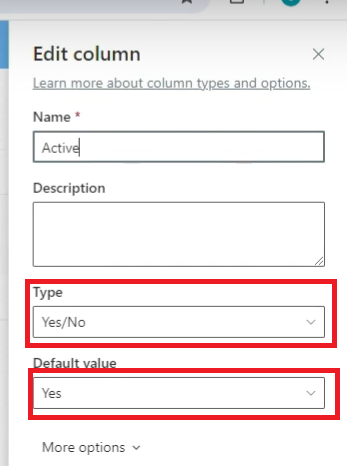
The Edit Column pane will show up on the right side of the Sharepoint list screen and you will see the data type of the column in the Type drop-down field.
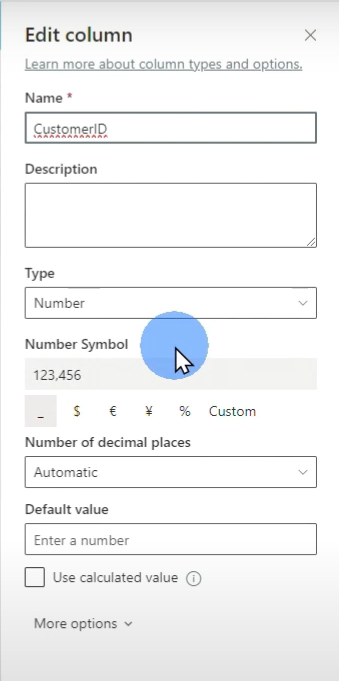
On this sample Sharepoint data source, the fields have the following types:
- CustomerID – Number
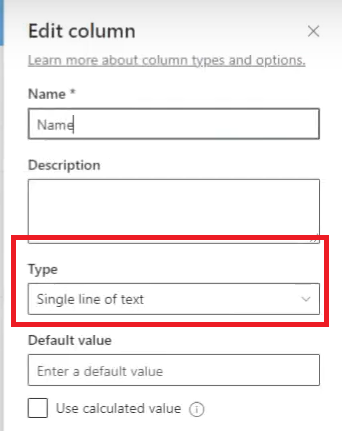
- Name – Single Line of Text
- Birthday – Date and Time
- City – Choice with 3 options: Chicago, New York and Austin
- Active – Boolean with 2 options: Yes and No. Its default value is Yes.
Creating the App
Once you have figured out the data type of your data source, you can now proceed to creating the app on Power Apps.
Step 1
Go back to Power Apps Studio.
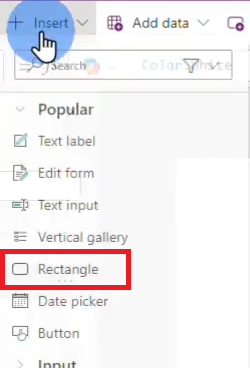
Create the Header by clicking +Insert > Rectangle.
Step 2
Drag out the frame of the rectangle so that it fills the entire top of the empty canvas

Step 3
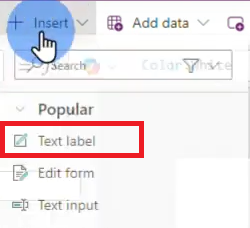
Click +Insert again then select Text Label to add a text on the header rectangle you have created.
Step 4
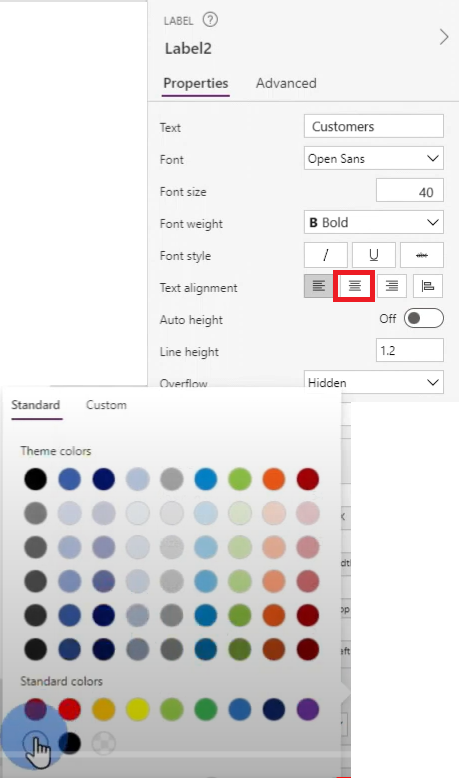
Change the properties of the text label to:
- Text – Customers
- Text Color – White
- Font size – 40
- Font weight – Bold
- Text Alignment – Center
Step 4
Add a vertical gallery to your app screen by clicking +Insert > Vertical Gallery.
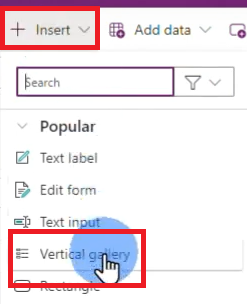
At this point, your data source won’t appear on your app yet as you need to make it available first to Power Apps Studio.
Integrating the Data source into your App
In order for you to integrate your data source into your app on Power Apps, you first need to make it available on Power Apps Studio. To do this:
Step 1
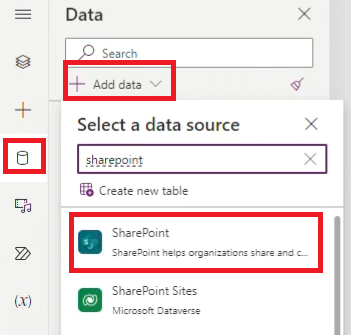
Click the Data button on the left panel, then click +Add Data. Select the data source.
Step 2
Select the Sharepoint site.
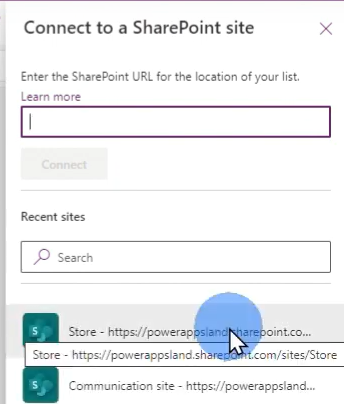
Step 3
Select the Sharepoint list.
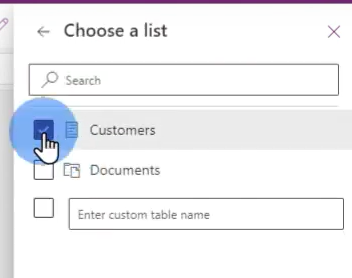
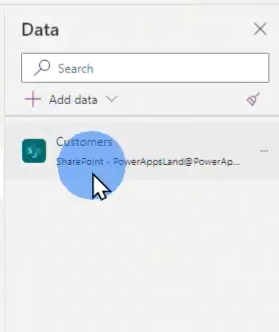
The Sharepoint data source should now be available on the Data pane, ready to be integrated to your app.
Connecting the data source to your gallery
For you to be able to see your existing records on your vertical gallery, you need to connect the Sharepoint data source to your application. To do that:
Step 1
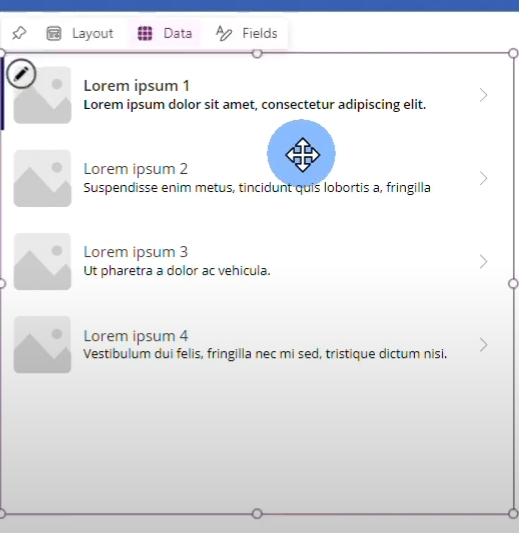
Click on your vertical gallery.
Step 2
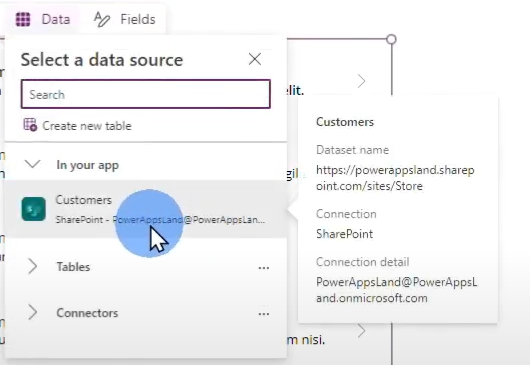
Click on Data then select the data source. In this guide, we’ll select Customers.
Step 3
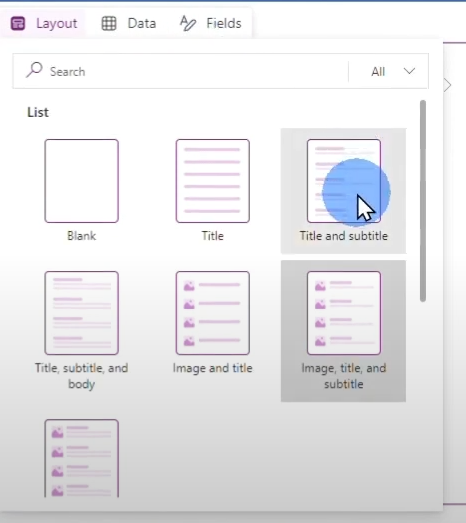
Change the layout by clicking Layout and selecting a template. In this case, we’ll go with Title and Subtitle.
Step 4
Resize accordingly.
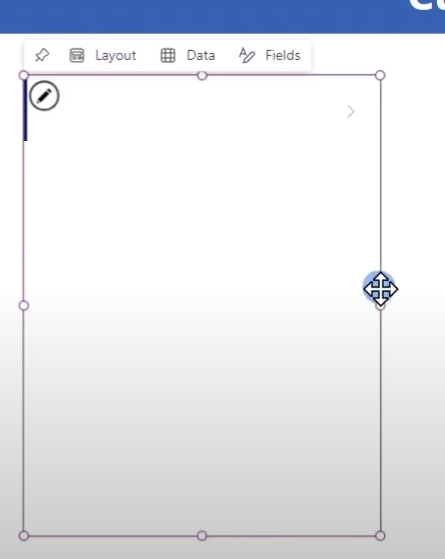
As there’s no data on the data source yet, the gallery will remain empty for now. You’ll need to create a form field where your potential end-users can add to the data source.
Creating a Form Field
The data that will appear on the vertical gallery will come from the text input from the fields you will be creating. To create the fields for the data input:
Step 1
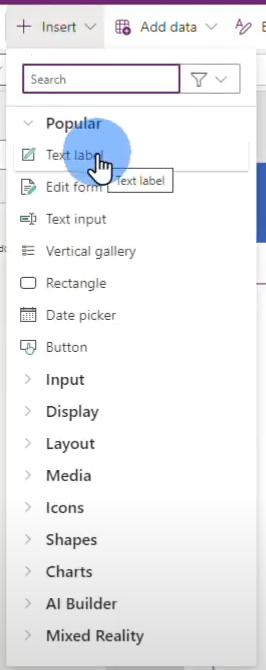
Click +Insert then select Text Label.
Step 2
Click +Insert again then select Text Input.
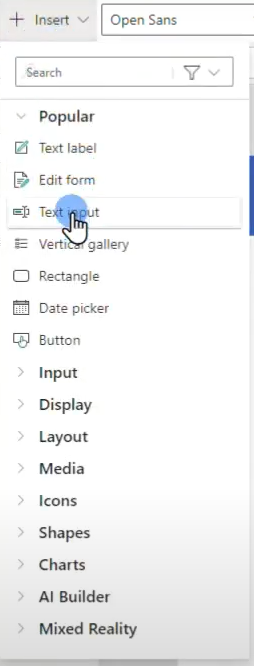
Step 3
Rename this text field as CustomerID.
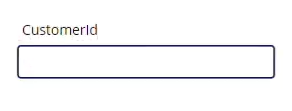
Step 4
Repeat steps 1-3 to create the second field: Name.

Step 5
For the Birthday field, select Date Picker instead of Text Input.
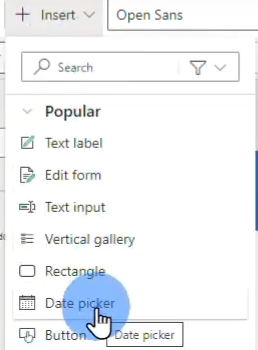
Step 6
For the City field, select Drop down.
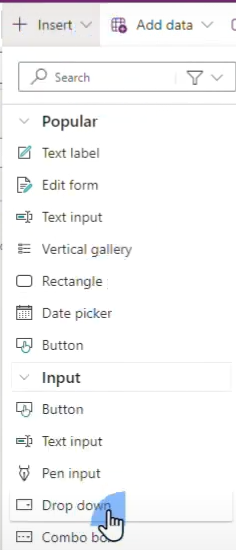
Step 7
Configure the City field to only have the same options as its Sharepoint counterpart by changing the formula in the fx field to: [“Option1”, “Option2”, “Option3”]
E.g. [“Chicago”, “New York”, “Austin”]

Step 8
For the Active field, select Toggle from the +Insert menu.
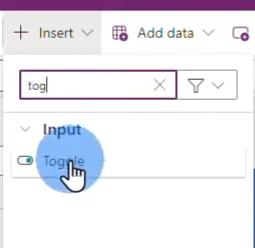
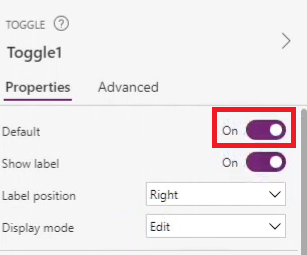
Step 9
As it is a Boolean field, change the default to On.
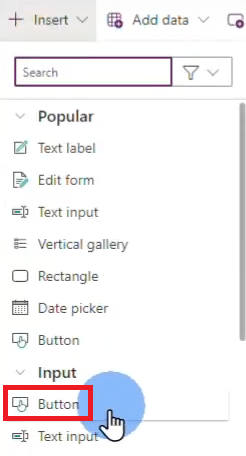
Step 10
Add a Save button by clicking +Insert then selecting Button.
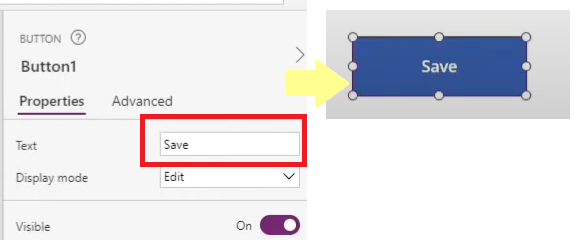
Step 11
Rename the button Save and resize it accordingly.
Step 12
Rename all fields on the Tree View for you to easily configure each field using the Power Apps Patch Function. To rename components on the Tree View, click on the ellipses menu beside the component and select Rename.
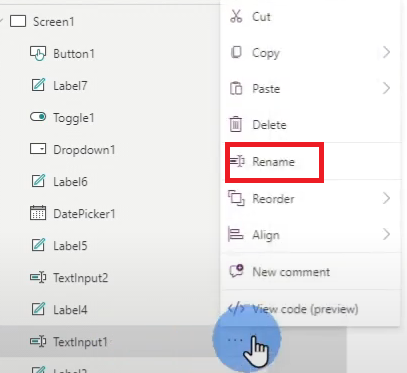
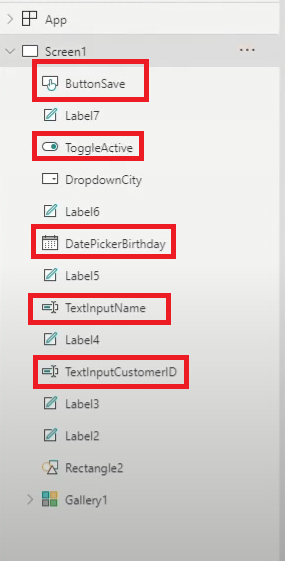
Rename the following components:
- TextInput1 – TextinputCustomerID
- TextInput2 – TextinputName
- DatePicker1 – DatePickerBirthday
- DropDown1 – DropdownCity
- Button1 – Save
- Toggle1 – ToggleActive
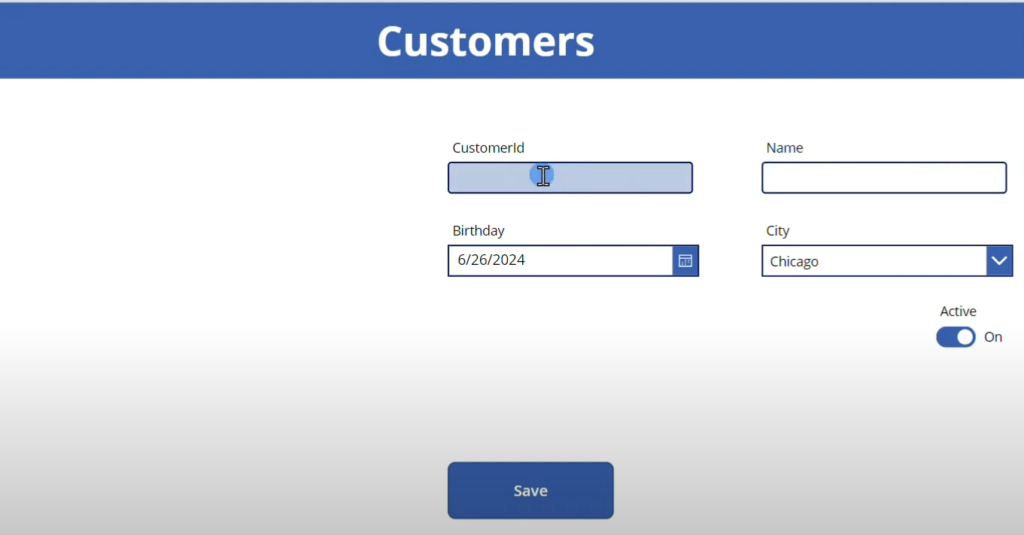
The fields are now visible on the Preview mode and ready for configuring.
Adding Power Apps Patch Function to insert new records
In order for the fields to start adding records to your data source so they appear on the vertical gallery, you need to apply the Patch Function to the Save button. To do that:
Step 1
Click the Save button and remove the existing formula in the fx bar.

Step 2
Increase the size of the fx field by dragging the bottom frame down.

Step 3
Add in the following formula, replacing the texts in italics with your application’s actual field and data source names:
Patch(Data Source, Type of Operation (Data Source), {Field1: Name of field. Field Type, Field2 Name field.Field type}
In this example, we are using this Patch Function code:
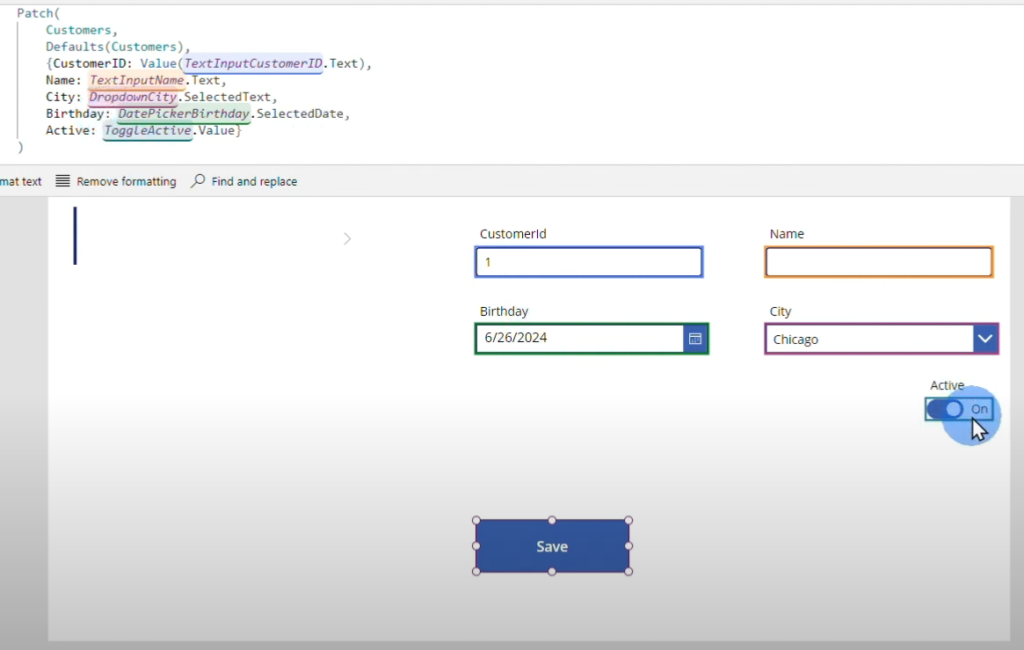
Patch(Customers, Defaults (Customers), {CustomerID: Value(TextInputCustomerID.Text), Name: TextInputName.Text, City: DropdownCity.SelectedText, Birthday: DatePickerBirthday.SelectDate, Active: ToggleActive.Value}

You don’t have to type all values and field names manually as the autocomplete feature already generates the full name of the fields and their expected values. Just press Enter to complete the formula statements.

If you notice a line of code with a red underline, it means that there is an error within that statement. Hover your mouse cursor over the line of code with a red underline to see the error message so you know how to fix it.

In this case, the error is caused by the .Text part of the CustomerID line of code as the expected value in the Sharepoint data source is a number.
To fix this without having to delete the CustomerID field and redoing it, you need to convert it to a number instead. To do this, add Value before the TextInputCustomerID.Text statement, then enclose the latter with parentheses.

As you can see, the Patch Function code allows you to assign and modify commands to more complex form applications such as this sample application.
This simple Patch Function code has the following components:
- Data Source – The Sharepoint site Customers
- Type of operation, which is either Insert (To add to the records) or Update (To update existing records). We put in Default as it is an Insert operation with default values.
- Data entry fields
- Each field’s input
Step 4
Test out the Patch Function to see if the data is returning correctly. When the Patch Function code is applied correctly, you will see the new records appearing on the Vertical Gallery at the left side of the application interface.
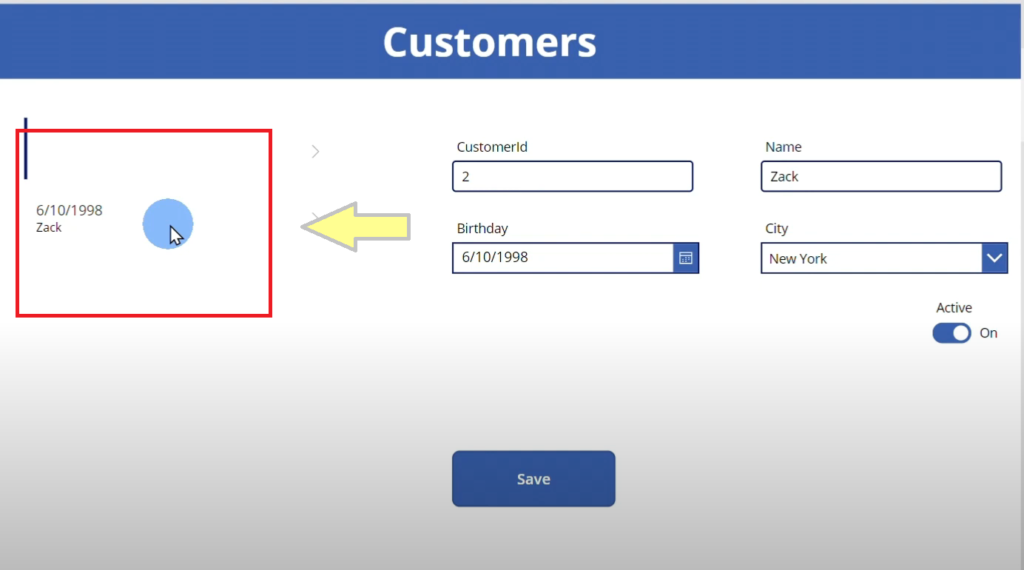
The new data will also appear on your Sharepoint list.

Adding Patch Function to update existing records
To change the operation of the Patch Function you have previously added to your app from inserting new data to updating existing records, follow the two (2) steps below:
Make the selected item distinguishable
Step 1
Click the Vertical Gallery.
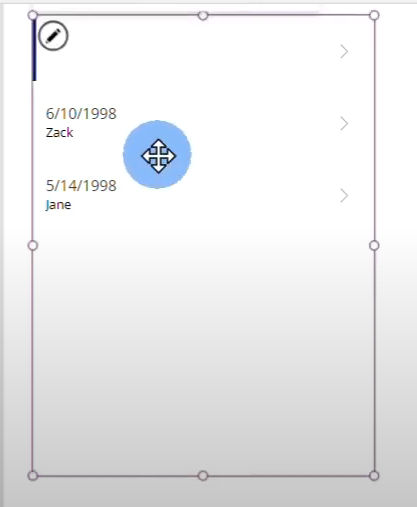
Step 2
Select TemplateFill on the Properties drop-down then delete the formula.

Step 3
Add this formula: If(Thisitem.IsSelected, Color.[your preferred color when item is selected], Color.[your preferred color when item is not selected])
E.g. If(ThisItem.IsSelected, Color.CadetBlue, Color.LightGray)

As the color of the gallery item changes to cadet blue when clicked, it is now easier for you to identify which items you have selected for updating.
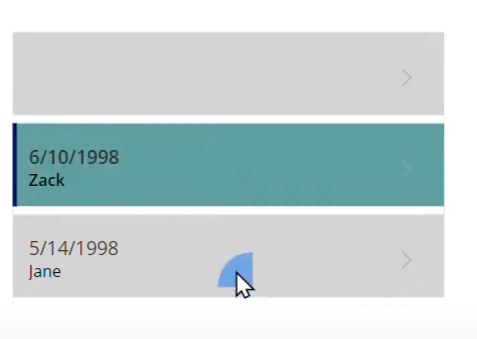
Updating the Patch Function for modifying existing records
A simple change in one of the line of codes can turn your existing insert Patch Function to edit Patch Function. To do this:
Step 1
Click the Save button.

Step 2
Go to the fx field.

Step 3
Delete the current operations type on the Patch Function code. In this example, we’ll delete the Default(Customers).
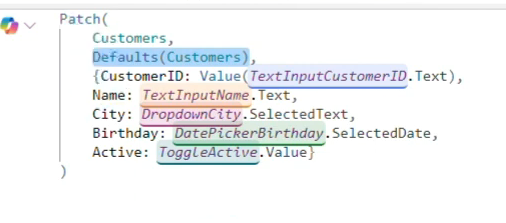
Step 4
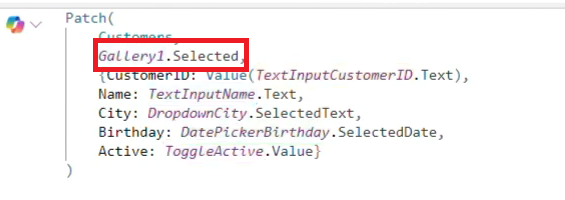
Replace the operations type code with: VerticalGallery.Selected, which should generate the selected item on the gallery on the form fields.
E.g. Gallery1.Selected
Step 5
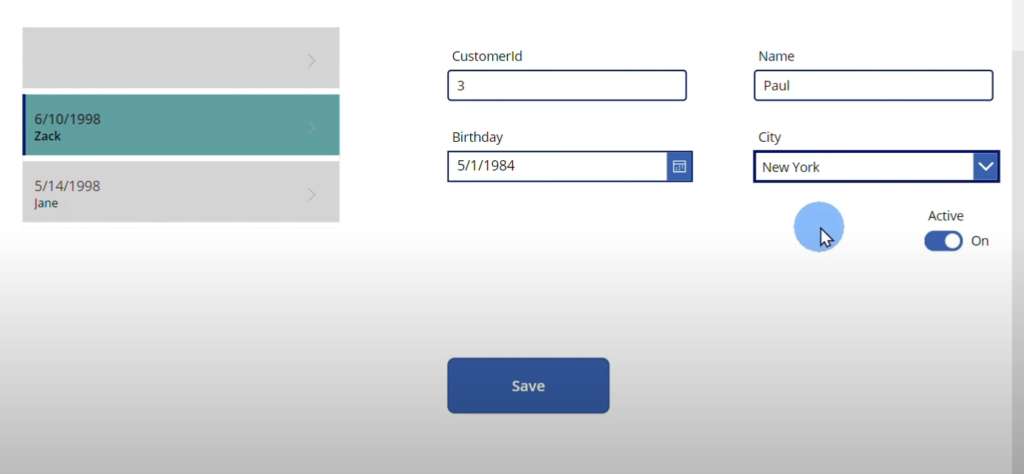
Test it on Preview Mode. On our sample application, we’ll change the name of Zack to Paul, then update the birthdate from June 10, 1998 to May 5, 1984. We’ll also be changing the city to Austin.
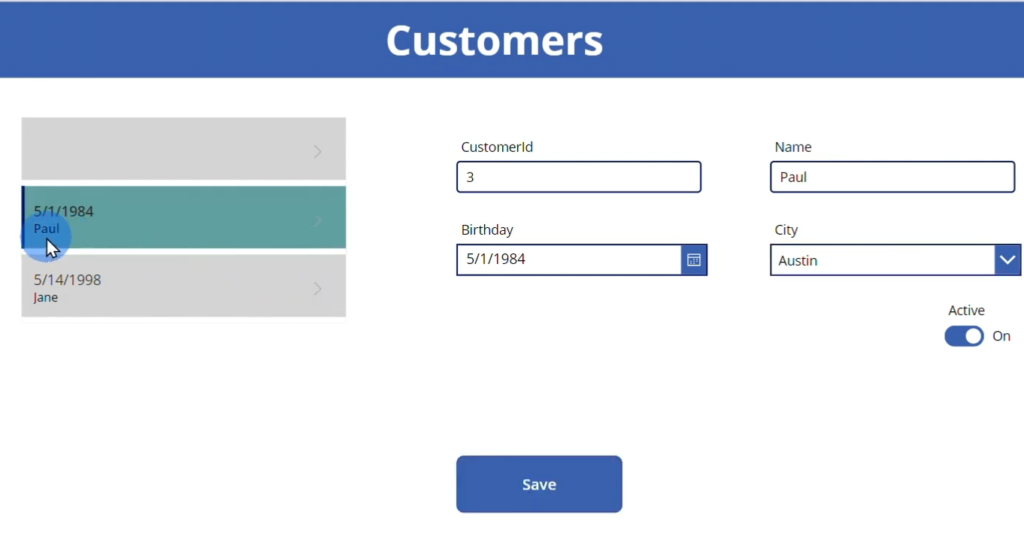
Zack’s name will be changed to Paul on the gallery once we click Save.
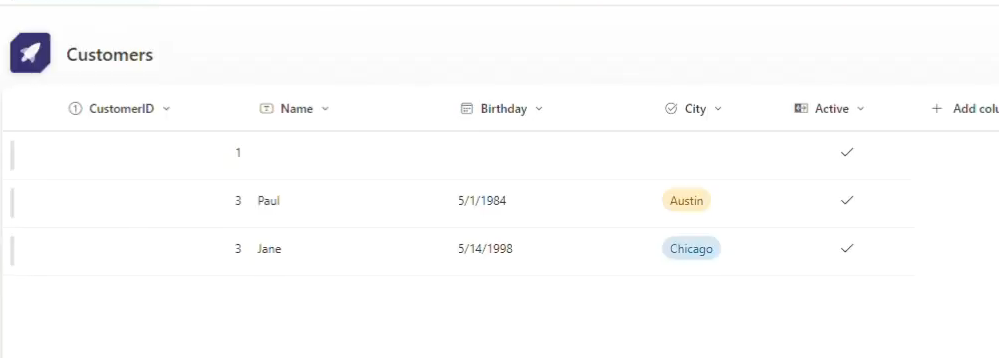
Paul’s details will also appear on Sharepoint instead of Zack’s.


Leave a Comment