
Building custom business applications has traditionally required significant coding skills and development time. But with the rise of AI-powered tools like Microsoft Power Apps Copilot, anyone can now create powerful apps using simple natural language commands.
In this tutorial, you’ll learn how to quickly build a basic hotel room booking app from scratch — no coding needed! You’ll see how Copilot can generate your app’s data structure, user interface, and essential features in minutes. Plus, you’ll learn how to customize and extend the app using conversational prompts.
Whether you’re a seasoned app maker or just getting started with Power Apps, this step-by-step guide will help you leverage the power of AI to speed up your development process and create practical business solutions effortlessly.
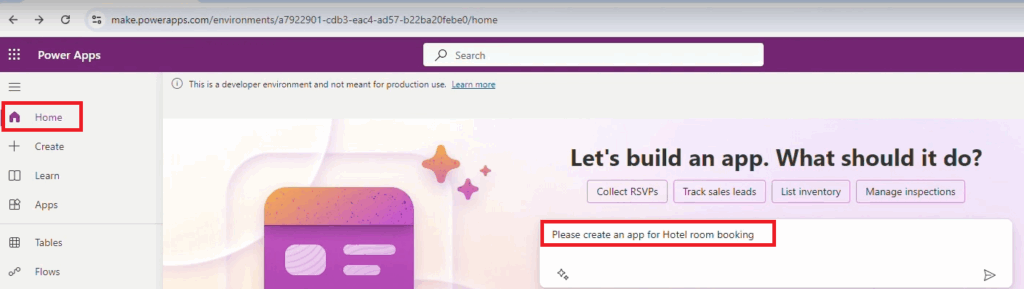
Step 1: Start at the Power Apps Homepage
- Go to make.powerapps.com and sign in.
- Locate the Power Apps Copilot prompt box in the center of the homepage.
- Enter:
“Create an app for hotel room booking.”
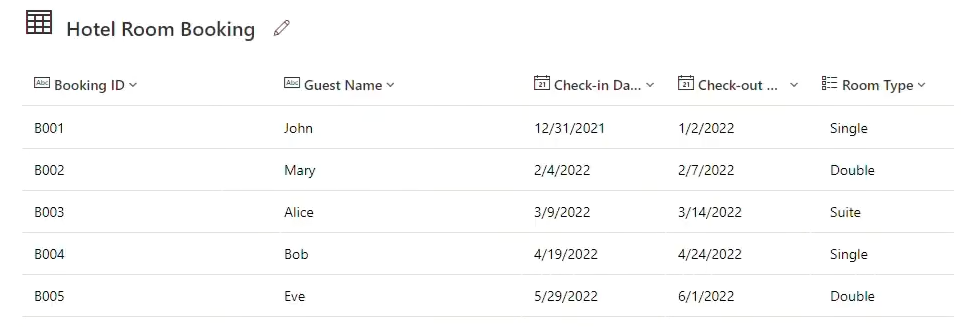
Step 2: Review and Customize the Auto-Created Table
Copilot generates a table named Hotel Room Booking with sample fields:
- Booking ID
- Guest Name
- Check-in Date
- Check-out Date
- Room Type
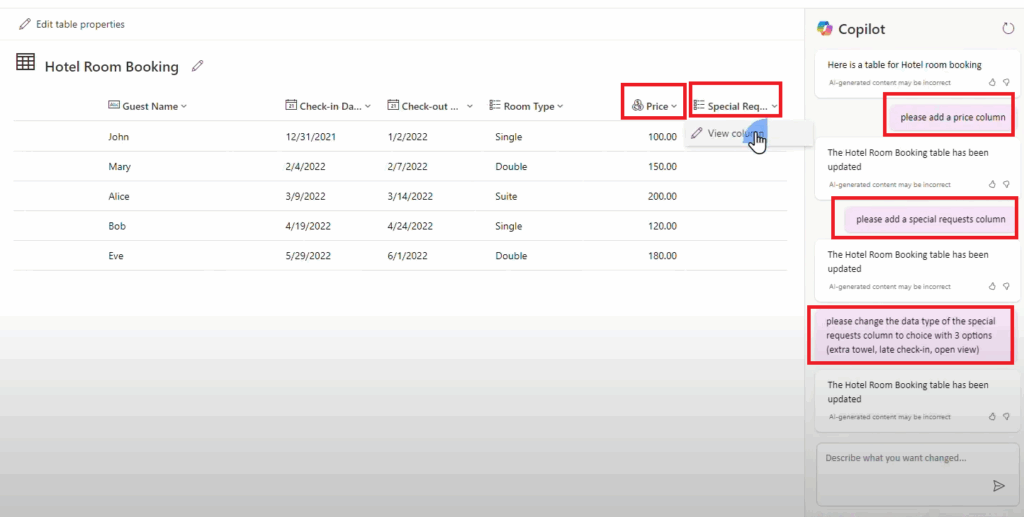
Add More Fields
Use Copilot commands below the table:
- “Please add a price column.”
- “Please add a special requests column.”
Change Field Types
Request:
“Please change the data type of the special requests column to Choice with three options: Extra towel, Late check-in, Ocean view.”
Step 3: Create the App
Once satisfied, click Create App.
Power Apps generates:
- Booking list
- Form with all the table fields
- Functional UI for interacting with records
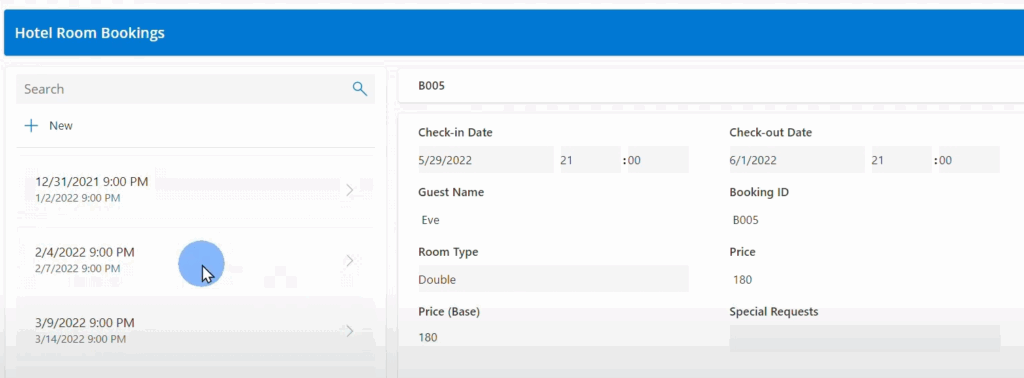
Preview & Interact
- Browse records
- Add/edit/delete data
- Try the search box (works with guest names)
Notice how the app works fine.
Step 4: Use Power Apps Copilot to Customize the UI
Change a Button’s Color
- Identify the control name (e.g.,
EditIconButton1) - Tell Copilot:
“Change the background color of EditIconButton1 to light gray.”
Notice how it successfully changes the Button background color.
Add a New Button
Request:
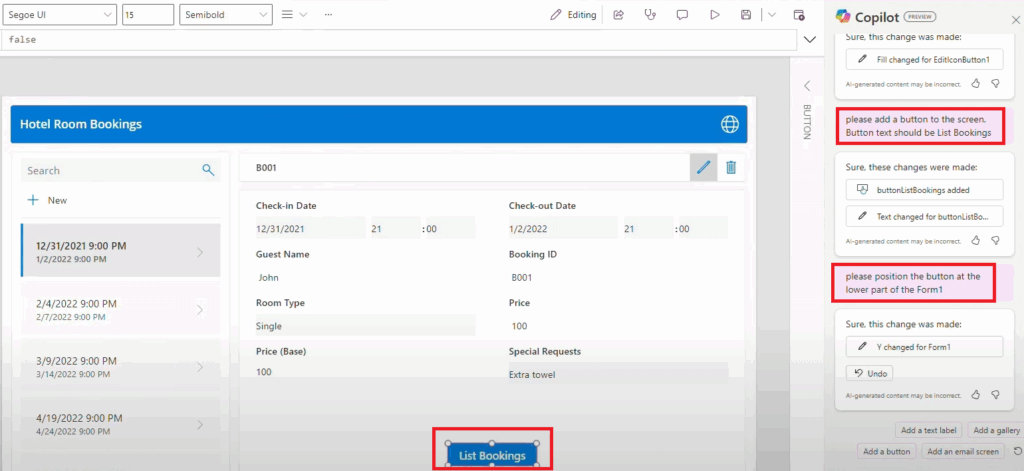
“Add a button with text ‘List Bookings’.”
Now request:
“Position the button at the lower part of Form1.”
Note that Copilot adds the button to the screen but it is not able to position it where you want. That’s something you need to manually do.
Step 5: Create a New Screen
Request:
“Create a new blank screen and call it ListBookings.”
Choose a layout when prompted.
Optional: Add a Data Table on the new screen connected to the Hotel Booking table.
Step 6: Add Navigation Logic
Link the button to the new screen:
“Make the button ListBookings navigate to the ListBookings screen on click.”
Power Apps updates the OnSelect property to include:Navigate(ListBookings)

Step 7: Understand Copilot’s Limitations
The search field, searches in the Guest Name field.
Now let’s say you want it to search both on Guest Name field and on Special Requests field.
If you ask Copilot “Please make the search field search also on hte special requests field, not aonly in the guest name”, it will still not work.
Copilot was not able to implement that.
Final Thoughts
✅ What Copilot Was Able to Do:
- Build a CRUD app from a single sentence
- Generate and modify Dataverse tables
- Add UI components and basic logic
⚠️ What Required You to Do:
- Manually position some elements
- Write formulas for complex logic
- Troubleshoot AI missteps
Conclusion
Using Power Apps Copilot, it was possible to build an app with minimal effort. From field creation to interface customization and screen navigation, Copilot is a powerful productivity partner — though not a total replacement for manual app development.
As Copilot continues to evolve, more advanced tasks will be supported.
Leave a Comment