The Power Apps Submit Form function lets you create a application that allows users add in their data and edit existing ones on your database.
Just follow this step-by-step guide to learn how.
Setting up the Data Source
Before you proceed with creating a Power Apps form, you need to setup a data source first. For this guide, we’ll be using Sharepoint.
To access and create a Sharepoint datasource:
Step 1
Log-in to Power Apps to go to the homepage.
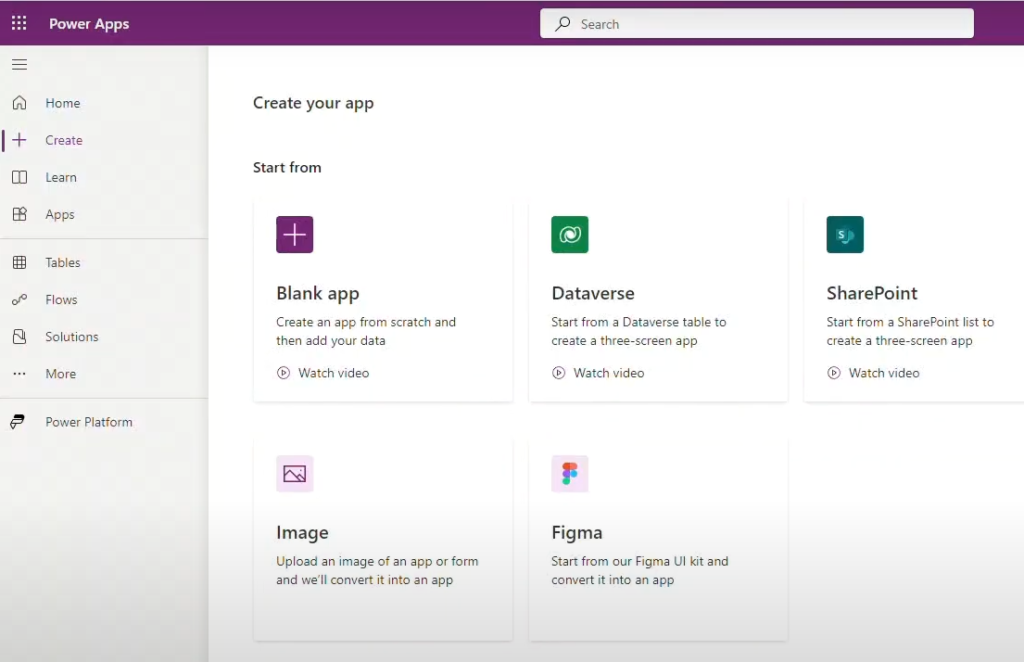
Step 2
Click the Microsoft 365 menu at the top-left corner of the Power Apps homepage.
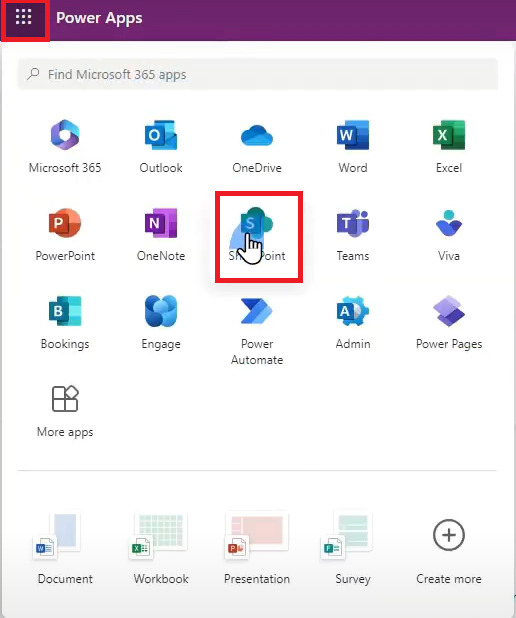
Step 3
Choose from one of the existing sites. For this example, we’ll be selecting Store.
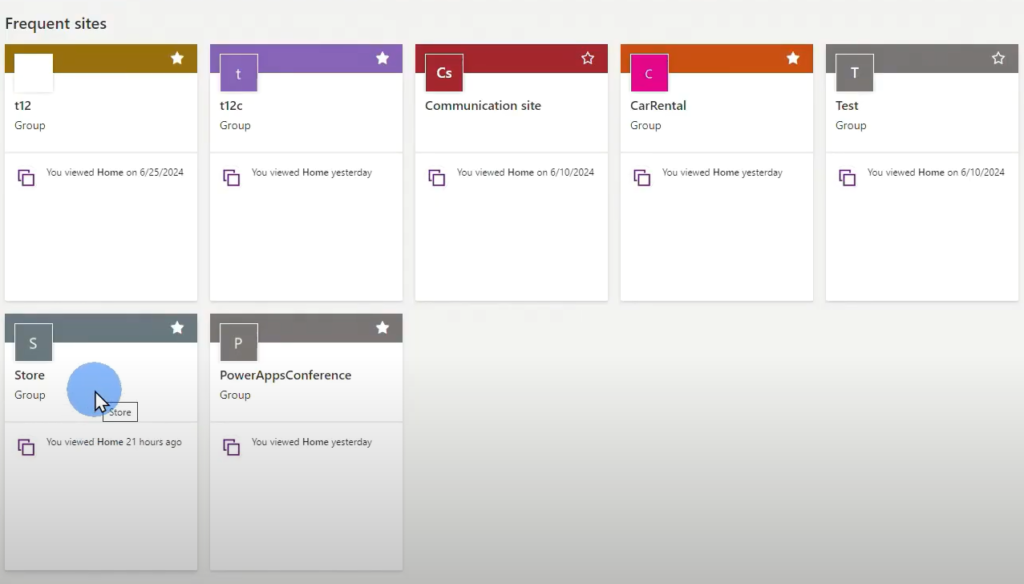
Step 4
Create a new list by clicking +New > List.
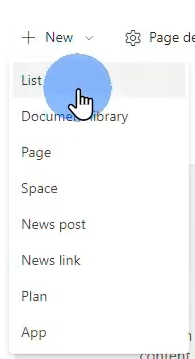
Step 5
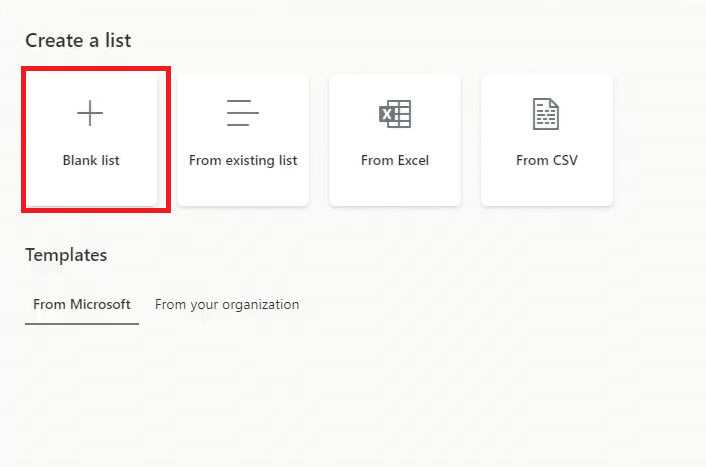
Click Blank List.
Step 6
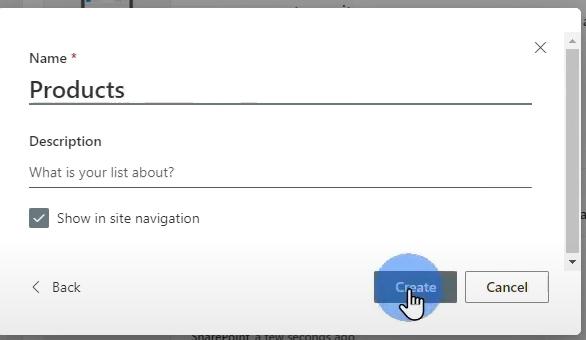
Name the list, then click Create. In this example, we’ll name the new list Products.
Step 7
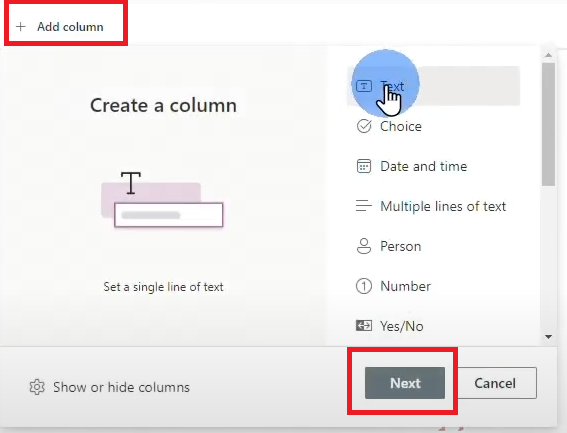
Click +Add Column and select Text.
Step 8
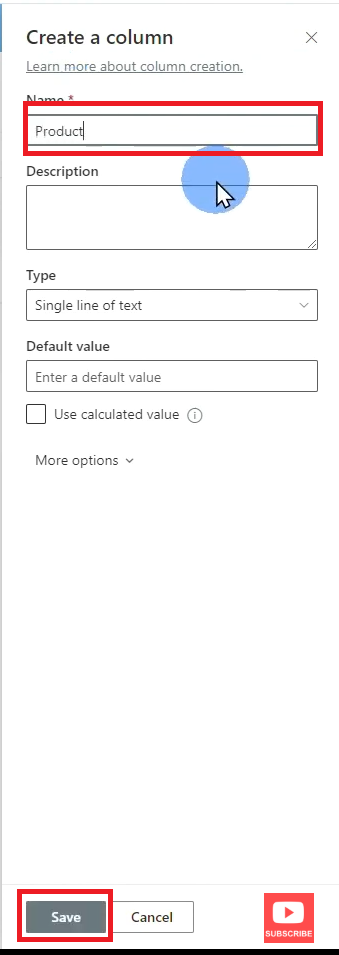
Add a name for your column, then click Save. In this example, we’ll name the column Product.
Step 9
Add two (2) more columns with the following types:
- Price – Currency
- Quantity – Number
Step 10
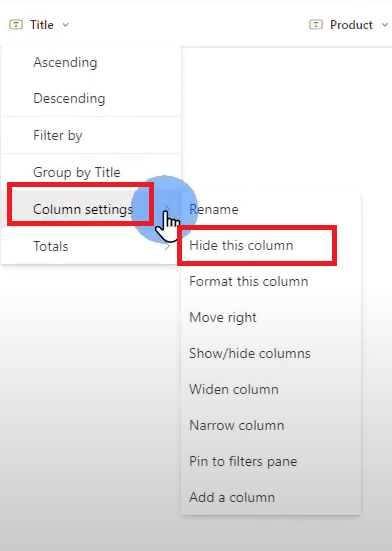
Hide unnecessary columns by clicking the column you want to hide then going to Columns settings > Hide this column.
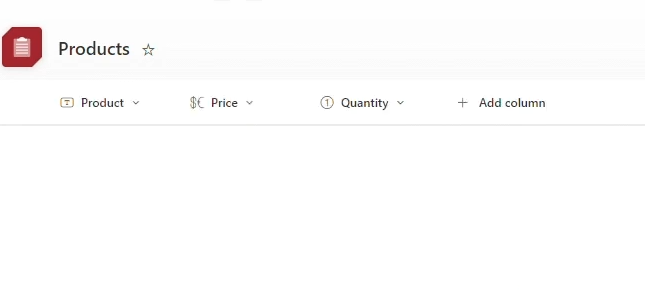
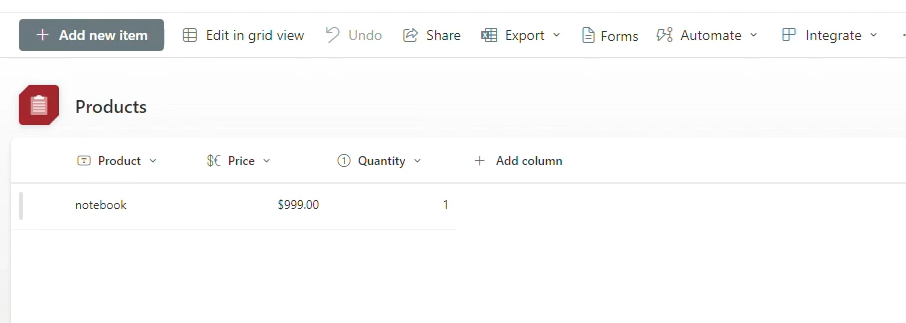
Your Sharepoint data should look like this.
Creating your Form App
Once you have your data source, you can now create a form app on Power Apps.
Step 1
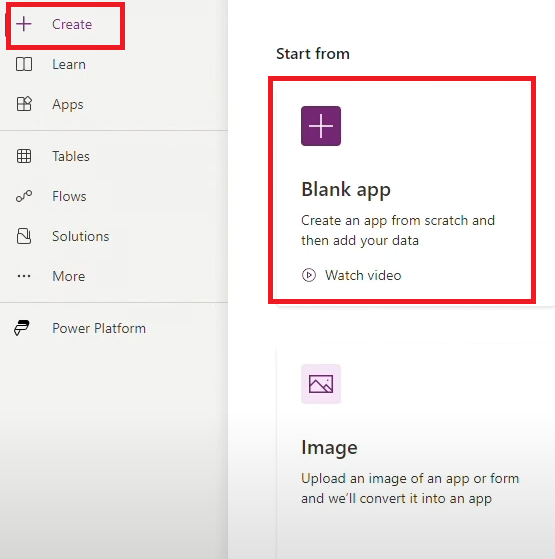
Click +Create on the Power Apps homepage, then select Blank App.
Step 2
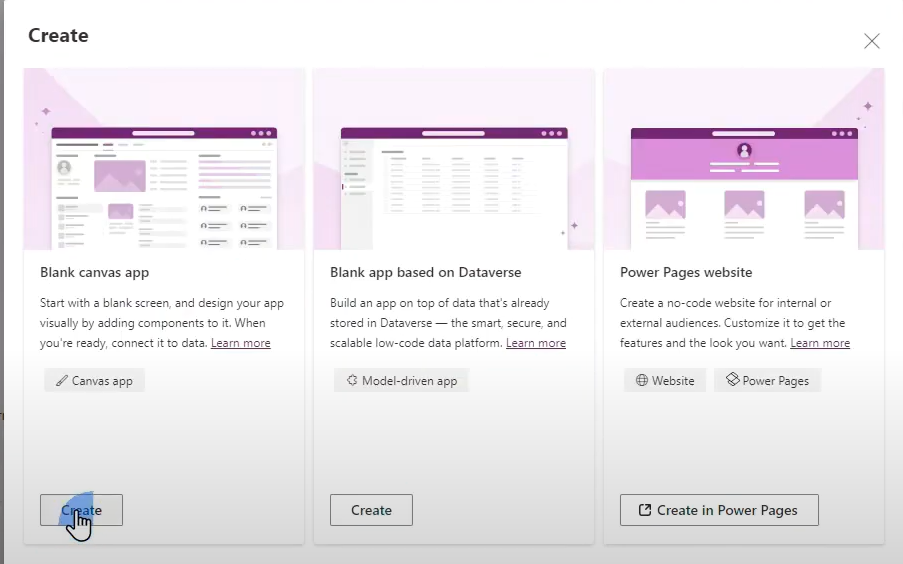
Select Blank canvas app then click Create.
Step 3
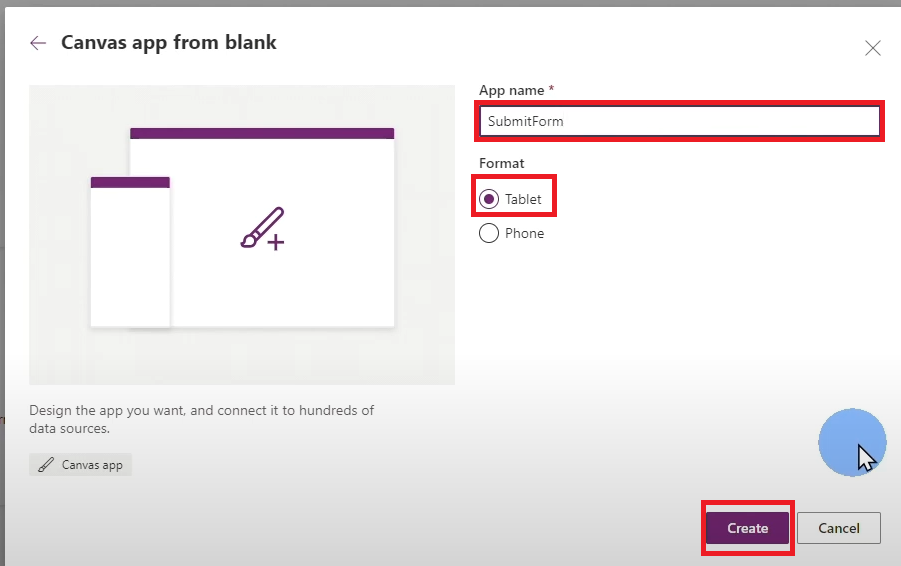
Add a name on the App name * field then click Create. Make sure to select Tablet so the app works on both a tablet or a desktop computer. For this tutorial, we’ll name the app SubmitForm.
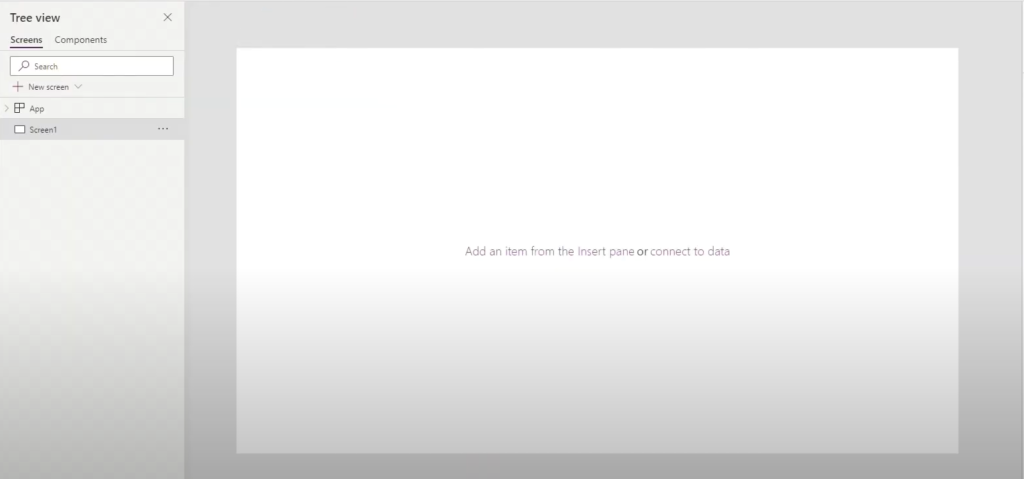
You’ll be taken to the Power Apps Studio where you can begin customizing your app.
Adding a header
Step 1
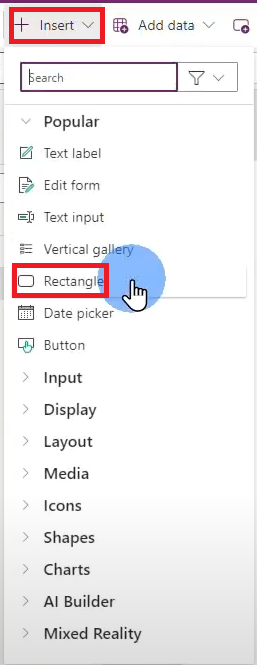
Click +Insert then select Rectangle.
Step 2
Drag the rectangle to the top left of the canvas, then drag the right frame of the rectangle until it reaches the other end of the canvas.

Step 3
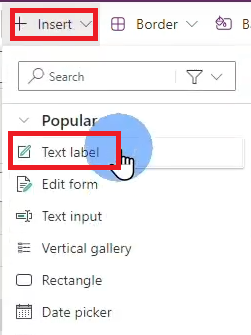
Click +Insert again then select Text Label.
Step 4
Change the properties of the text label on the Properties Pane to the following:
- Color – White
- Font size – 40
- Font weight – Bold
- Text Alignment – Center
- Text – Products
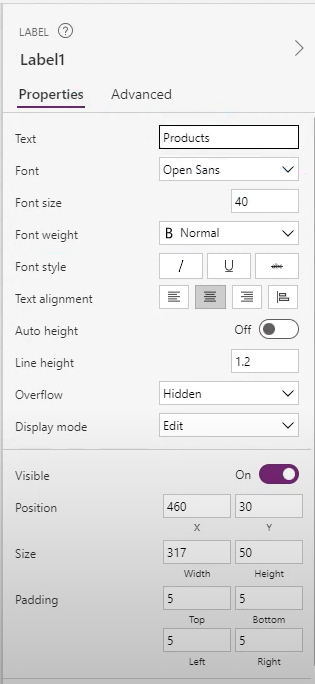
Your app’s screen header should look like this:

Making the Datasource available to Power Apps
Before you connect your data source to your app, ensure that it is available on Power Apps first.
Step 1
Click the Data button to go to the Data pane on the left side of the Power App Studio.

Step 2
Click Add Data then look up and select the datasource you will be using for the app. In this example, we’ll be looking up and selecting Sharepoint to pull up the site we created earlier.
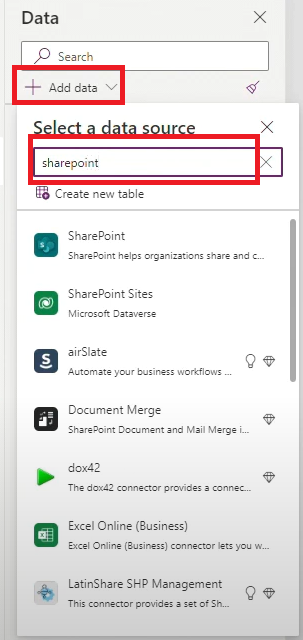
Step 4
Click Sharepoint one more time to select the Sharepoint site you created.
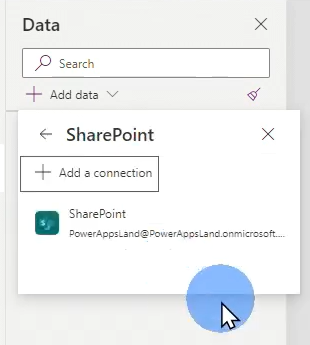
Step 5
Select the Sharepoint site you want to connect to your app. In this guide, we’ll be choosing Store.
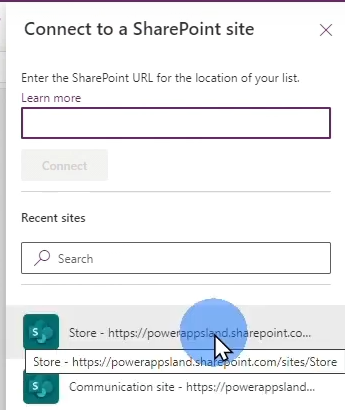
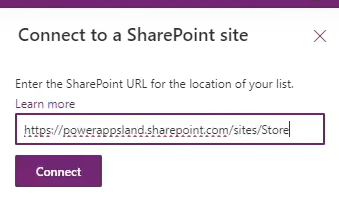
Note: If the site is not showing up on the Connect to a Sharepoint Site pane, go to Sharepoint then copy the URL of the Sharepoint site you want to connect to your app.

Go back to the Power Apps Studio then paste the URL to the topmost field of the Connect a Sharepoint Site pane. Click Connect right after.
Step 6
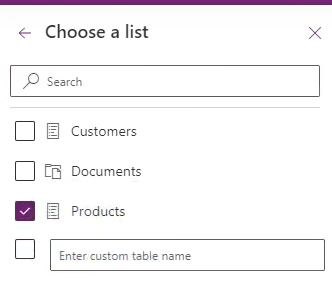
Select the list you want to add to your app then click Connect again. In this example, we’ll choose Products.
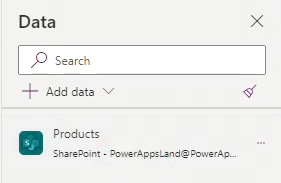
The selected Sharepoint list is now available on the Data tab, ready for use.
Creating an Edit Form
With the data source available on Power Apps Studio, you can now create an edit form which allows users to add data into your selected data source. To create an edit form:
Step 1
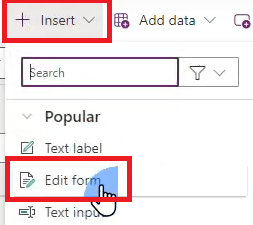
Click +Insert > Edit Form.
Step 2
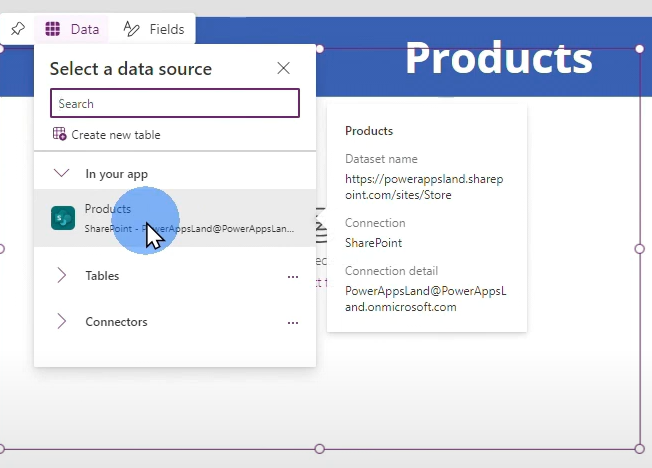
The Data source menu will automatically show up on the Edit Form you created. Select the data source you will be using for the app.
Step 3
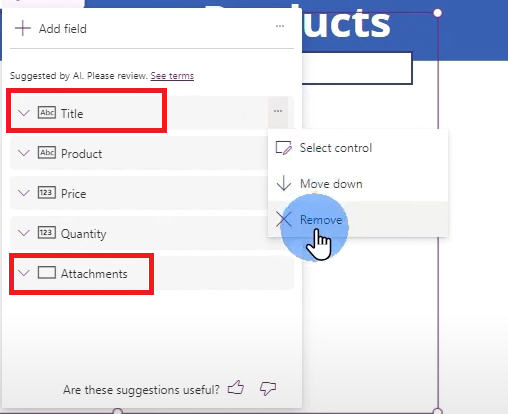
The Fields menu will automatically show up once you have selected the data source. It will show you the fields that will appear on your form app. You may choose to remove unnecessary fields from the form by clicking the ellipses beside the field you want to take out then selecting Remove.
In this example, we’ll remove Title and Attachment.
Step 4
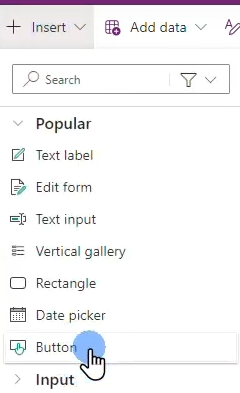
Add a Save button by going to +Insert > Button.
Step 5
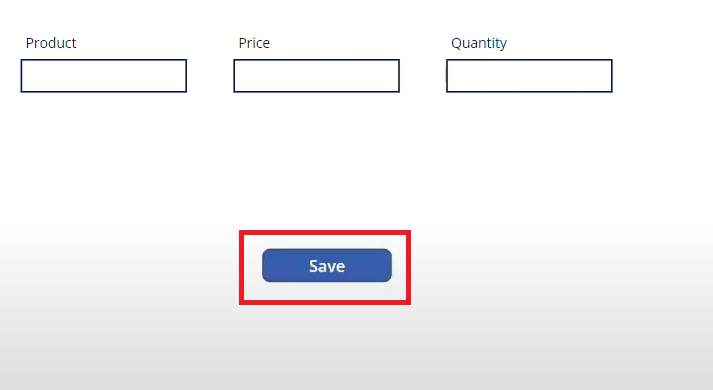
Position the button then change the text to Save.
Step 6
Save and preview the app.

Step 7
On the Preview mode of the app, you will see that the fields have disappeared.
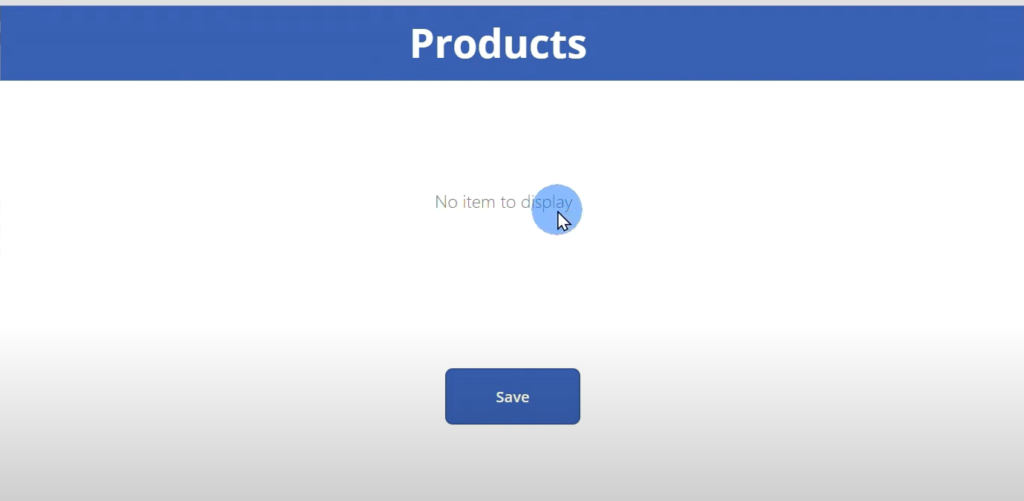
Exit the Preview mode then click the form. On the Properties Pane, change the Default Mode to New.
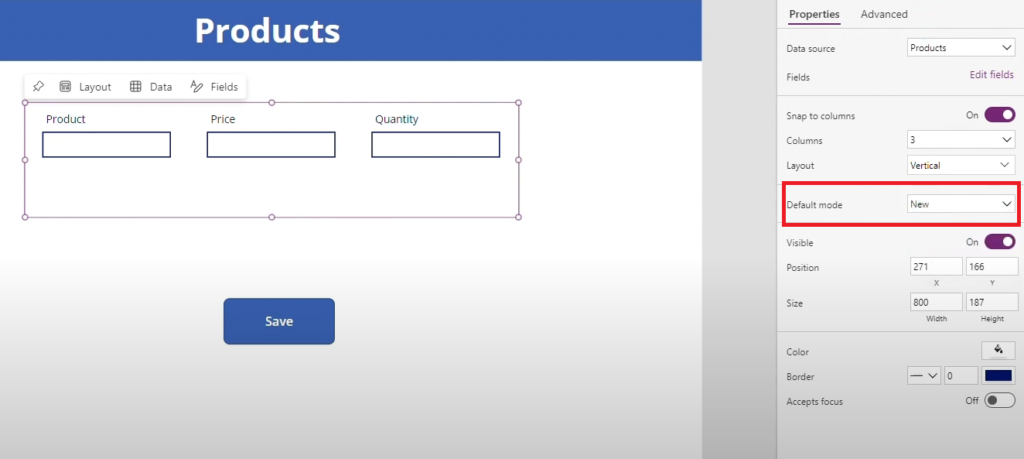
Step 8
Go back to Preview mode to see if the fields have appeared already.
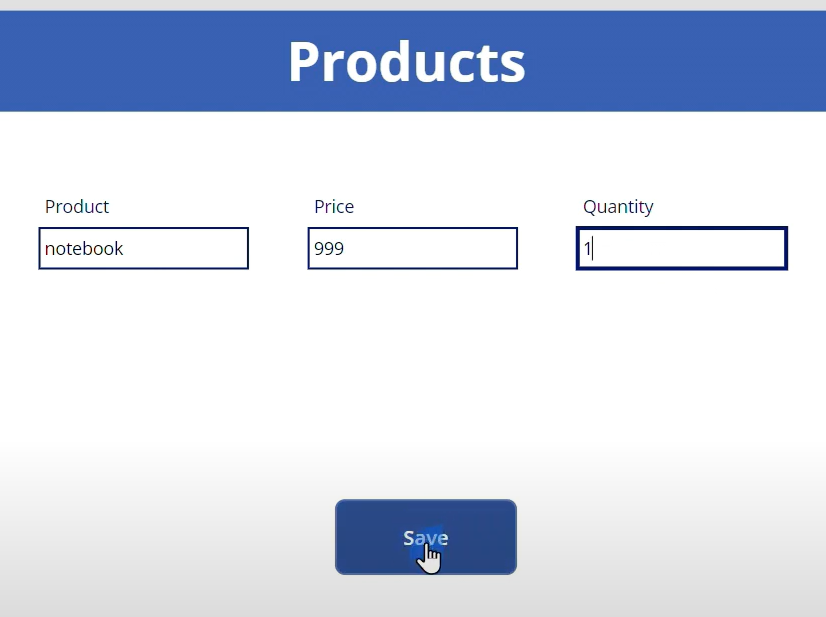
The form fields should now appear on the app you created.
Adding the Submit Form function to insert data to the data source
The Save button won’t work at the moment as you need to configure it to actually save the data from the field into the Sharepoint data source. To do that:
Step 1:
Exit the Preview mode then select the Save Button.
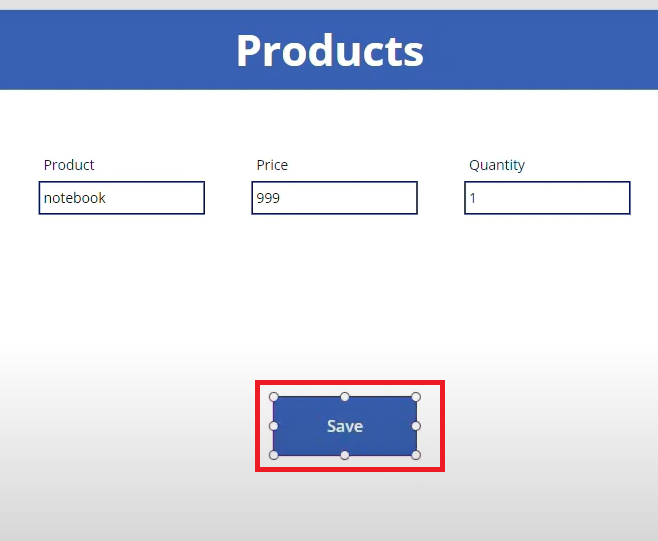
Step 2
Add the Power Apps Submit Form function.
For that, choose Onselect on the Properties drop-down then update the formula in the fx box to: Submitform(the form you want to submit); Resetform(the form you want to submit).
E.g. SubmitForm(Form1); ResetForm(Form1)

When you go back to the Preview mode, you should now be able to save the data you have entered into the fields. Once you click Save, the fields should now be empty.
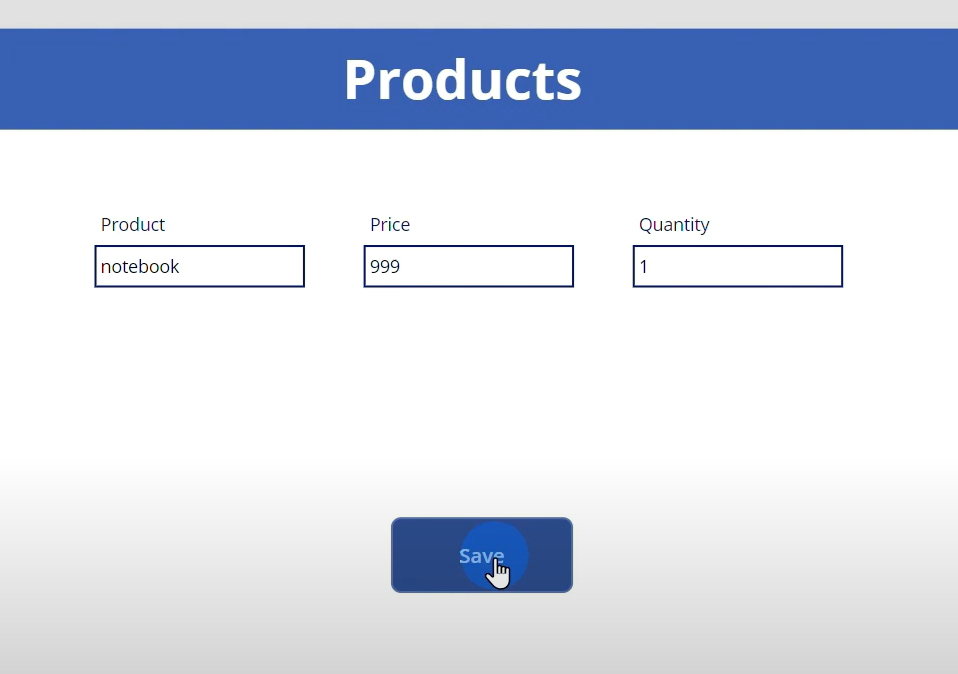
The data that you have entered on the Power Apps form should now be found on your Sharepoint data source.
Making your data available for updating on your application
You can also configure your form to update an EXISTING data from your data source. But first, you need to make sure that the data is available for selection on your application’s interface. To do that:
Step 1
Move Form1 to the rightmost section of your app screen. You can drag your form’s frame to elongate the fields.
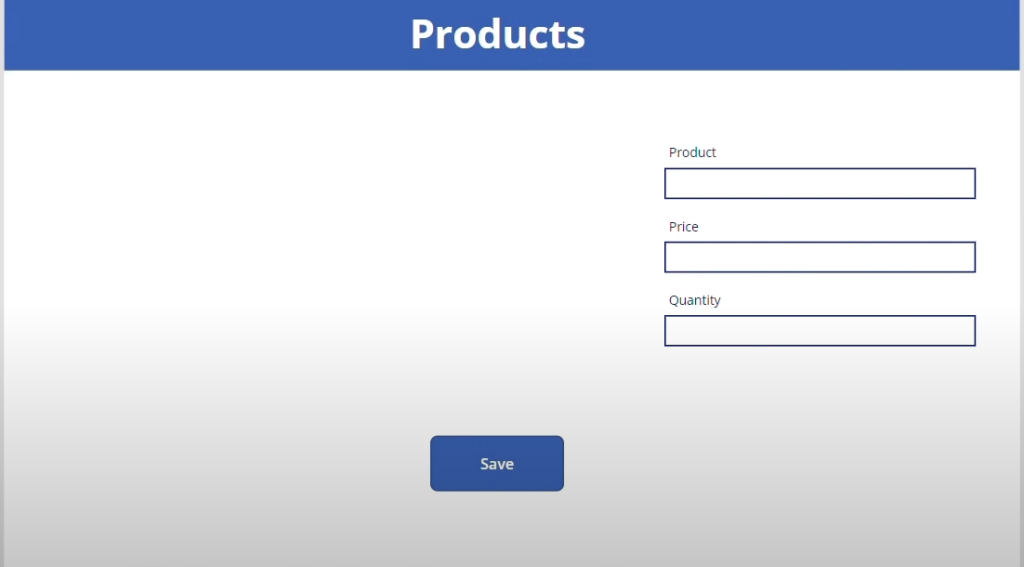
Step 2
Click +Insert > Vertical Gallery.
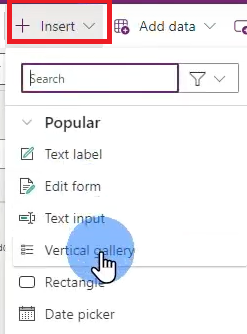
Step 3
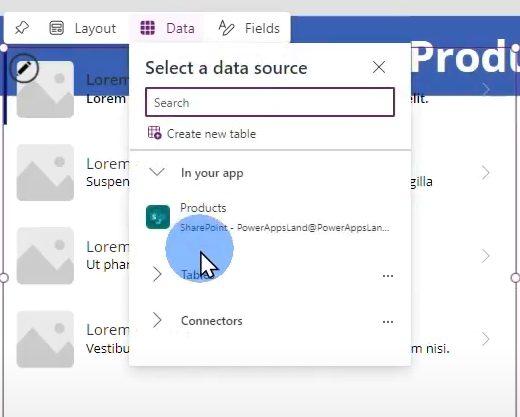
Select the data source (Products) from the Data drop-down menu.
Step 4
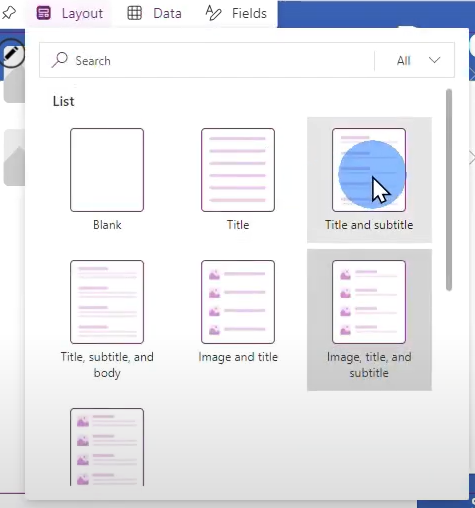
Select a layout. In this example, let’s go with Title and Subtitle.
Step 5
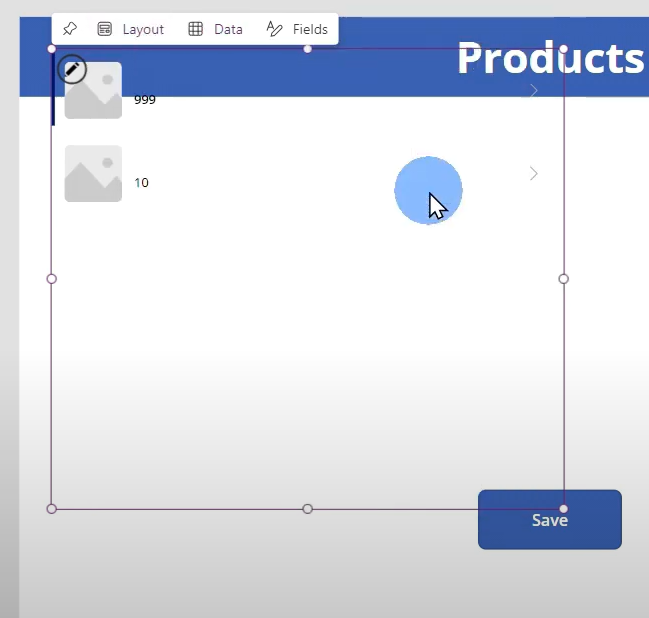
Adjust Vertical Gallery so it’s situated right beside the Form1.
Step 6
Click Fields then select Product on the Title drop-down and Price on the Subtitle2 drop-down.
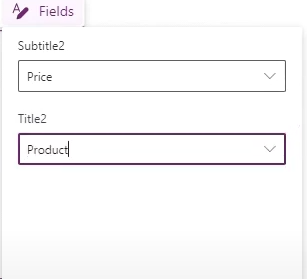
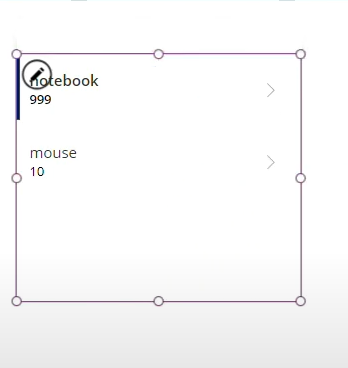
The test data you have entered should appear on the Vertical Gallery field of your application screen.
Converting the application form into an Edit Form
Step 1
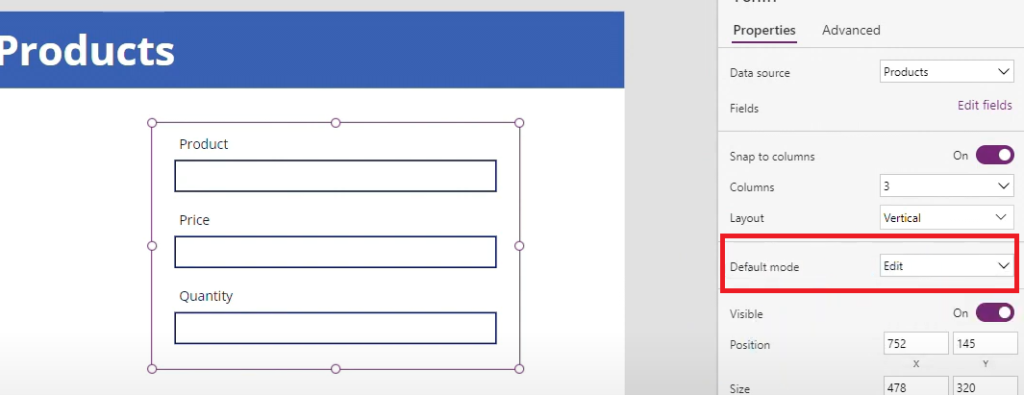
Select Form1 again then change the Default Mode on the Properties Pane to Edit instead of New.
Step 2
Go to the Advanced tab of the Properties Pane then scroll down to the Item field. On the Item field, enter this formula: (the name of the vertical gallery).Selected
E.g. Gallery1.Selected
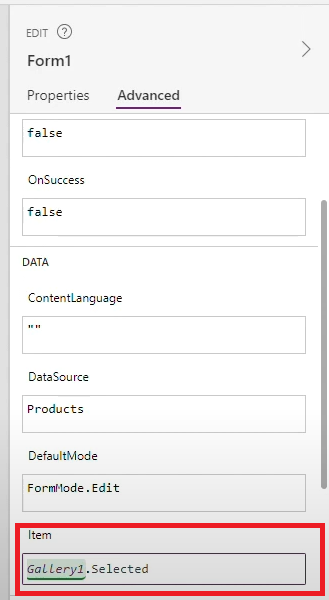
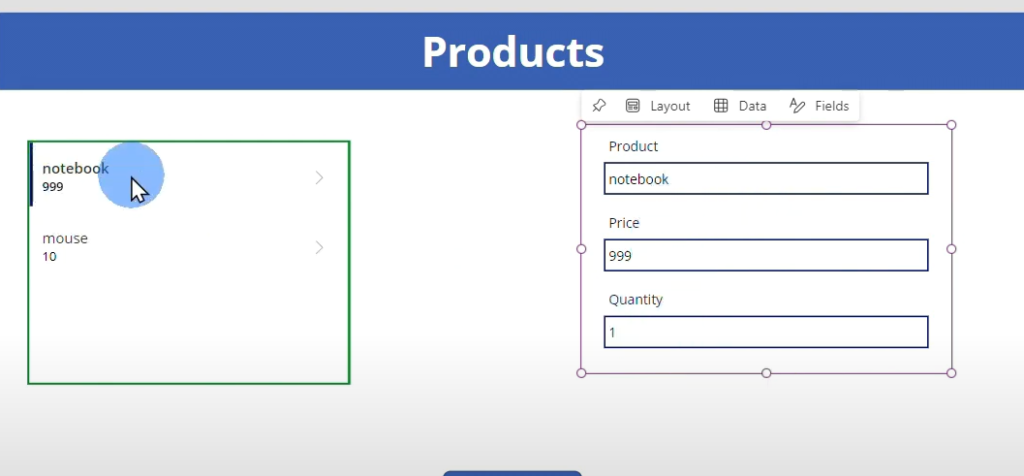
This formula allows you to populate the details of the selected item from the Vertical Gallery on the form fields for updating.
Step 3
Test out the app by clicking Save then Preview.

Step 4
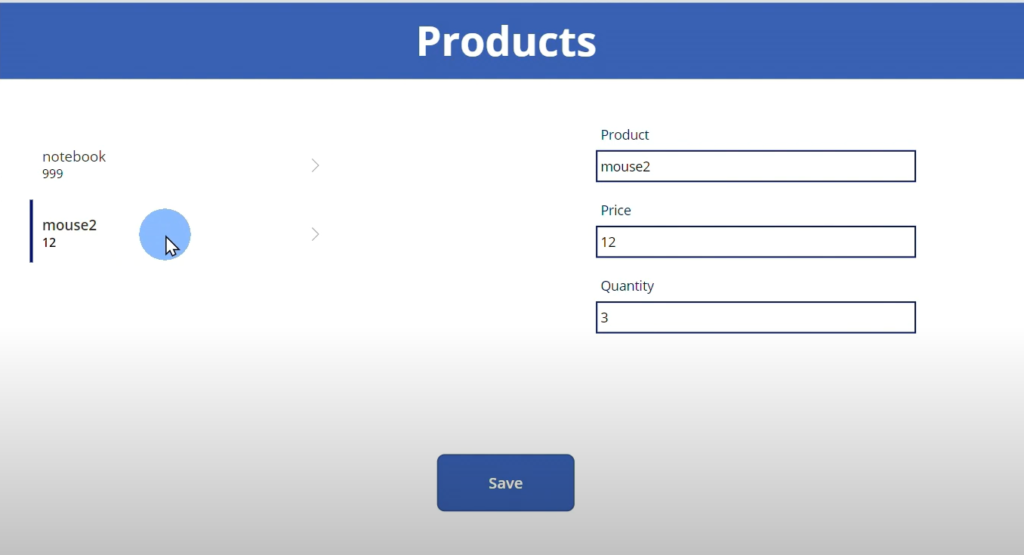
On the Preview Mode, select an item from the Vertical Gallery then edit on the form fields.

Once you click Save, the changes should apply on the Vertical Gallery.
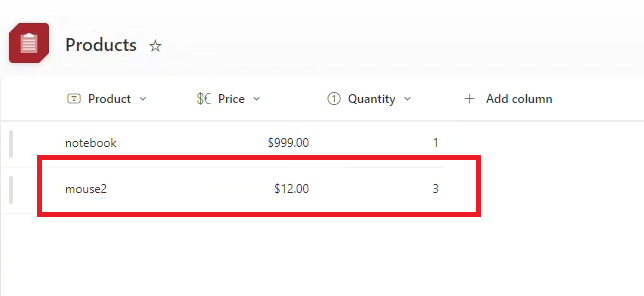
You will also see the changes applied on Sharepoint

Leave a Comment