Microsoft Sharepoint can act as a data source, or a repository for your data when creating an application with Power Apps.
It is part of the Microsoft 365 suite.
With Power Apps, you can integrate your applications with Microsoft Sharepoint for collecting and updating records.
To do this, you first need to create a Sharepoint site with lists.
Creating a Sharepoint site
The Sharepoint site will become your data source. If you already have a Sharepoint data source, you can skip this step.
Step 1
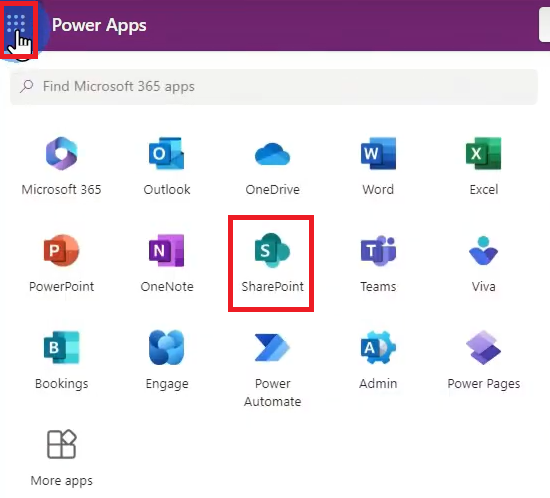
Click the Microsoft 365 Menu then select Sharepoint.
Step 2
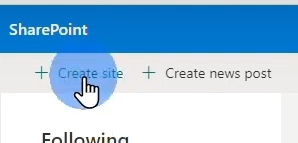
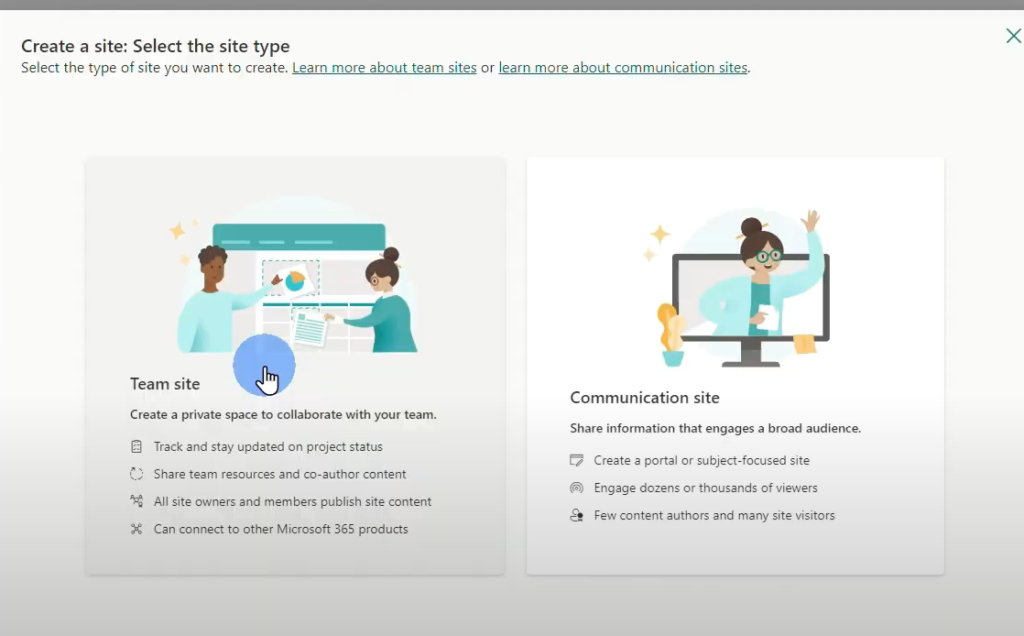
Click Create Site then select Team Site.
Step 3
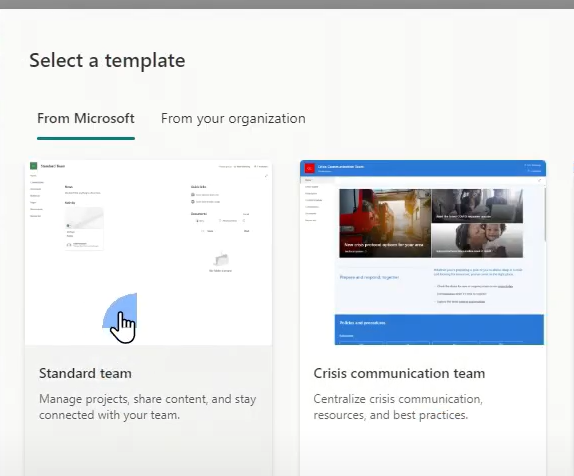
Click Standard Team > Use Template.
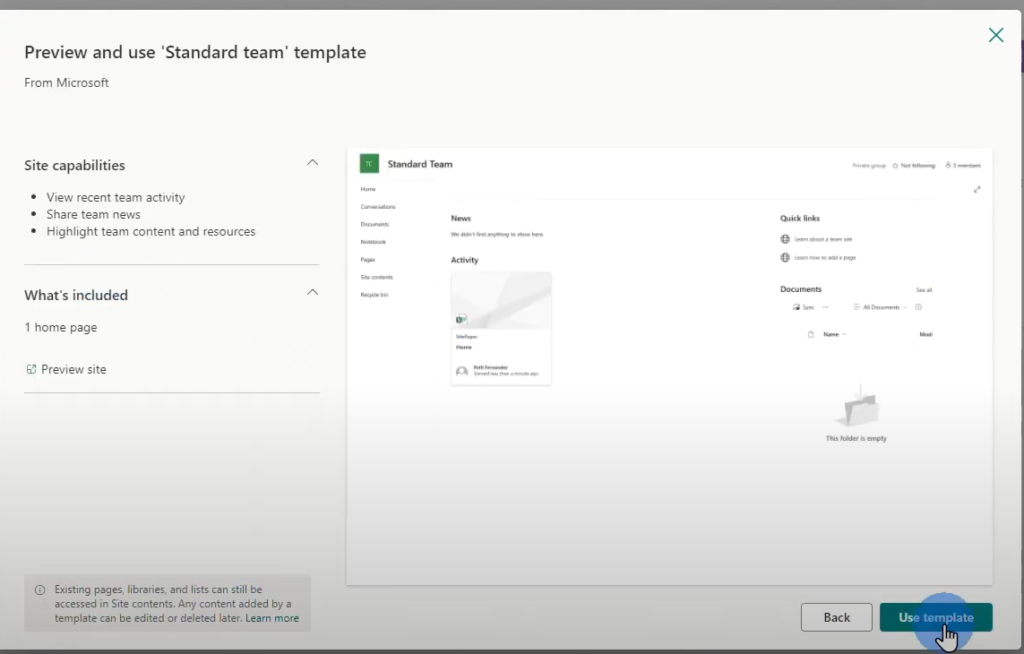
Step 4
Give your site a name. For this sample Sharepoint site, we’ll name this PowerAppsConference. Once done, click Next > Create Site > Finish.
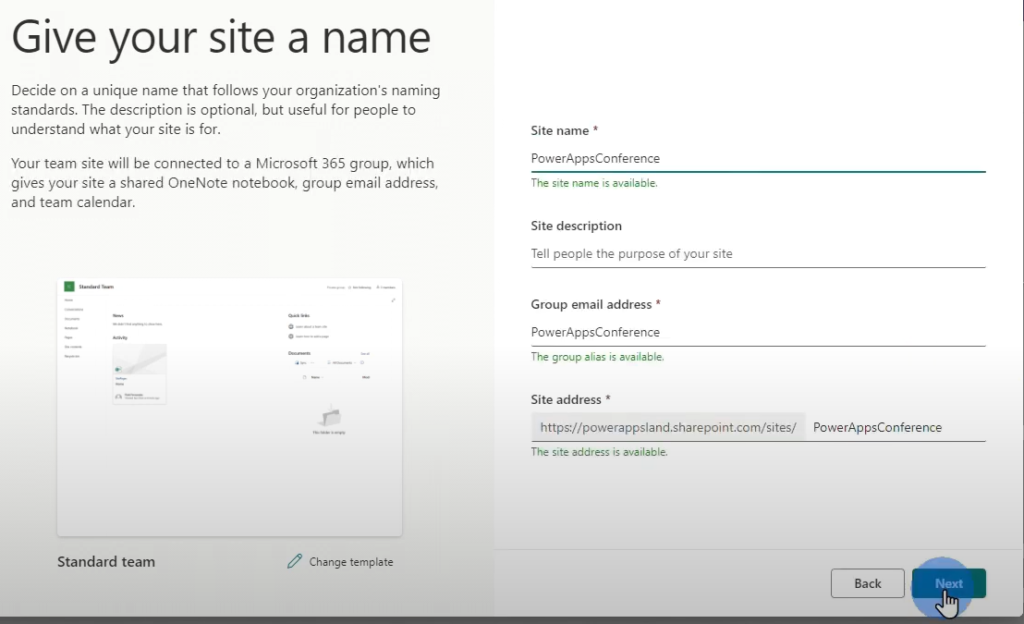
Step 5
Click + New > List.
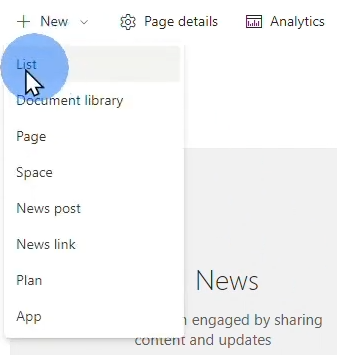
Step 6
Select a template. For this sample Sharepoint list, we’ll use the Event Itinerary template.
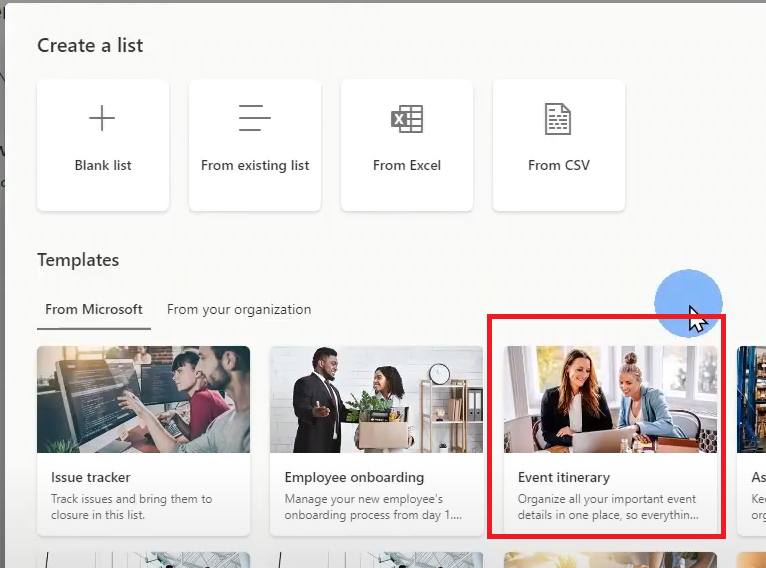
Step 7
Click Use Template to proceed.
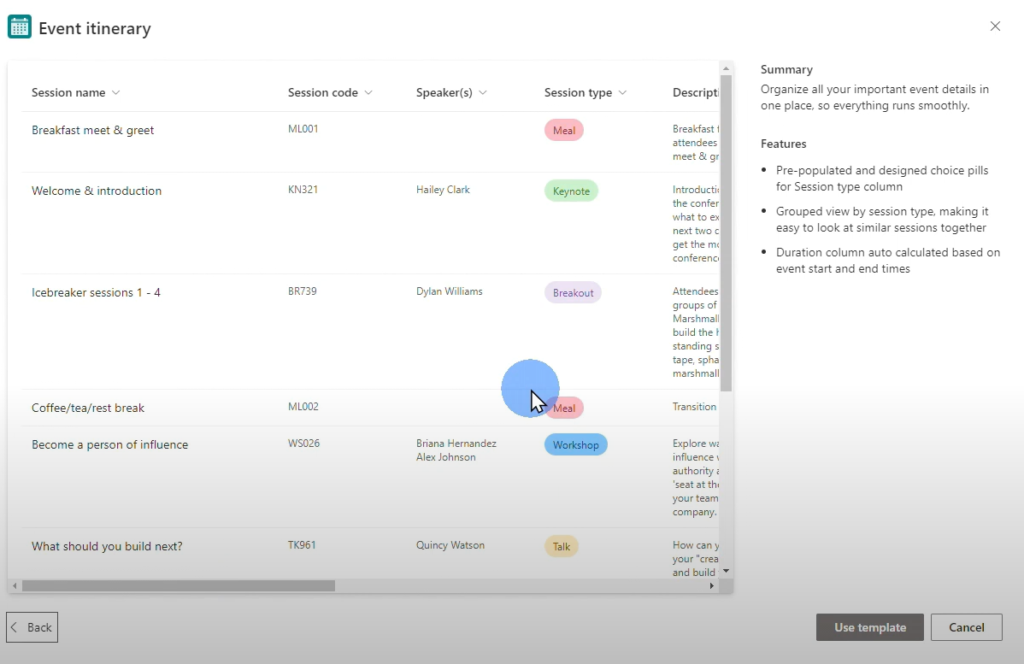
Step 8
Give the list a name then click Create. E.g. Event Itinerary
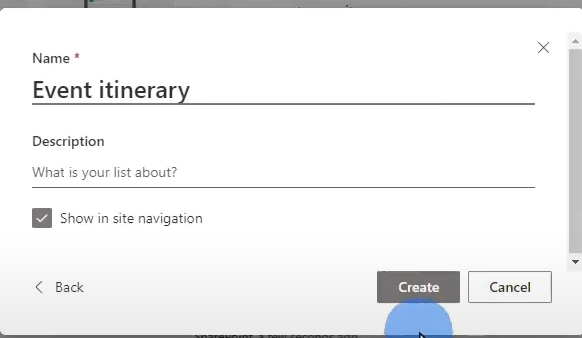
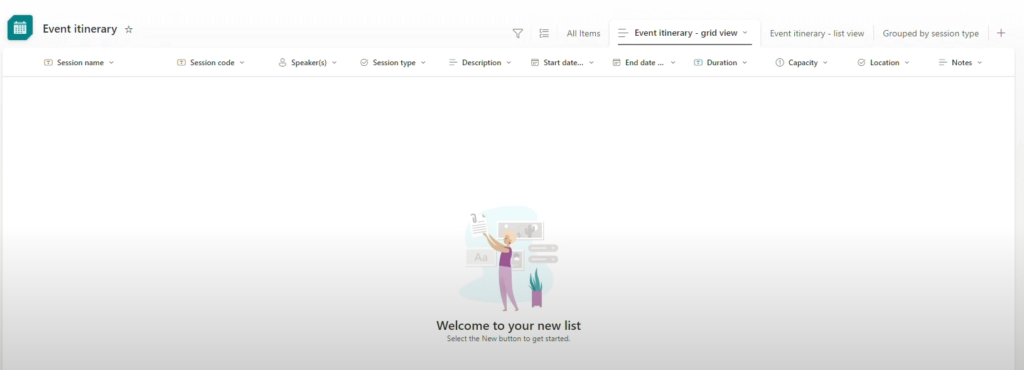
You now have a Sharepoint site which will act as your Power App’s application data source.
Creating a Power Apps Canvas App
To create an app using Power Apps, follow the steps below.
Step 1
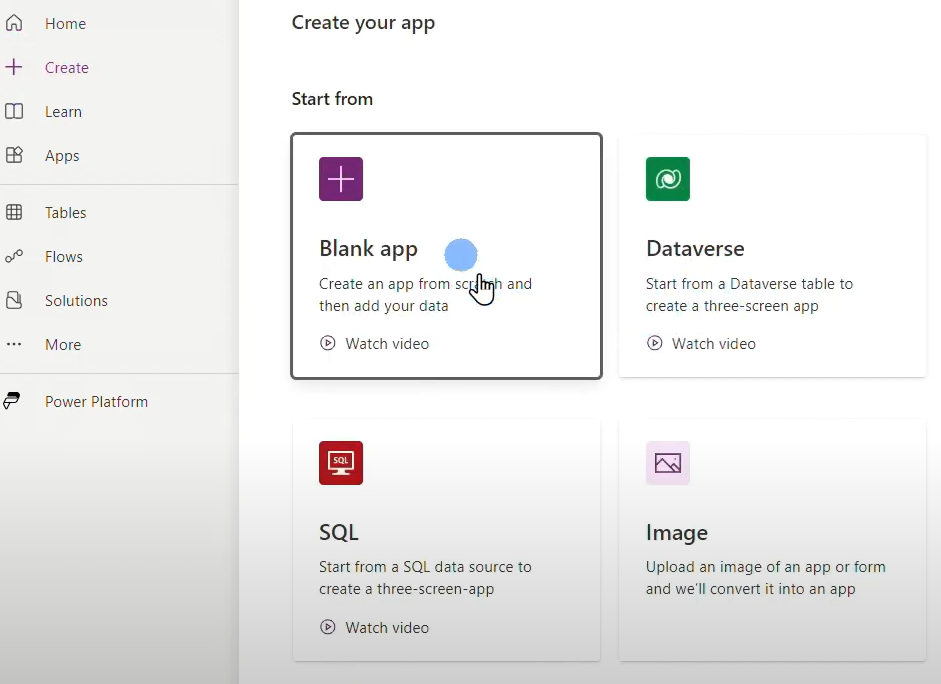
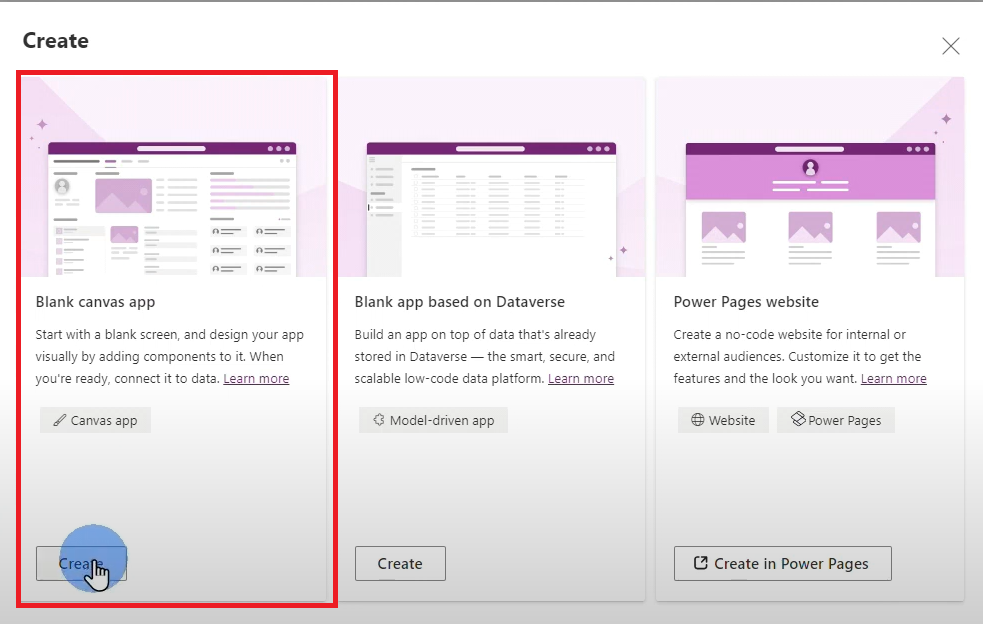
Go to Power Apps and click + Create > Blank App.
Step 2
Select Blank App then click Create.
Step 3
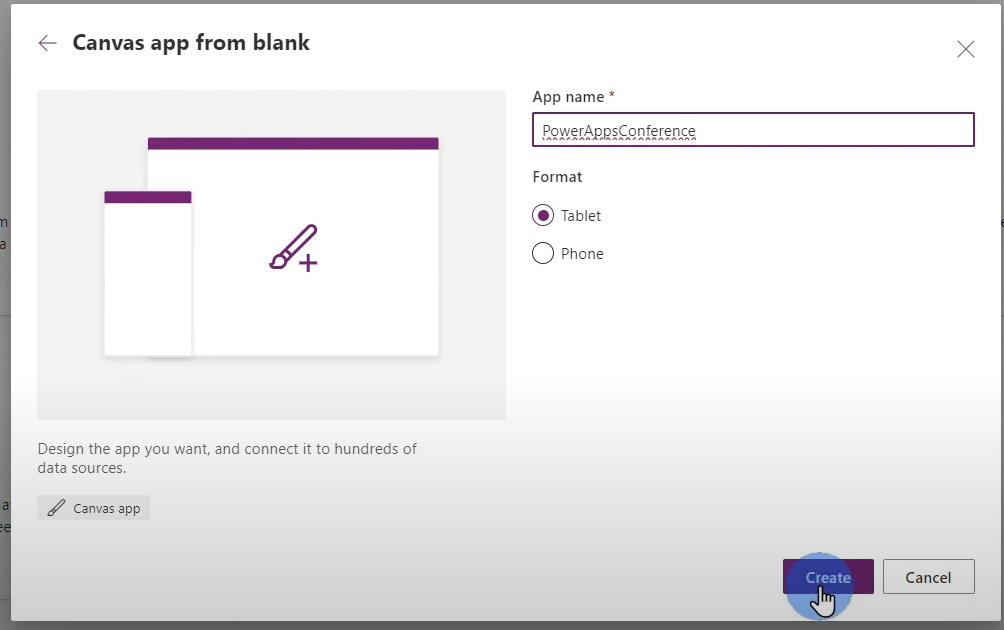
Give your app a name then click Create. For this sample app, we’ll name it PowerAppsConference.
Step 4
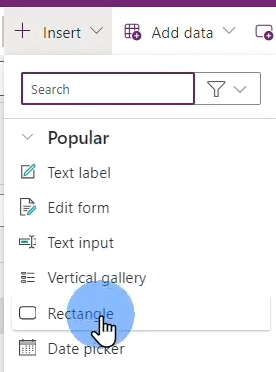
For the header, click +Insert then select Rectangle.
Step 5
Drag the edge the rectangle to cover the top part of the application screen.

Step 6
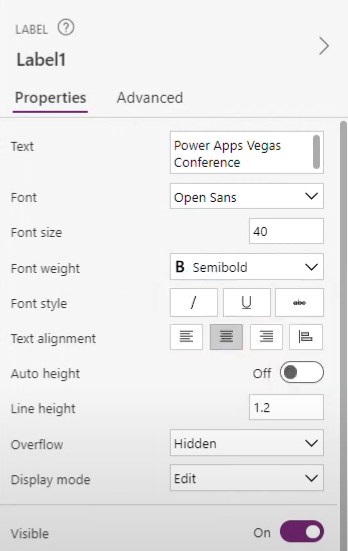
Add a text label then change the properties to:
- Text – Power Apps Vegas Conference
- Color – White
- Font size – 40
- Alignment – Center
- Font Weight – Semibold
Step 9
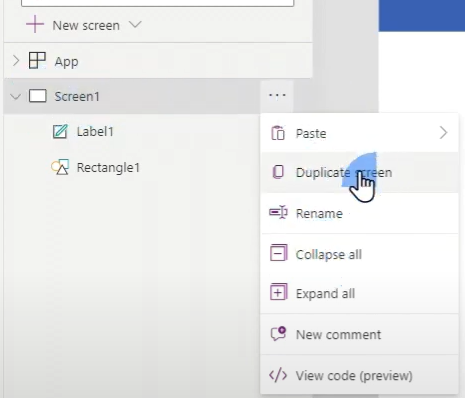
Duplicate Screen1.
Step 10
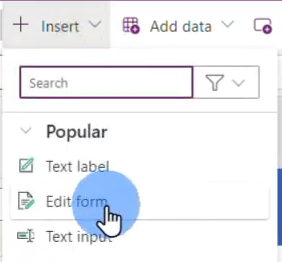
Go back to the first screen then click +Insert > Edit Form.
Step 11
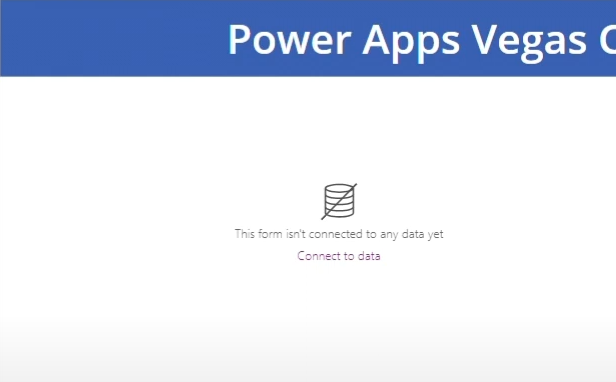
At this point, the form field is still empty as our Sharepoint data source hasn’t been added to Power Apps.
Connecting Power Apps to the Sharepoint List
To add Sharepoint to Power Apps as a data source, follow the steps below:
Step 1
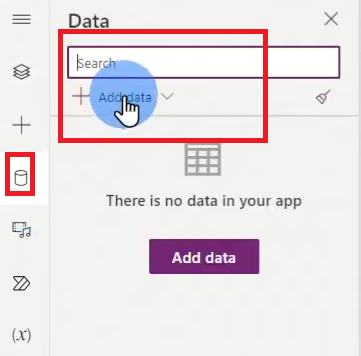
Click Data on the left panel then click +Add Data.
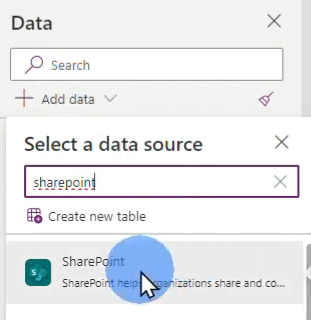
Step 2
Search and select Sharepoint.
Step 3
Select the Sharepoint data source on the Connect a Sharepoint Site pane.
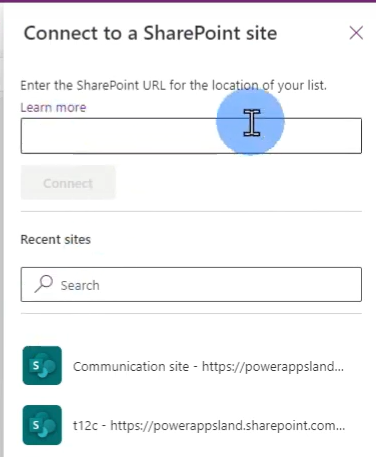
If you can’t find the data source from the list, go back to the Sharepoint site you created then copy the URL.

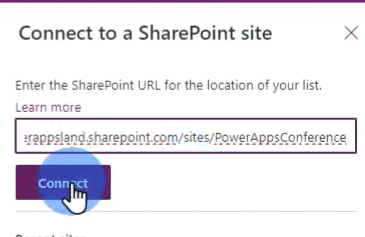
Step 4
Go back to Power Apps then paste the URL. Click Connect to generate the list.
Step 5
Select the list you want to add to your app then click Connect.
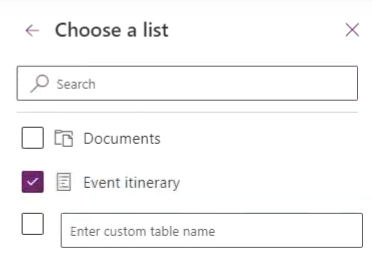
Your Sharepoint site will now be available as a data source for your Edit Form field.
Generating Sharepoint fields on your app screen
To populate fields on your form app based on Sharepoint lists of the site you created, follow the steps below.
Step 1
Click the Edit Form field then click Data.

Step 2
Select the data source you want to use for your application.
Once the selected data source has been added to your form, it will automatically populate the lists columns as fields. You can drag and position the form to the center of app screen.
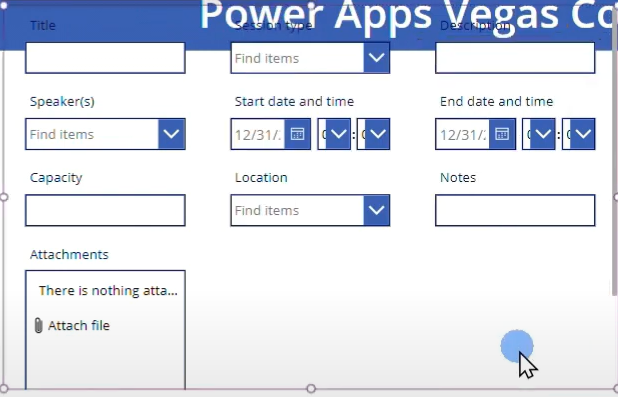
Step 3
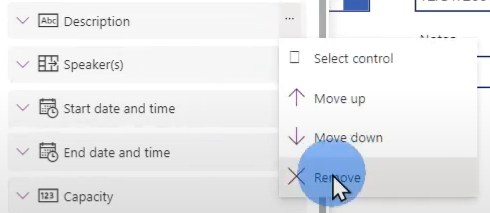
Clean up your Edit Form by removing unnecessary fields. Go to the Fields menu and click the ellipses beside the field you want to remove. Click Remove.
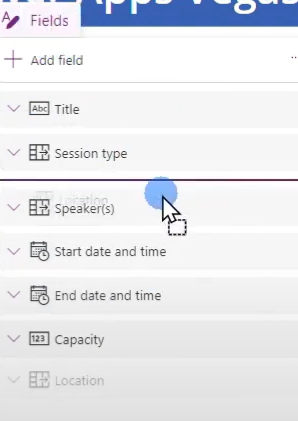
You can also rearrange the fields by dragging and dropping the components on the Field menu.
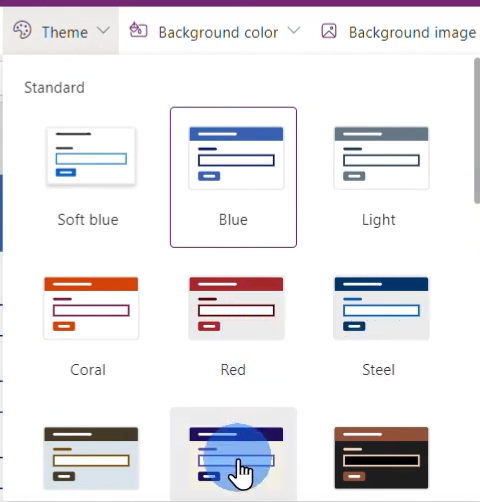
Step 4
If you want to change the color of your app, go to Theme then select a template.
Step 5
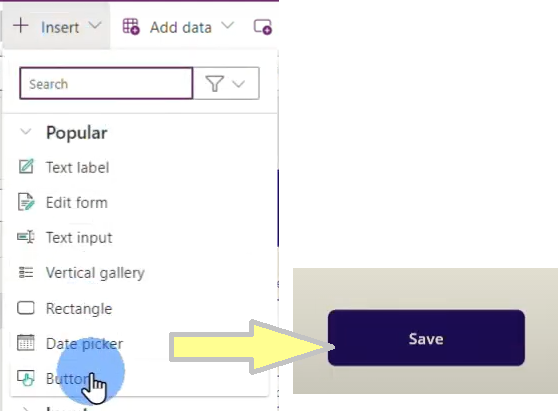
Add a Save button by going to +Insert > Button. Change the text to Save.
Step 6
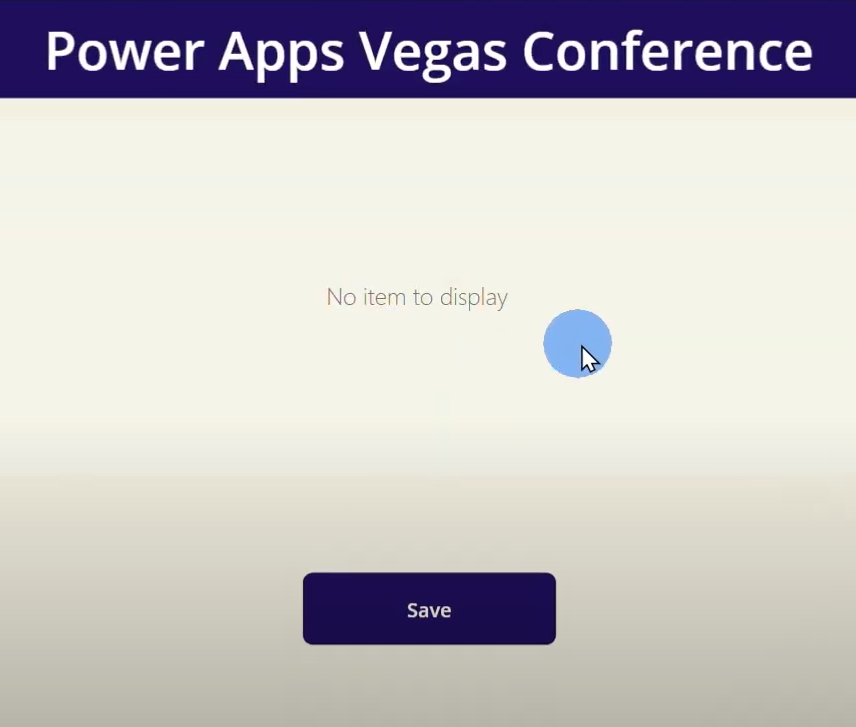
Go to Preview mode.

At this point, the form field will still be empty.
Step 7
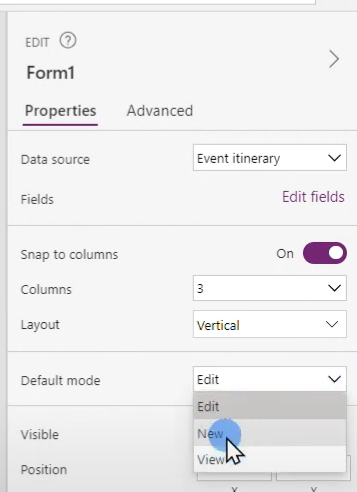
Go back to the Edit view. On the Properties Pane, change the Default Mode to New.
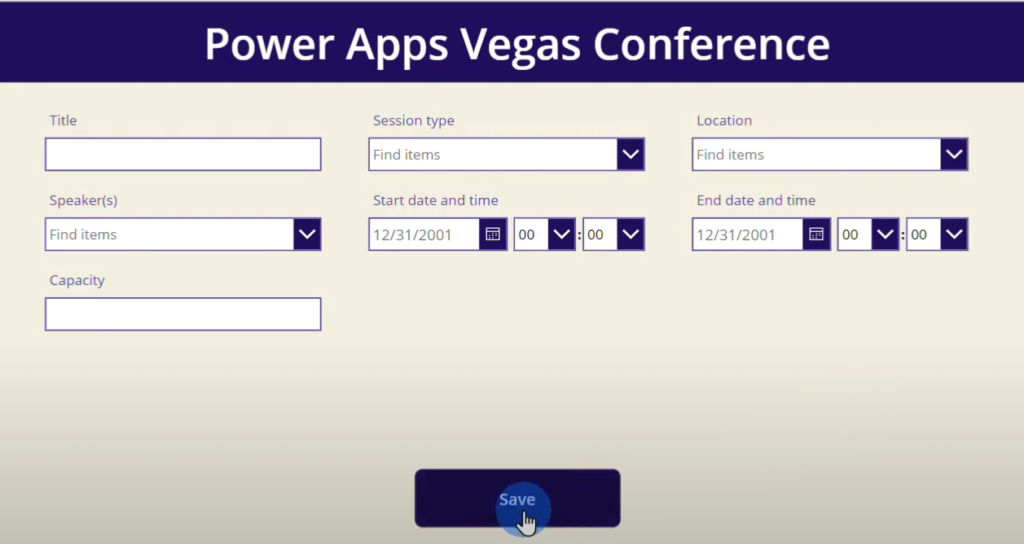
On the Preview mode, you can now see the fields, but you cannot save any new records. You need to configure the Save button.
Step 8
Click the Save button, then on the fx field, change the formula to: Submitform(Form1); Resetform(form1).

Step 9
On the Preview Mode, add a test data then click Save.
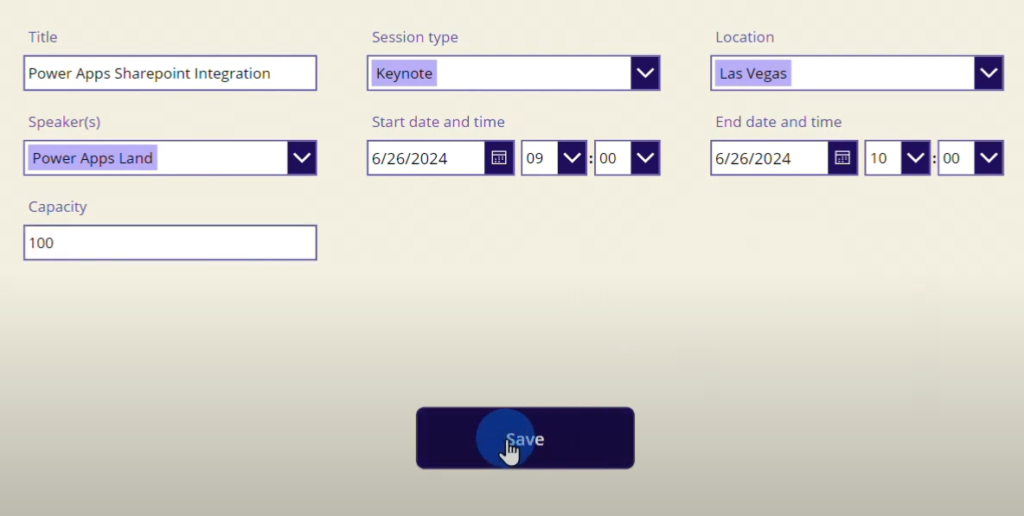
Go to Sharepoint to see the records added from the Power Apps application.

Making your records visible on your application
You can also make the data from your data source visible on your application by adding a vertical gallery. To do this:
Step 1
Click the screen you duplicated from main screen.
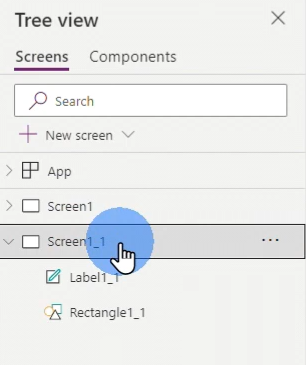
Step 2
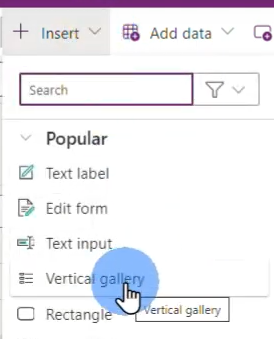
Click +Insert > Vertical Gallery.
Step 3
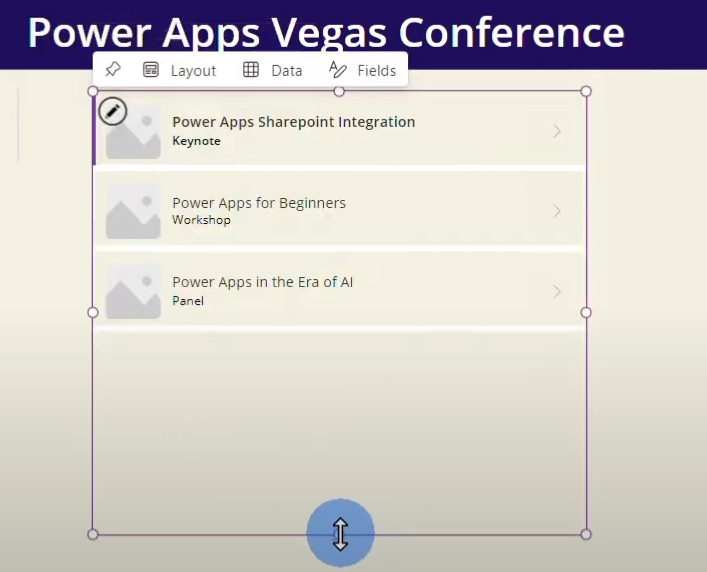
Click Data and select the data source you want to appear on your vertical gallery.

The data you have previously entered on the form fields will now appear on the Vertical Gallery you created. Adjust the size of the gallery and position it at the center of the screen.
Step 4
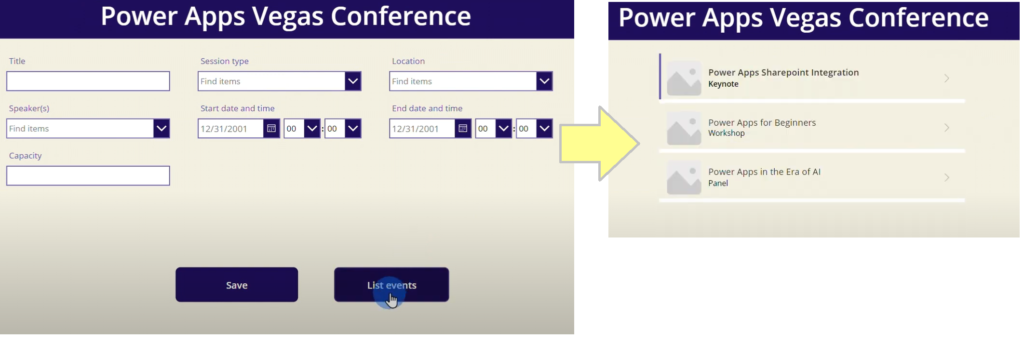
To make the records accessible from the first screen, create a button and rename to List Events.

Step 5
Configure the List Events formula on the fx field to: Navigate(Destination screen). E.g. Navigate(Screen1_1)

Clicking the List Events button will lead you to the records screen.
Step 6
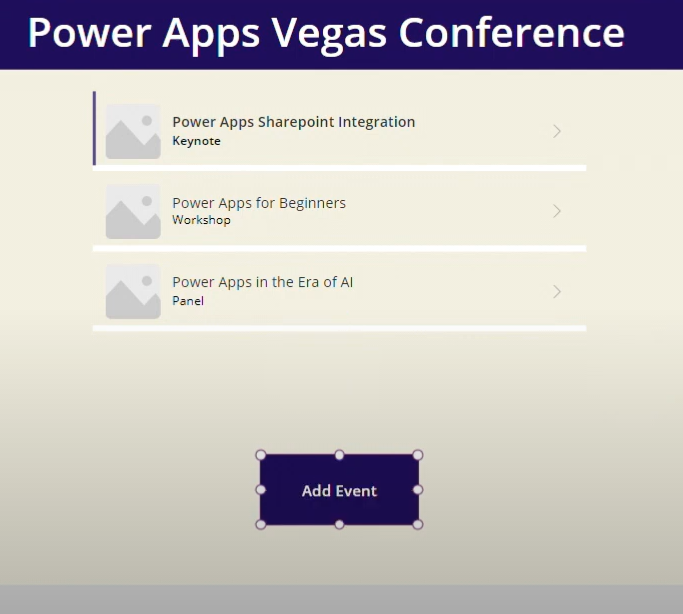
On the records screen, add a button that will take you back to the event forms field. Rename it to Add Event.
Step 7
Configure the Add Event formula on the fx field to: Navigate(Screen1)

Step 8
On the Preview Mode, click the List Events if it redirects you back to the Add Events form fields.
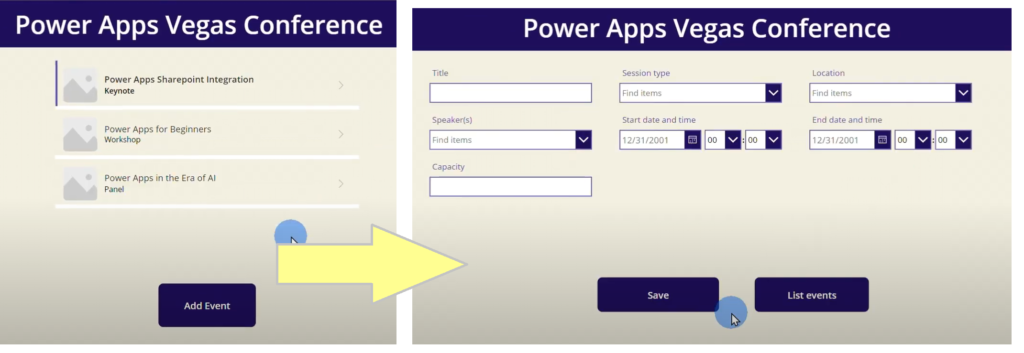
When correctly set up, you should be able to toggle between the two (2) screens.

Leave a Comment